 Fiber Cement Siding Repair Advice & Specifications
How to repair fiber cement lap siding butt joint & trim joint gaps, damage, peeling paint, loose boards
- POST a QUESTION or COMMENT about the cause & cure of butt joint gaps in fiber-cement siding & about fiber cement siding installation
Fiber cement board lap siding repair guide.
This article describes repair procedures for cosmetic or functional siding issues that may arise such as loose siding, wind-damaged siding, siding paint or coating failures, and siding gaps, especially gaps at fiber cement siding butt joints where lap siding is installed.
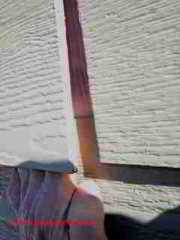
Our page top photo shows loose and improperly installed fiber cement siding on a New York home. We quote from the siding manufacturer's installation guides, contractor guides, and appropriate codes & standards and we debate the pros and cons of caulking vs. flashing for certain siding repairs. We include sources for building siding back flashing & H-flashing products.
InspectAPedia tolerates no conflicts of interest. We have no relationship with advertisers, products, or services discussed at this website.
- Daniel Friedman, Publisher/Editor/Author - See WHO ARE WE?
Manufacturers' Advice for Repairing, Maintaining & Protecting Fiber Cement Siding
 Here we tackle steps to stop ongoing leaks, damage, or to un-do damage from either a sloppy siding installation job or from more normal wear and tear as a building's exterior siding is exposed to weather, kick balls, peeing dogs, squirrels and raccoons, or to my grandsons and granddaughters, all six of whom (Chase, Tanner, Quinn, Sophie, Zoe, Chloe) could be hired as a home wear and tear test gang.
Article Contents
- LOOSE FIBER CEMENT SIDING BOARD REPAIRS
- PIN BACK NAILING for FIBER CEMENT SIDING
- BUCKLED FIBER CEMENT SIDING REPAIR
- FIBER CEMENT BOARD COATING FAILURE REPAIRS
- FIBER CEMENT BOARD PAINT FAILURE REMEDY CHOICES
- FIBER CEMENT SIDING GAP CURES at BUTT JOINTS or at TRIM - open butt joint siding failures
- ALGAE LICHENS FUNGUS MOSS on FIBER CEMENT SIDING
- RE-CAULKING vs. H-COVERS for BUTT JOINT GAPS in FC SIDING - separate article
- REMOVE INDIVIDUAL FIBER CEMENT SHINGLES or BOARDS - how to
- FIBER CEMENT SIDING CHIPS DINGS - how to repair
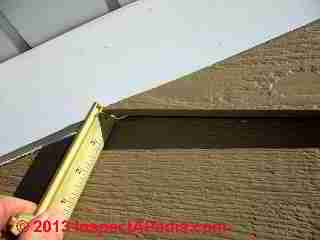
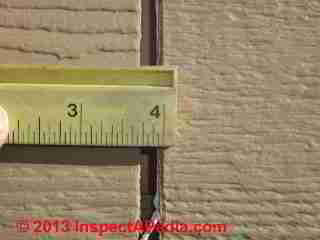
Our close-up photo of a butt joint gap in this fiber cement lap siding (above left) shows the width of the shrinkage gap.
The installers failed to install the recommended backer flashing / weatherproofing at any of the butt joints that we examined and we think the siding was installed wet and possibly not properly end-butted.
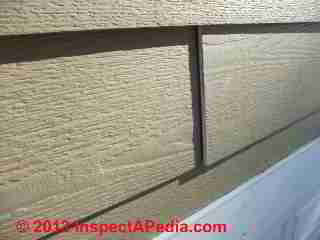
Here as well as at page top are photos of loose fiber cement siding. Considering that in our photo at left the siding should have been lapped (by the board above, typically 1 1/4"), for this end butt joint to be completely out of alignment with its neighbor we figure that the board above was also not properly nailed, possibly bulged as well. Also notice that the boards are misaligned vertically as well. All of these clues suggest a super high-speed, sloppy siding installation by un-trained and un-supervised installers. For more diagnosis we ask about the fiber cement siding's original installation & nailing: was the siding installed according to the product specifications for type of nail, nail spacing, overlap, back priming, butt joint and trim joint end priming & caulking? See the product's caulking, nailing, flashing, installation details provided by James Hardie and excerpted in our notes below.Cures for Loose Fiber Cement Siding Boards
Except in high wind areas, the product is installed using blind nailing (nails at the top of each siding course are covered by the succeeding course). Nails (or screws for metal stud applications) must be corrosion resistant, galvanized or stainless steel. Hot-dipped galvanized fasteners or stainless steel (near salt or ocean areas) are recommended.
...
Pin-Back Nailing repairs for loose fiber cement siding
In James Hardie's technical bulletin No. 17, the company provides a description of PinBack nailing for use at loose planks that were "high nailed" at original installation) or where there are problems with gaps, loose planks, or rattling noises.
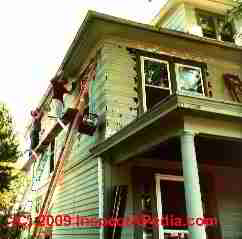
At left we show a different loose siding problem: where the diagonal end-cut siding was installed against the home's sloping gable-end trim, the installer perhaps couldn't catch a stud, or perhaps s/he simply didn't want to move the ladder to nail the end of the siding board.
Now just a few years later the siding ends are curled away from the building. How can we fix this other than by a complete removal and replacement of this wall covering?
Excerpting:
- Pin Backs
Pinning the plank down at the bottom edge is a common practice called “pin back.” It is used to correct “high nailing”, loose planks, gaps or rattling. Pinning of the butt joints with is not intended to increase wind load values; and shall be installed 3/8” from end and between 3/4” and 1” from bottom edge.
The finish nail shall be nailed flush to the surface (not countersunk), must be corrosion resistant (e.g. galvanized or stainless) and does not provide structural support. For best aesthetics nail heads should be touched up to color match. [17]
...
Cures for Buckled Fiber Cement Lap Siding
Buckled fiber cement siding is most likely to occur because the installer failed to give the recommended gap between the ends of the fiber cement boards and abutting vertical trim at corners, windows, doors, etc.
Buckling fiber cement siding may also occur if the product was not properly nailed.
It may be possible to cut an end gap clearance in place between the siding end and vertical trim, wearing proper protective gear to avoid silica dust hazards etc.
Also see Pin Back Nailing discussed above.
...
Cures for Coating Failures on Fiber Cement Siding
At JAMES HARDIEPLANK® FC SIDING we discuss the failure of this factory-coated fiber cement siding installation.
- Coating type originally used:
what type of paint was used on the product? Was it back-primed (if recommended) or factory primed? What is the moisture resistance of the coating used?
The siding should be painted (use an acrylic paint) within 180 days for primed products or within 90 days for unprimed products. Do not use stain; do not use oil/alkyd-based paints;
Do not use stain on James Hardie products.
The company also warns against painting when the surfaces are wet - a topic that we elaborate ad nauseam
at PAINTING MISTAKES.
The James Hardie company provides special touch-up coatings for ColorPlus products. - Painting fiber cement siding:
Take care when re-painting, to avoid incompatible paints. The company recommends 100% acrylic paint. [14] See James Hardie Technical Bulletin 17 for painting and other fiber cement repair recommendations. - Sealing / caulking fiber cement siding:
how were butt joints and end joints treated, flashed, caulked? Cut ends of fiber cement siding should have been sealed using 100% acrylic latex primer or paint (Certainteed) or in some cases using an approved caulk wiped on the cut surface (see our notes on Hardieplank installation). And caulk is required at certain joints such as vertical trim at windows, doors, corners.
Caulk is not to be installed in J channel, F-channel, nor in fiber cement siding butt joints, though it may have been applied later by a homeowner or maintenance contractor.
Check the caulking specifications provided in the installation guide by the manufacturer for your specific siding product. For example OEM specifications on caulking for fiber cement siding,
see SIDING, FIBER CEMENT GAP & CAULK SPECS.
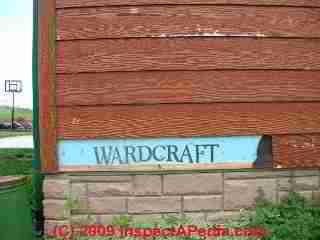
Frankly, my OPINION is there is no nice cure for fiber cement siding with a coating failure such as shown in our photo. As we discuss in excruciating detail in our article series beginning
at PAINT & STAIN GUIDE, EXTERIOR, surface preparation is the key to a durable paint job.
Even the most sophisticated coating will fail if sprayed over dirt, for example.
See PAINT SURFACE PREPARATION for more help.
...
How to Decide on a Remedy for Paint Failure on Siding
Choosing the best remedy for failing paint on fiber cement siding or any other exterior building surface depend on at least these considerations:
- What is the base product material, and what condition is it in.
For example failed paint on hardboard siding, if the siding has delaminated, means it's time to replace the siding.
See details at SIDING HARDBOARD IDENTIFICATION & CLAIMS
Watch out: some siding materials and surfaces simply cannot be effectively and economically "saved" by re-painting. Siding replacement may be a less costly option in a number of circumstances. - How do we remove peeling paint
from a factory-painted fiber cement product, how much bad paint do we remove, how aggressive should we be?
See MEDIA BLASTING for MOLD REMOVAL - a technique that can prepare a bad surface for painting. - How do we prepare the cleaned surface
for re-painting? Is there chalking of remaining paint? Do we need to use a special primer?
see PAINT SURFACE PREPARATION - What paint or coating should be used?
Talk with both the siding manufacturer as well as your paint supplier. For fiber cement siding the paint and primer need to be compatible with fiber cement products. - How should the coating be applied?
Spray paint application is fast and less costly but may not bond the paint as well to the surface. With Art Cady I had success working as a team, using spray to get the paint onto the surface and a roller to work it into the surface for better adhesion.
...
Cures for Open Butt Joint Gaps in Fiber Cement Lap Siding Installations
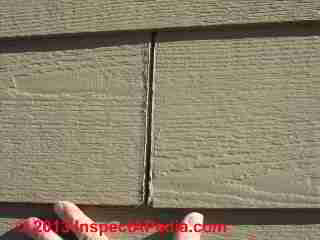
Cosmetic issues: Building owners should also be made aware of possible future cosmetic issues, depending on the repair method used and workmanship;
For cosmetic concerns, if building condition permits a slower approach, consider trying more than one product and method for gap sealing, examining the durability and appearance of the repair after 12 months or longer of weather exposure on the most-challenged building sides.
Details about repair approaches to open butt joints in fiber cement lap siding are give
at SIDING, FIBER CEMENT GAP CURES.
There we also discuss adding back flashing to seal open lap siding butt joints against leaks into the wall system.
...
Cures for Algae, Fungus, Moss, Lichens on Building Siding
Algae, fungus, moss or lichens on siding are usually due to a combination of moisture and shade on the building wall. Plants too close to the building wall, repeated wetting by sprinkler systems, or unnecessarily dense close shade tree growth are conditions that can usually be remedied.
See TREES & SHRUBS, TRIM OFF BUILDING.
For more about algae, lichens, moss growth on buildings
see ALGAE, FUNGUS, LICHENS, MOSS.
Adapted, expanded & excerpted from CertainTeed Corporation's "CertainTeed WeatherBoards™ Fiber Cement Siding Installation Manual" [5a], from "Fiber Cement Siding Best Practices for Effective Job Site Management"[5b] and from JamesHardie Corporation installation instructions and bulletins for JamesHardie HardiePlank lap siding. [12][12b] and finally also from applicable building codes & standards.
...
How to Remove Individual Fiber Cement Shingles or Boards
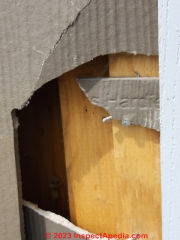
Photo: damaged James Hardie board siding damaged by vehicle impact at a boathouse along the Fish river in Saratoga, New York.
Reader Question: how do I remove individual or bottom fiber cement siding boards?
20 January 2015 Tony said:
I need to remove a bottom Hardie Lap siding board because it has deteriated from the furnace condensation outlet
. I have replacement boards but how do I remove the bottom board by itself when there is a board above it and covering the nails, etc.
Reply:
Great Question, Tony. I have had to deal with this problem on FC shingle siding, lap siding and also on slate roofs.
If the FC siding has been painted such that the lower edge of the upper board is sealed tightly to the one below, cut the paint seal with a utility knife.
Then use one of the following methods to cut the nails holding the lower board:
If the lower edge of the upper board above the one to be removed is face-nailed through the lower edge of the upper board, reaching between the two boards, cut the nails with a hacksaw blade or slating tool as I describe next:
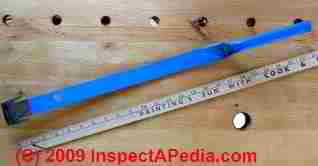 For slate roofs there is a hammer-tool that can be used for some siding removal - the tool slips up under the upper slate, a sharp flat hook slides over the nail, an outside handle of the tool is hammered down to cut the nail - but you may have trouble finding this tool.
But you can see it - the bright blue tool illustrated near the top of the article -
at SLATE ROOF SOURCES & TOOLS and shown here.,
Alternatively, working carefully so as not to break the Hardie Lap boards above the ones to be removed, you can use a hacksaw blade to slip up between the boards, slide it horizontally to find the next nail, then saw through the nail.
Buy a few metal-cutting hacksaw blades and a simple handle that attaches to one end of the blade leaving about 6" of free hacksaw blade.
If the FC lap siding boards are nailed very tightly you may be able to reach up under the board you are going to remove, using a flat bar, to pry GENTLY at the top of the board, beneath thus the board to be removed and the lower edge of the board course above it, prying thus between the back of the lower board and the wall sheathing, just enough to open the boards enough to go back to the hacksaw.
Don't pry too much or you'l break the board above.
If the lower board was blind-nailed, that is nailed to the wall through its upper edge such that the second course lapped over the nails holding the first course board in place, you'll need to ....
Gently pry up the lower board using a flat bar beneath its lower edge just enough to be able to slide the flat bar up to the upper edge of the board to find where it is nailed.
From that position you probably can't use the hacksaw trick I describe above, but you can use either the slating tool I describe to cut the nails OR you can use a thin flat bar to drive up, cutting each nail in position.
Take care not to pry too much or you'll break the boards above.
More details about removing fragile or brittle siding materials are
...
How to Repair Minor Chips, Dings, Damage in Fiber Cement Siding like HardieBoard
Question: how to repair bubbles & holes on the HardieBoard Siding on my home
2017/04/04 Norris said:
I have a hardy board at each corner of our front porch. Looks like a 1x6 by 8 long. Both pieces have numerous bubbles opening up and showing open holes on the face and the sides. House is 10 yrs old. What would be the best patch / repair treatment? Thank you
Reply:
Norris:
Discussing their HardieZone HZ10 siding Hardie says:
Repair or Patching Fiber Cement Board Siding
Dents, chips, cracks and other minor surface damage in James Hardie siding and trim products can be filled with cementitious patching compound. Refer to manufacturer recommendations for products that are compatible with fiber cement.
For small areas of damage you can use a sealant/caulk (preferably one designed for cement repairs) but then you will have to paint those areas of repair to match the original color.
OPINION: Clean out the area of damage, removing loose material but trying not to gouge into the boards. For larger areas I prefer to use a cement (or "cementious") patching compound, sold in plastic tubs or in tubes that can be used in a caulking gun.
If your boards include a pattern such as a wood grain, small areas of repair can be tooled to match the surrounding lines with a putty knife; for larger areas of repair some owners have tried making a clay impression of nearby surfaces to press into the patch.
Hardie sells touch-up paint that can match the color of your HardyBoard siding.
Boards that are actually broken away will need to be cut out and replaced.
Here is what James Hardie says about repairs to their siding product:
James Hardie [JH] does not approve use of JH approved color matched caulk, other caulking materials or cementitious patching compounds to touch up nail heads, nail holes, dents, chips, cracks or other minor surface blemishes on JH products with ColorPlus® Technology.
Warranty Coverage
James Hardie routinely receives inquiries from consumers and builders regarding the use of paint as touch-up on ColorPlus products. These inquiries sometimes include requests that James Hardie provide warranty coverage to remediate problems associated with paints, and other non-approved materials as touch-ups.
James Hardie’s warranty provides coverage for defects in materials and workmanship on ColorPlus products and its Touchup only. It does not warrant, in any respect, the appearance or performance of any third party coatings or finishes, including paint, used as touch-up and third party touch-up paints used on ColorPlus products. - Touch-Up Notice to Contractors and Consumers
- HARDIEPLANK BEST PRACTICES – INSTALLATION GUIDE, SIDING AND TRIM PRODUCTS [PDF] (Version 8.3 - May 2016) for HardiePlank®, HardieShingle®, HardiePanel®, HardieTrim®, HardieSoffit®, retrieved 2017/04/04, origial source: https://www.jameshardie.com/d2w/best-practices/intro-tools-hz10-us-en.pdf
See "Repair Patching" p. 27
Excerpt:
Dent, chips, cracks and other minor surface damage in James Hardie primed siding and trim products can be filled with cementitious patching compound except on ColorPlus.
When repairing holes of less than 1 in. that has been created by scaffold anchors, pipe, etc. James Hardie recommends a backer rod be placed rod be placed into hole and sealed to prevent water infiltration. James Hardie will assume no responsibility for water infiltration. - HARDIEBACKER® CEMENT BOARD WARRANTY [PDF] (2010) JamesHardie, 26300 La Alameda, Suite 400, Mission Viejo, CA 92691, Tel: 1-866-442-7343, Website: www.jameshardie.com (2010) retrieved 2017/04/04, origial source: https://www.jameshardie.com/pdf/warranty-backer.pdf
- HZ5® CARE and MAINTENANCE GUIDE [PDF], (2010) JamesHardie, op.cit.,
- HZ10® CARE & MAINTENANCE GUIDE [PDF], JamesHardie, op.cit., (2010) retrieved 2017/04/04, origial source: https://www.jameshardie.com/pdf/HardieZone-HZ10-Care-and-Maintenance-Guide.pdf
- TOUCH-UP NOTICE to HARDIEPLANK CONTRACTORS & CONSUMERS [PDF], retrieved 2017/04/04, original source: www.jameshardie.com/JamesHardieMainSite/media/Site-Documents/TechnicalDocuments/color-plus-touch-up-paint-notice-english.pdf
- FEMA RECOGNITION OF HARDIFE-BOARD [PDF], James Hardie's non-asbestos fiber cement interior lining & exterior siding products as Class V Materials [PDF], retrieved 2017/04/04, original source: https://www.jameshardie.com/pdf/fema.pdf
Also see these
- JAMES HARDIE HARDIEPLANK INSTALLATION GUIDES & BEST PRACTICES found in our article FIBER CEMENT SIDING - home
...
...
Reader Comments, Questions & Answers About The Article Above
Below you will find questions and answers previously posted on this page at its page bottom reader comment box.
Reader Q&A - also see RECOMMENDED ARTICLES & FAQs
On 2020-09-07 - by (mod) -
You can replace the damaged sections (work with care); You could also back-flash and then simply paint the cracked siding;
any sealant or "patch" will "work" mechanically to seal the crack but it'll be ugly when painted.
On 2020-09-05 by Stuart George
Hi. My mobile is 20 yrs old and has the cement fiber siding. We want to paint but have noticed some cracks in the cement. Whats the best way for a home owner to repair this before we paint. Thanks
On 2020-05-14 - by (mod) -
Ps
But don't let your favor bamboozle you. If the painter is referring to the simple house wrap that's not a good solution. However if there was actually individual flashing at each butt joint that would be good practice.
On 2020-05-14 - by (mod) -
Kass
Better and more correct would be back fkashing at each siding butt joint. Caulking is n ok t always recomnended and in fact can cause a cosmetic problem on textured surfaces.
On 2020-05-05 by Kass Holdeman
My home inspector called out that the newly painted hard board siding didn't have new caulking in the butt joints. The home was built in 2001. The painter said the butt joints don't need to be caulked and that the backing paper was adequate to prevent moisture intrusion. Many of the siding boards have nails at the bottom of the butt joints, so after-installation flashing isn't a good option. Should I accept what the painter says? He is experienced. I am in the Pacific Northwest.
On 2018-08-10 by Timmy Weeks
I got a quote for hardy siding and I was curious about all this myself. This article does have a lot of good things to say. Is there a good company to go with when it comes to this I got a quote from conservation construction of texas and lowes. Does anybody else have suggestions?
On 2018-03-28 by Geoff Korous
I have chipped/dented the face trim around my garage door while turning into the garage with my truck. Have been searching for DIY advice on how to remove the damaged exterior trim piece (this is not a jamb, but rather the "picture frame" around the door) and replace it. Would call someone, but finding reliable and reputable workmanship in my area is a love shoot at best. Any help would be appreciated. Contact gkorous@gmail.com
On 2017-08-03 - by (mod) -
Thanks Greg for the encouragement; we work hard on this stuff so I'm really happy when a reader finds it useful. We also welcome content suggestions and critique.
Daniel
On 2017-08-02 by Greg Kapitan
Thank you for such a good article here as well as the picts...
On 2017-06-01 - by (mod) -
Mike,
Email for mailing photos can be found at the page top or bottom CONTACT link.
On 2017-06-01 by Mike
The house I am working on has hardy siding but the bottoms of the vertices corner pieces are rotting. I am beginning to think that those pieces are not Hardy but some type of masonite kind of material. The Hardy siding pieces are good. How can I send you some pictures?
On 2017-05-28 - by (mod) -
Mike,
I think I'm missing part of the question here, so you may need to elaborate or use the page top or bottom CONTACT link to send me photos of the problem.
I think I'd cut any sealant/caulk with a knife and pull off the corner trimt if replacement were needed.
On 2017-05-28 by Mike Matthews
How do I replace the vertical corner pieces of hardy board siding that run from the tops to the bottom of the house?
On 2017-04-04 - by (mod) -
Norris:
Discussing their HardieZone HZ10 siding Hardie says:
Repair or Patching
Dents, chips, cracks and other minor surface damage in James Hardie siding and trim products can be filled with cementitious patching compound. Refer to manufacturer recommendations for products that are compatible with fiber cement.
For small areas of damage you can use a sealant/caulk (preferably one designed for cement repairs) but then you will have to paint those areas of repair to match the original color.
OPINION: Clean out the area of damage, removing loose material but trying not to gouge into the boards. For larger areas I prefer to use a cement patching compound, sold in plastic tubs or in tubes that can be used in a caulking gun. If your boards include a pattern such as a wood grain, small areas of repair can be tooled to match the surrounding lines with a putty knife; for larger areas of repair some owners have tried making a clay impression of nearby surfaces to press into the patch.
Hardie sells touch-up paint that can match the color of your HardyBoard siding.
Boards that are actually broken away will need to be cut out and replaced.
Here is what James Hardie says about repairs to their siding product:
James Hardie [JH] does not approve use of JH approved color matched caulk, other caulking materials or cementitious
patching compounds to touch up nail heads, nail holes, dents, chips, cracks or other minor surface blemishes on JH
products with ColorPlus® Technology.
Warranty Coverage
ames Hardie routinely receives inquiries from consumers and builders regarding the use of paint as touch-up on ColorPlus
products. These inquiries sometimes include requests that James Hardie provide warranty coverage to remediate problems
associated with paints, and other non-approved materials as touch-ups.
James Hardie’s warranty provides coverage for defects in materials and workmanship on ColorPlus products and its Touchup
only. It does not warrant, in any respect, the appearance or performance of any third party coatings or finishes, including
paint, used as touch-up and third party touch-up paints used on ColorPlus products
- Touch-Up Notice to Contractors and Consumers, retrieved 2017/04/04, original source: www.jameshardie.com/JamesHardieMainSite/media/Site-Documents/TechnicalDocuments/color-plus-touch-up-paint-notice-english.pdf
On 2017-04-04 by Norris
I have a hardy board at each corner of our front porch. Looks like a 1x6 by 8 long. Both pieces have numerous bubbles opening up and showing open holes on the face and the sides. House is 10 yrs old. What would be the best patch / repair treatment? Thank you
...
Continue reading at SIDING, FIBER CEMENT MAINTENANCE or select a topic from the closely-related articles below, or see the complete ARTICLE INDEX.
Or see SIDING, FIBER CEMENT REPAIR FAQs - questions & answers posted originally at this article.
Or see these
Recommended Articles
- CERTAINTEED WeatherBoards™
- CHINESE FIBER CEMENT SIDING
- FIBER CEMENT PRODUCT STANDARDS
- FIBER CEMENT ROOF SHINGLE ASBESTOS TEST RESULTS
- FIBER CEMENT SIDING - home
- FIBER CEMENT SIDING DEFECTS - home
- FIBER CEMENT SHINGLE DEFECT DIAGNOSIS
- FIBER CEMENT SHINGLE CUTTING TOOLS
- FIBER CEMENT SHINGLE REPAIRS
- FIBER CEMENT SIDING BUCKLING
- FIBER CEMENT SIDING BUTT JOINT CURLING
- FIBER CEMENT SIDING BUTT JOINT GAPS & SHRINKAGE
- FIBER CEMENT SIDING BUTT JOINT BACK FLASHING OMITTED
- FIBER CEMENT SIDING CAULKING ERRORS
- FIBER CEMENT SIDING COEFFICIENTS of EXPANSION
- FIBER CEMENT SIDING CURL / LIFT DEFECTS
- FIBER CEMENT SIDING DEFECT DIAGNOSTIC QUESTIONS
- FIBER CEMENT SIDING END CUT PRIMER COAT
- FIBER CEMENT SIDING GAPS
- FIBER CEMENT SIDING GAP & CAULK SPECS
- FIBER CEMENT SIDING GAP CURE
- FIBER CEMENT SIDING NAILING DEFECTS
- FIBER CEMENT SIDING LOOSE, NAILING FAILURES
- FIBER CEMENT SIDING NAILING ERRORS
- FIBER CEMENT SIDING SPLITS
- FIBER CEMENT SIDING STARTER STRIPS
- GROUND CLEARANCE DISTANCE for SIDING
- HOUSEWRAP DAMAGE
- HOMEOWNER COMMENTS on FIBER CEMENT SIDING
- TEMPERATURE EFFECTS on FIBER CEMENT SIDING
- FIBER CEMENT SIDING IDENTIFICATION
- FIBER CEMENT SIDING MANUFACTURERS & Manuals
- FIBER CEMENT SIDING MAINTENANCE
- FIBER CEMENT SIDING MOISTURE LEVELS
- FIBER CEMENT SIDING PAINTS
- FIBER CEMENT SIDING REMOVAL
- FIBER CEMENT SIDING REPAIRS
- JAMES HARDIEPLANK® FC SIDING
- JAMES HARDIE HARDIEPLANK INSTALLATION GUIDES & MANUALS
- NICHIHA ™ FIBER CEMENT SIDING FIELD REPORT
- SIDING CLEARANCE TO GROUND
Suggested citation for this web page
FIBER CEMENT SIDING REPAIRS at InspectApedia.com - online encyclopedia of building & environmental inspection, testing, diagnosis, repair, & problem prevention advice.
Or see this
INDEX to RELATED ARTICLES: ARTICLE INDEX to BUILDING SIDING
Or use the SEARCH BOX found below to Ask a Question or Search InspectApedia
Ask a Question or Search InspectApedia
Try the search box just below, or if you prefer, post a question or comment in the Comments box below and we will respond promptly.
Search the InspectApedia website
Note: appearance of your Comment below may be delayed: if your comment contains an image, photograph, web link, or text that looks to the software as if it might be a web link, your posting will appear after it has been approved by a moderator. Apologies for the delay.
Only one image can be added per comment but you can post as many comments, and therefore images, as you like.
You will not receive a notification when a response to your question has been posted.
Please bookmark this page to make it easy for you to check back for our response.
IF above you see "Comment Form is loading comments..." then COMMENT BOX - countable.ca / bawkbox.com IS NOT WORKING.
In any case you are welcome to send an email directly to us at InspectApedia.com at editor@inspectApedia.com
We'll reply to you directly. Please help us help you by noting, in your email, the URL of the InspectApedia page where you wanted to comment.
Citations & References
In addition to any citations in the article above, a full list is available on request.
- James Hardie Fiber Cement Siding Best Practices, Appendix A, (2014) [PDF] available from James Hardie Corporation, 231 S. LaSalle St., Suite 2000
- [1] "James Hardie's Mesothelioma and Asbestos Legacy Continues, 2009", web search 03/01/2011, www.survivingmesothelioma.com
- [2] Killer Company, James Hardie Exposed, Matt Peacock, Harper Collins Australia, ISBN: 9780733325809; ISBN10: 0733325807
- [3] " Anyone else have HardiePlank siding on their house?", Early Retirement.org online blog, retrieved 1/14/2013, original source: http://www.early-retirement.org/forums/f27/anyone-else-have- HardiePlank-siding-on-their-house-19475.html
- [4] - DIY Chatroom, retrieved 1/17/2013, original source http://www.diychatroom.com/f2/ certainteed-weatherboard-vs-HardiePlank-4638/
- [5] Certainteed Weatherboard fiber cement siding and trim products - see certainteed.com/ or see certainteed.com/resources/sidingandtrimspecsheet.pdf
- [5a] "CertainTeed WeatherBoards™ Fiber Cement Siding Installation Manual", CertainTeed Corporation, 2012, CertainTeed Corporation, PO Box 880, Valley Forge PA 19482, Professional Help Line: 800-233-8990, Consumer Help Line: 800-782-8777, Website: Certainteed.com www.certainteed.com/resources/fc017.pdf retrieved 4/11/2013, [copy on file as Certainteed_Fiber_Cement_Siding_Install_fc017.pdf ]
- [5b] "Certainteed WeatherBoards™ Fiber Cement Siding Best Practices for Effective Job Site Management", CertainTeed Corporation, retrieved 4/15/13 original source: www.certainteed.com Copy on file as Certainteed_FC_Handling Brochure-Contractor_FC063.pdf
- [6] "Moisture Control in buildings: Putting Building Science in Green Building," Alex Wilson, Environmental Building News, Vol. 12. No. 5. [Good tutorial, "Moisture 101" outlining the physics of moisture movement in buildings and a good but incomplete list of general suggestions for moisture control - inadequate attention given to exterior conditions such as roof and surface drainage defects which are among the most-common sources of building moisture and water entry.--DJF]
- [7] J. Tibbets, "Green Houses", NCBI, retrieved 1/17/2013, original source: http://www.ncbi.nlm.nih.gov/pmc/articles/PMC1469482/
- [8] Gleeson et al, "Fiber Cement :Building Materials with Low Density Additives", U.S. Patent 8,182,606, B2 5/22/2012, [adding low volumes of volcanic ash & hollow ceramic microspheres to cellulose fiber-reinforced building materials.
- [9] Thanks to reader Marie Carr for James HardiePlank siding photograph and case history information. 06/01/2008
- [10] JamesHardie HardiePlank® Lap Siding information can be found at the company's web page on this material:
https://www.jameshardie.com/products_siding_hardieplankLapSiding.py - [11] "30-Year Limited Warranty
HardiePlank® HZ5® Lap Siding, HardiePanel® HZ5® Vertical Siding,
HardieShingle® HZ5® Siding, HardieSoffit® HZ5® Panels", 1-800-9-HARDIE
10901 Elm Avenue Fontana, CA 92337, retrieved 1/18/2013, original source: https://www.jameshardie.com/pdf/warranty/hz5.pdf [copy on file as Hardieplank_Warranty_hz5.pdf] - [12] James Hardie Building Products, James Hardie CustomerLink™ Service Centre, 10 Colquhoun Street, Rosehill NSW 2142, Tel: 13 1103, Outside Australia 61 2 8837 4709,
Fax: 1 800 818 819. Hardie has operations in Australia, Asia, Canada, Europe, New Zealand, United States, and the Philippines. The company is a significant producer of fiber cement siding and backerboard. Email: info@JamesHardie.com and Website https://www.jameshardie.com/
- JamesHardie Corporation, in the U.S. can be contacted at 26300 La Alameda, Suite 400,
Mission Viejo, California 92691 -
1-888 J-HARDIE
1-888 542-7343 or by email to info@JamesHardie.com - [12b] "Technical Bulletin #9, Joint Flashing at Field Butt Joints", JamesHardie, retrieved 4/15/2013, original source: www.jameshardie.com, copy on file as James_Hardie_9-joint-flashing.pdf - quoting:
This Technical Bulletin is an explanation supporting the announcement made by James Hardie on September 8th, 2008 withdrawing its recommendation on the use of caulk at field butt joints for HardiePlank® lap siding.
- JamesHardie Corporation, in the U.S. can be contacted at 26300 La Alameda, Suite 400,
Mission Viejo, California 92691 -
1-888 J-HARDIE
- [13] Instructions for application of HardiePlank lap siding can be found at https://www.jameshardie.com/products_siding_hardieplankLapSiding.py?openTab=jsnavLink4
- [14] "Homeowners Care and Maintenance Tips", 1-800-9-HARDIE
10901 Elm Avenue Fontana, CA 92337, included with product warranty information, retrieved 1/18/2013, original source: https://www.jameshardie.com/pdf/warranty/hz5.pdf [copy on file as Hardieplank_Warranty_hz5.pdf] - [15] "HardiePlank HZ5 Lap Siding Installation Requirements - Primed & Colorplus® Products",JamesHardie, November 2012, 1-800-9-HARDIE, 10901 Elm Avenue Fontana, CA 92337, retrieved 1/18/2013, original source: https://www.jameshardie.com/pdf/install/hardieplank-hz5.pdf, [copy on file as Hardieplank-hz5_Install.pdf]
- [16] Technical Bulletin #9, Joint Flashing at Field Butt Joints, James Hardie corporation, retrieved 1/19/2013, original source: https://www.jameshardie.com/pdf/technical-bulletins/9-joint-flashing.pdf
- [17] Technical Bulletin #17, Fastening Tips for HardiePlank® Lap Siding, James Hardie Corporation, retrieved 1/19/2013, original source: https://www.jameshardie.com/pdf/technical-bulletins/17 -fastening-tips-for%20-plank.pdf [copy on file]
- [18] Technical Bulletin #8, Expansion Characteristics of James Hardie® Siding Products, James Hardie Corporation, retrieved 1/19/2013, original source: https://www.jameshardie.com/pdf/technical-bulletins/8-expansion-characteristics.pdf [copy on file]
- [19] Eric Galow, Galow Homes, Lagrangeville, NY. Mr. Galow can be reached by email: ericgalow@gmail.com or by telephone: 914-474-6613. Mr. Galow specializes in residential construction including both new homes and repairs, renovations, and additions. Personal communication 3/20/2013.
- [20] Johnston, Colin D., Fiber-reinforced cements and concretes. Vol. 3., Taylor & Francis, (CRC Press) 2000. ISBN-10: 9056996940 ISBN-13: 978-9056996949, "This book summarizes and simplifies the results of a considerable body of research and practical experience with a wide range of fiber-reinforced cementitious composites."
- [21] Hugh Cairns, Subject 2 Home Inspections, is a professional home inspector in British Columbia, Canada, with offices in Kelowna B.C. and Kamloops B.C. He contributed the American Cemwood photo used at the top and within this article. Mr. Cairns can be contacted by telephone: 250-808-5777, or by email: okanagan@subject2homeinspections.com
- [22] Roger Xu, 徐银杰 (my Chinese name), Ningbo Yihe Greenboard Co., Ltd., No.189, Longzhen Road, Nongkenchang, Longshan Town, Cixi, Ningbo, Zhejiang China, Tel: 0086-574-63974118/83887668 Fax:0086-574-63974129/83887670 Mobile: 0086-15924317823; E-Mail: sales6@yhboard.com; Skype: dajiezi107, www.yhboard.com/en, personal correspondence 3/21/2013
- [23] James Hardieplank, personal communication with Daniel Friedman, 6/6/2013. We called James Hardie to ask for guidance in determining just how much moisture was "too much" in Hardieplank siding, after observing that siding at a job arrived visibly wet from the factory even though still inside its original sealed plastic wrapping. We called James Hardie's technical support line where a courteous representative told us he would refer us to Hardie's expert Benjaman Batres. Our call to Mr. Batres was returned by Stephanie (declined to give last name) from James Hardie's customer warranty service department. Stephanie informed us that there are no moisture numbers, that it is not possible to measure moisture in fiber cement siding (utter nonsense!) and repeatedly advised "Just read our instructions" or "So file a claim". Don't count on much help from James Hardie's customer warranty department on siding shrinkage or butt joint gap concerns. Gaps at Hardieplank siding butt joints continue to appear in the Hardieplank installation.
- MASONITE WOODRUF® ROOFING OR MASONITE OMNIWOOD® SIDING LAWSUIT SETTLEMENT NOTICE - PDF file
- Paint Handbook: testing, selection, application, troubleshooting, surface preparation, etc., Guy E. Weismantel, Ed., McGraw Hill Book Company, 1981, ISBN-10: 0070690618, ISBN-13: 978-0070690615, [Excellent but a bit obsolete paint theory and practice, also a bit light on field investigation methods, out of print, available used-DF]
How to select and apply the right paint or coating for any surface. The first major reference to help you choose the correct paint or other finish to do the job best on a particular surface exposed to a particular environment. Experts in the field give full advice on testing surface preparation, application, corrosion prevention, and troubleshooting. The handbook covers wood, metal, composites, and masonry, as well as marine applications and roof coatings. A ``must'' working tool for contractors, architects, engineers, specification writers, and paint dealers. - Paint and Surface Coatings, Theory and Practice, R. Lambourne & T.A. Strivens, Ed., Woodhead Publishing Ltd., William Andrew Publishing, 1999 ISBN 1-85573-348 X & 1-884207-73-1 [This is perhaps the leading reference on modern paints and coatings, but is a difficult text to obtain, and is a bit short on field investigation methods - DF]
Provides a comprehensive reference source for all those in the paint industry, paint manufacturers and raw materials suppliers, undergraduate and postgraduate students, and industrial paint users. R. Lambourne was in the Research Department at ICI Paints Division and the Industrial Colloid Advisory Group, Birstol University, UK. - Seeing Through Paintings, Physical Examination in Art Historical Studies, Andrea Kirsh, Rustin S. Levenson, Materials in Fine Arts, 2000 ISBN 99-051835 [ forensic science, technical reference, focused on art works - DF]
- Sealants, Durability of Building Sealants (RILEM Proceedings), J.C. Beech, A.T. Wolf, Spon Press; illustrated edition (1995), ISBN-10: 0419210709, ISBN-13: 978-0419210702
This book presents the papers given at the RILEM Seminar held at the Building Research Establishment, Garston, UK in October 1994. The book provides an opportunity for researchers to review up-to-date progress towards the achievement of the objectives of the standardisation of laboratory techniques of sealants in the variety of service conditions to which they are exposed. - Staining, Prevention of Premature Staining in New buildings, Phil Parnham, Taylor & Francis; 1996, ISBN-10: 0419171304, ISBN-13: 978-0419171300
The appearance of ugly staining early in a buildings life, ruins an otherwise pleasing appearance, tarnishes the image of the owners and gives rise to costly refurbishment works. In this book Phil Parnham raises a number of questions that should be considered whenever a new building is being designed or built. These are: * why has staining become so prominent; * what causes premature staining; which parts of new buildings are likely to be affected; * how can it be avoided? By using a number of highly illustrated case studies, the author answers these questions and ends by suggesting measures that should be taken by all design and construction professionals to prevent premature staining. - WEATHER RESISTIVE BARRIERS [PDF] U.S. Department of Energy, ", how to select and install housewrap and other types of weather resistive barriers
- In addition to citations & references found in this article, see the research citations given at the end of the related articles found at our suggested
CONTINUE READING or RECOMMENDED ARTICLES.
- Carson, Dunlop & Associates Ltd., 120 Carlton Street Suite 407, Toronto ON M5A 4K2. Tel: (416) 964-9415 1-800-268-7070 Email: info@carsondunlop.com. Alan Carson is a past president of ASHI, the American Society of Home Inspectors.
Thanks to Alan Carson and Bob Dunlop, for permission for InspectAPedia to use text excerpts from The HOME REFERENCE BOOK - the Encyclopedia of Homes and to use illustrations from The ILLUSTRATED HOME .
Carson Dunlop Associates provides extensive home inspection education and report writing material. In gratitude we provide links to tsome Carson Dunlop Associates products and services.


