 Flat Roof Leak
Diagnosis
How to track down the source of leaks in a flat roof
- POST a QUESTION or COMMENT about how to find the leak on flat or low slope roofs
Flat & Low Slope Roof leak diagnosis:
This article describes how to find the location of the leak source on a flat or low slope roof.
This article describes procedures for finding and fixing all types of leaks in roofs, figuring out the actual spot where a roof leak is occurring, and methods for tracking down the source of water or wet spots on ceilings or in attics.
InspectAPedia tolerates no conflicts of interest. We have no relationship with advertisers, products, or services discussed at this website.
- Daniel Friedman, Publisher/Editor/Author - See WHO ARE WE?
Find & repair leaks in a flat or low sloped roof
 As you can see from the three links below, starting with this page we divide this task into three stages, each of which is described on a separate web page.
Article Series Contents
- FIND THE LEAKS IN A FLAT ROOF
- PREPARE TO REPAIR THE LEAKS - separate article
- APPLY ROOF SEALANT OR COATING - separate article
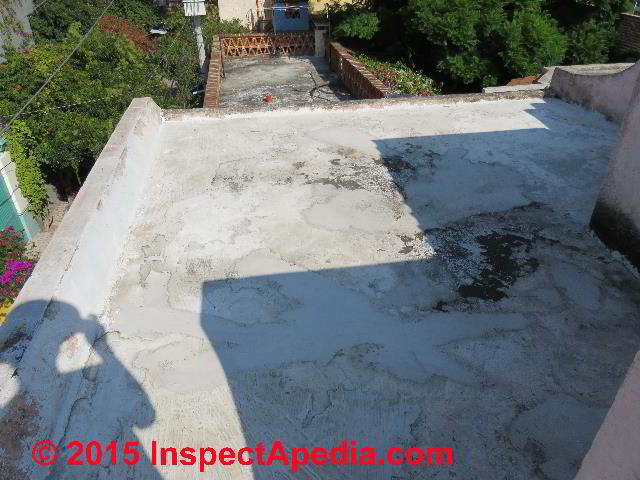
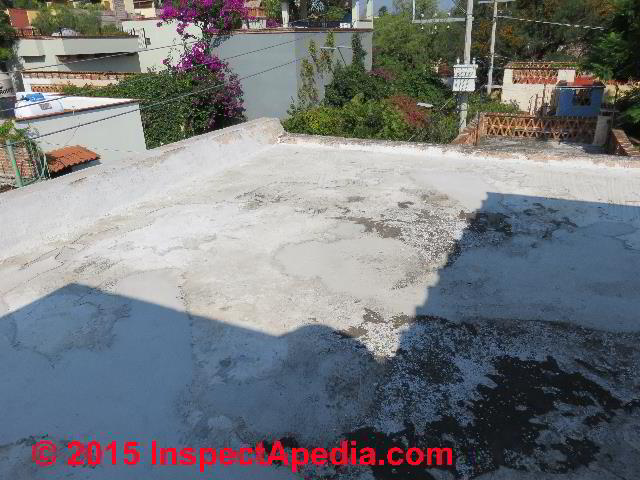
The concrete roof described in this article is a nearly flat roof sloping slightly (less than 1" in 12") to a roof drain in one corner.
This roof was constructed atop a home in San Miguel de Allende, in Guanajuato, Mexico in 2000. The flat roof leak diagnosis and sealant application to stop roof leaks described here were performed in 2015.
[Click to enlarge any image]
Flat and low slope concrete roofs on homes and other buildings are widely used in many areas of Mexico, the Southwestern U.S., Morocco, India, Australia and many other parts of the world where the roof surfaces are exposed to intense sunlight and often high temperatures.
Track down the source of leaks in a flat roof
On low slope membrane covered roofs, water can travel a considerable distance horizontally before it appears inside the building. Roofers use a combination of visual inspection and moisture meters to scan membrane-coated roofs to find the wet areas below the membrane and thus the probable leak point - usually at a seam, mechanical damage, a roof penetration or at a roof drain.
See MEMBRANE & SINGLE PLY ROOFS.
But a leak in a coated concrete roof can mimic the hard-to-track leaks in a membrane type roofing too. That's because layers of roof coating on the concrete roof may look good from above but may not be adhered to the concrete surface. Poorly adhered roof sealant can provide a hidden horizontal water creep pathway.
Reader Question: how can I find the source of a small leak in my flat roof?
31 August 2015 Dirk said:
I have a very special type of roof that has a leak. It was designed around 1940 as a passive air conditioned house in Florida.
The roof is concrete slab (flat) with a deck and parapet walls so that the upper deck can be used as a sun deck. The entire deck was tarred and has j-bolts and standoffs then squares of concrete are mounted to the J-bolts and bolted down with flush nuts.
The idea was that water would fill the area under the squares (which have a small crack between them).
The water would then evaporate through the concrete squares. The hotter the sun the more cooling the house got. This worked until about 10 years ago when the roof began to leak. (great idea but its useful life ended)
The client had the deck roofed over and AC installed. The problem is that there is a small leak somewhere. Annually, the living room ceiling needs repaired. I am wondering if you have any method of finding the actual leak?
The deck looks properly roofed. Without removing the roofing and lifting the concrete squares and re-hotmopping the deck I can figure no way to find and repair it. I am not even sure one could remove the special flush nuts!
I have thought of thermal cameras but unsure if they will show anything from the top side. remember that under the new roof is a "pool" in essence, so that the leak showing in the house will be where that "pool" leaks, not where the membrane leaks. Please advise?
Reply: steps in tracking down a flat or low slope roof leak
Dirk:
Tracking down the source of a leak in a flat roof is indeed challenging, as we discuss in the article above.
Roofers use a combination of
- Careful visual inspection of the roof surface above for possible leak points such as any anomaly in the roof surface membrane or coating or dust and debris accumulation that mark areas of ponding
- Careful inspection of the roof drainage system for blockages or drain leaks into the building
See FLAT ROOF DRAINAGE SYSTEMS - Inspection below for the location of the leak where it appears indoors
- Careful attention to the exact roof slope (no "flat roof" is perfectly dead flat) that can help predict where water will run
- Use of moisture screening equipment such as the Tramex electronic moisture metering system and infra red imaging or thermogaphy to find wet areas below the roofing membrane or coating. For a roof that is totally ponded-over you can still make this check from the building interior as long as you can obtain visual access to the under-side of the roof.
- Distinguish between roof leaks and interior condensation problems
See FLAT ROOF MOISTURE & CONDENSATION
Keep in mind that both moisture meters and infra red imaging (the latter relies on temperature differences presuming wet areas are cooler) cannot accurately pinpoint a leak source if no water is present, that is if too much time has elapsed since the last rain or last leak.
I do not advocate tearing off a functional roof to patch a leak; I advocate very careful inspection by an experienced person (an inexperienced person won't have the eye to spot all useful cleak clues). Often we will identify several probable or most-likely leak points and apply a patch or sealant over those areas. Then we monitor the roof to see how successful we were.
Common leak points in concrete roofs
The most common points of leakage in these roofs are where the concrete has cracked, particularly if the crack is in an area of roof ponding or near a roof drain where the most water accumulated during wet weather.
Our flat roof photo above is typical of coated concrete roofs world-wide: poured concrete, typically reinforced with steel mesh or steel re-bar, has a gentle slope to a roof drain (not shown above). Imperfections in roof construction or less often due to sagging or structural movement can cause low areas that pond.
Areas of roof ponding show up as dark areas where dust and debris accumulate in the areas that stay wet longer on the roof surface. Ponding that has evaporated within 24 hours of a rainstorm is not considered an actionable roof defect. Roof ponding is illustrated and discussed
at BUILT UP ROOFS.
Watch out: as you can see in our flat concrete roof photo above, there are no safety railings nor tall parapets on this roof. Pay attention to where you are walking or standing at every moment as it is easy to step backwards, slip, trip or fall to your death.
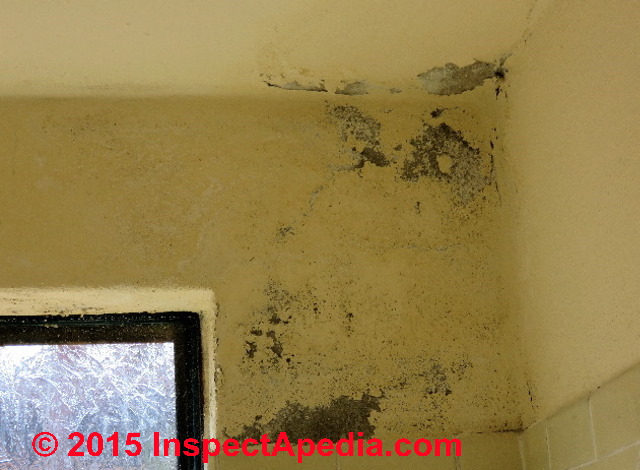
Inside the building these roof leaks appear as stains or mold on concrete or on painted concrete or masonry ceilings and on the upper portions of walls at or near the ceiling-wall juncture. Tracing a low slope or flat roof leak to its source is important if you are to assure that the roof leak repair will be successful.
On coated concrete flat or low slope roofs the tracing of a leak to its probable source is often a bit easier because the horizontal travel distance will be less and the inside leak will appear close to a crack or close to a roof drain or point of overflow if the drains are blocked.
See FLAT ROOF DRAINAGE SYSTEMS.
Water may also creep along underneath poorly-adhered roof coatings to leak some distance away from the point of water entry, as we will describe later in this article.
Occasionally water from the roof surface may follow a circuitous route through cracks in the concrete but you may see the crack on the roof surface if not also inside.
For the NEXT STEPS in the repair of a flat or low sloped roof, please continue reading at
FLAT ROOF LEAK REPAIR PREPARATION
...
Flat roof leak tracking & roof repair references
- ASTM C 1060-97 Practice for Thermographic Inspection of Insulation Installations in Envelope Cavities of Frame
Buildings - ASTM C-1153-97 Practice for the Location of Wet Insulation in Roofing Systems Using Infrared Imaging
- Eads, Lowry G., Richard A. Epperly, and John R. Snell Jr. "Thermography." ASHRAE journal 42, no. 3 (2000): 51.
- ISO 6781 Thermal insulation, qualitative detection of thermal irregularities in building envelopes, Infrared Method
- Nevalainen, A., P. Partanen, E. Jääskeläinen, A. Hyvärinen, O. Koskinen, T. Meklin, M. Vahteristo, J. Koivisto, and T. Husman. "Prevalence of Moisture Problems in Finnish Houses*." Indoor Air 8, no. S4 (1998): 45-49. Abstract
A random sample of 450 houses representing various decades was surveyed by trained civil engineers for signs of water leaks or condensation. In 80% of the houses, signs of current or previous moisture fault were observed.
In most houses, the surveyors made at least two separate observations of moisture but the occupants missed one in every two of these signs of moisture damage.
Part of the faults were caused by flaws in design or construction, and part were due to aging of materials. Approximately 55% of the Finnish houses (i.e., a total of nearly 500 000 houses), were assessed to be in need of repair or more thorough inspection.
The observations were equally frequent in the houses of different age, but certain types of moisture damage were characteristic of certain types of buildings or constructional methods used in different eras. Roof geometry was a significant factor accounting for roof leakages. The majority of the faults could be repaired at reasonable cost.
- ROOF & WATERPROOFING MAINTENANCE & REPAIR, HUD Guidebook V, Chapter Five, [PDF] retrieved 2018/02/17, original source: https://www.hud.gov/sites/documents/HUDGB5C5GUID.PDF
- Snell, John, Rob Spring, and Vermont Montpelier. "Nondestructive testing of building envelope systems using infrared thermography." [PDF] Inframation, Montpelier, VT (2002). Snell Infrared
Montpelier, Vermont
800-636-9820
www.snellinfrared.com Original source: http://www.cebq.org/documents/Infraredthermographyforbuildingenvelopes.pdf Abstract:
The structures we live and work in are susceptible to quality and performance problems during construction and maintenance that can impact performance and may, in some cases, render them dangerous. Regardless of the building type involved, infrared thermography also known as thermal imaging can provide remarkable, nondestructive information about construction details and building performance.
This paper discusses the numerous applications for the technology currently being used to inspect building envelopes.
These include validation of structural details, verification of energy performance (conduction and air leakage), location of moisture intrusion, and the identification of structural and system degradation of roofs and facades. Examples will be given for each application and the basic conditions required will be discussed.
Excerpt:
The inspection of flat roofs, especially built-up roofs (BUR) has been proven for a number of years. The technique allows for the detection of moisture trapped in a roof system; over time this moisture leads to the pre-mature degradation of the roof.
The moisture appears warmer at night after a sunny day due to its greater thermal capacitance. The roof surface must be dry and the technique works best on roofs with absorbent insulation. Inspection work can be accomplished either in a roof-top survey or an aerial survey conducted from a helicopter or fixed-wing craft.
...
Reader Comments, Questions & Answers About The Article Above
Below you will find questions and answers previously posted on this page at its page bottom reader comment box.
Reader Q&A - also see RECOMMENDED ARTICLES & FAQs
On 2024-03-21 by Rita Fishman - Use silicone to patch a leaky EPDM roof?
I have an epdm roof that was put in 3 yrs ago on a flat wood beamed converted warehouse--we attempted to patch several slits that occurred but they have failed in some cases
I have been thinking about having a silicon material applied over the epdm to solve the problem
Will this be the right answer
Reply by InspectApedia Publisher
@Rita Fishman,
Thanks for a helpful EPDM patch/repair question.
I have had good success making small repairs in an EPDM roof membrane using black (to match the roof color) silicone sealant. In any event you need to clean the surfaces to be sealed before applying the silicone.
Beware that trying to patch a larger cut or slit or tear, say more than in inch, with just a top blob of silicone is more likely to fail, because thermal movement in the roof membrane across a wide range of roof temperatures can pull your siliconed repair apart.
But a proper EPDM repair can be completely reliable. That involves the preparation steps I'll give below.
1. Prepare the EPDM patch: Measure the length of those slits or tears in your EPDM roof and cut a piece of the same EPDM material that is at least 8" wide and 8" longer than the tear length. Or buy a roll of 6" or 8" wide EPDM adhesive-backed EPDM repair tape.I'll give examples of EPDM cleaning and patching products here, starting with Dicor's EPDM cleaner shown above.
Where to buy EPDM patch material:
If your local commercial building supplier who sells EPDM roofing is as obnoxious to small contractors or people who don't own a roofing company as is the one we have in Poughkeepsie, NY, you'll find that either they won't even talk to you (they want to support local roofers) or they'll insist on selling you at least one entire roll of EPDM roofing, a thousand times more than you need.
When I've owned or worked on buildings with an EPDM roof, at the time the roof was installed we always would have some EPDM material left-over as no building is likely to have a roof that exactly matches the dimensions of EPDM roofing material when bought from the supplier. Key is to save some reasonably big segments of that same material for future prepairs.
But if it's too late for that for you, you have two other options:
- see if a local EPDM roofer will give or sell you a small amount of EPDM material. (I'm assuming the EPDM repair job in your case is so small that no EPDM roofing company would be anxious to take on the repair. For larger repairs, of course you should hire a professional.) Or if you see an active EPDM roof job in progress nearby, stop by and ask them to sell you enough EPDM for your repairs.
- from online vendors you can buy EPDM roofing repair tape that is sold in rolls - a 6" or 8" wide roll is probably sufficient.
2. Clean the EPDM surface around the area to be patched and extending an inch or more beyondit using an EPDM (rubber roof) cleaning chemical.
Lots of AI generated ads and companies offer non-soapy detergent and even abrasive cleaners that can work on an EPDM roof.
Don't try to apply even the adhesive-backed EPDM repair tape without first cleaning the existing EPDM roof surface. You'll see that a coating of oxidized EPDM (rubber roof) material comes off during cleaning - telling you that there was a top coating of oxidized material that would have prevented the best bond between the patch and the roof surface.
I prefer to use an EPDM roof primer-cleaner that is specifically formulated for that purpose, such as Dicor's EPDM Rubber Roofing Coating System EPDM cleaner - part 1 (which is the cleaner). (Take proper precautions such as rubber gloves, to avoid skin contact, breathing fumes, etc. when using any solvent chemicals.)
Also clean at least the down-side or under-side of your EPDM patch if you're using a section of actual EPDM roofing (in my view the best repair).
Using, instead, an adhesive EPDM patch tape is easier and faster, though in my experience, if you're applying that on a hot day on a hot roof it's more difficult to keep the patch absolutely flat and free of wrinkles than using an actual section of EPDM roofing rubber. Also the patch tapes are thinner than the original EPDM - walking on the tape on a hot day can disturb it or wrinkle it or leave a footprint. So if you use EPDM repair tape, don't walk on it later. Properly applied the EPDM roof repair tape is quite durable.
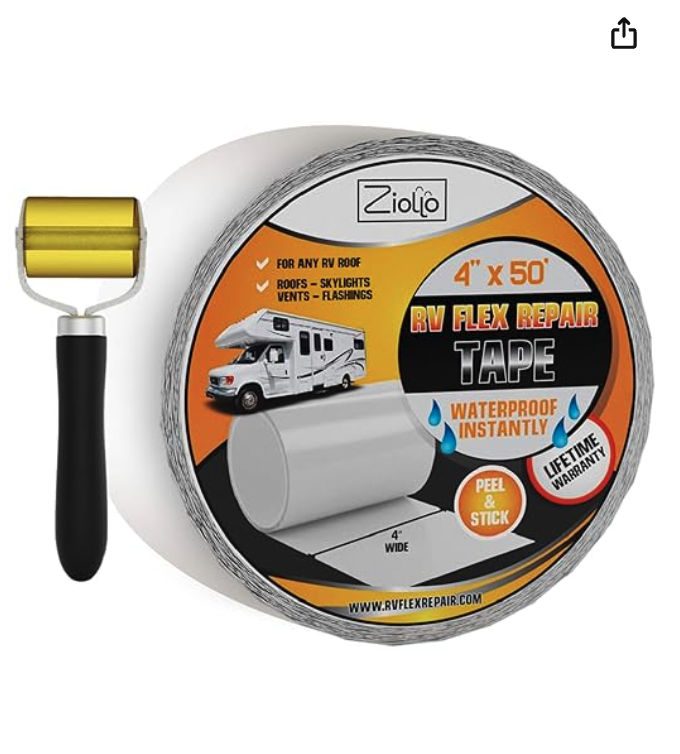
Some EPDM repair tape kits (Ziollo for example) include a small roller than can help you flatten the tape and roll out any air bubbles.
3. With the roof surface cleaned and dry, apply your adhesive-backed EPDM patch from the roll, starting at 4-6" before one end of the tear in your roof, unrolling and peeling off the backer paper, using your roller to keep the patch flat and straight and bubble free.
Watch out: DO NOT STRETCH the EPDM repair tape as you apply it or it'll pull and wrinkle and you'll be sorry later.
OR
If you're patching with actual EPDM roofing, after the surfaces of the roof and the underside of your patch have been cleaned and are dry, apply a proper EPDM adhesive.
Watch out: some "bonding adhesives" sold for EPDM roof repair are NOT for gluing down a patch, so read the label and the intended use before buying the adhesive.
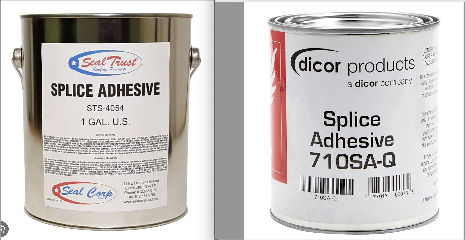
Dicor 710SA-Q Splicing Adhesive or Seal Trust Splice Adhesive STS-4054 are both intended for gluing EPDM seams and splices.
Dicor 917BA Water-Based EPDM and TPO RV Roof System Bonding Adhesive is specifically NOT for this type of patching. The label on this product says:
"This product is NOT intended for seaming rubber to rubber or adhering rubber to metal, fiberglass or plastic surfaces."
To do a neat job I place the patch (not a pre-adhesive strip) over the area to be repaired, draw a line around its outer edges, the flip it over atop some newspaper.
I use a brush or roller to spread adhesive in the patch area on the EPDM roof surface, extending less than 1/2" outside my lines.
I also coat the underside of my EPDM roof patch.
When the adhesive has dried properly it'll be tacky but not wet.
Carefully, working from one end (it helps to have an assistant for longer patch strips) set the patch in place and use a roller to smooth and adhere it.
If you don't have an EPDM patch roller you can use almost any smooth round object, even a rolling pin, for this task.
OK so I know some of you professional EPDM roofers who read this may have different advice, and we'll welcome your comments.
Here are examples of Dicor 710SA-Q Splicing Adhesive and Seal Trust Splice Adhesive STS-4054 intended for gluing EPDM seams and splices.
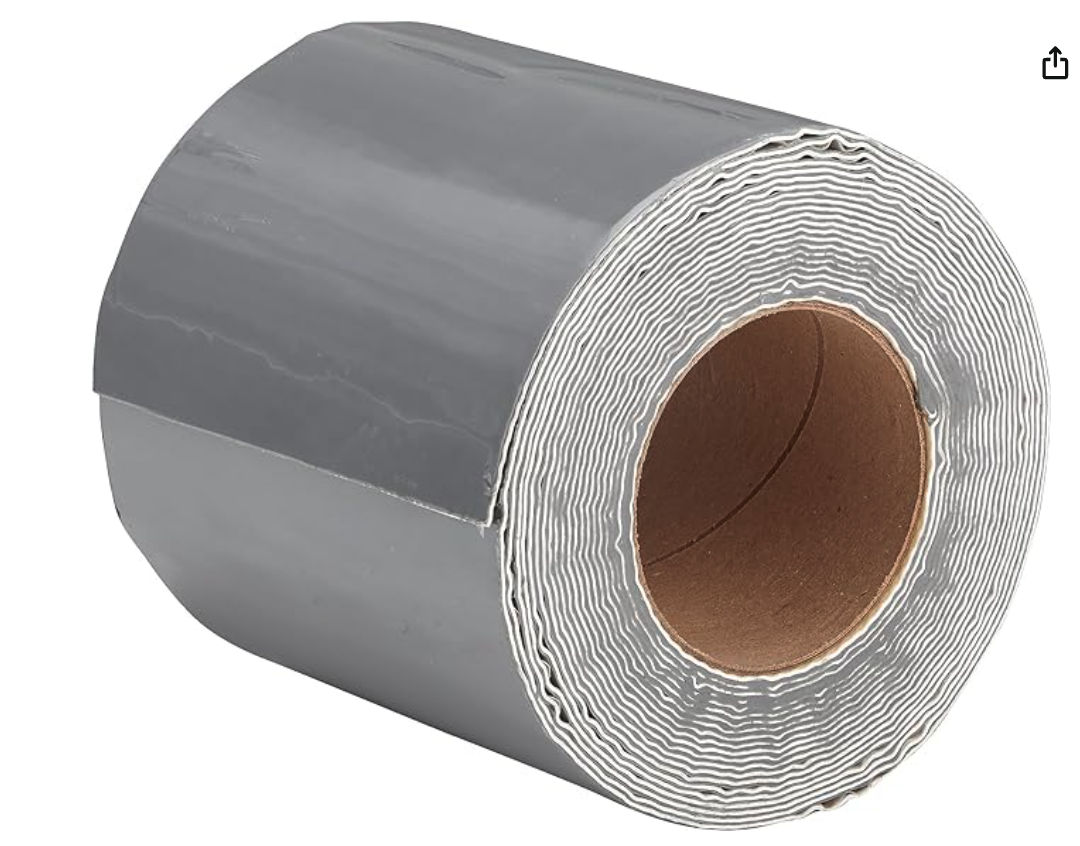
Here's an example of an EPDM repair tape (intended for RVs) that includes a roller, from Ziolo.Here's an example of pre-adhesive-backed EPDM roof seamer that can be used as a patch - also from Dicor but sold by other manufacturers too.
On 2021-10-24 by PMR - Streams of water running inside our walls at first rain after our flat roof was repaired
We have a flat roof, with one scupper/down spout (plus overflow spout) at the back center of the roof. This downspout is taken out into the yard and outflows about 20' away from the house.
The roof is 8-9 years old. It was a complete tear off at the time. Sheathing replaced with 2.5" of rigid insulation topped with new roof sheathing. I think it's modified bitumen as it has sections and seams and is covered with a coarse grit/fine gravel.
We have solar (3 years). The original roofer came back and sealed the solar panel standoffs.
House is stucco, 1923 construction. House was painted 4 years ago, no visible exterior cracks. We've had a couple of small earthquakes, but no exterior cracking. No cracks around windows.
We have just had the first torrential rain in 3 years.
I was in the "basement" (west coast version - above ground crawlspace/laundry 7' - no drywall or interior walls in this section, just EQ holddowns. )
Looking at the walls, I see stud bays, horizontal sheathing, tar paper) and noticed streams of water on the interior of the wood sheathing. One whole side of the house. streaming down from the top of the wall.
We've had weeping before, but nothing like this.
Knock on wood no upstairs interior signs of leaks, no stains, drips, mold - Just soaking wet walls in the underhouse crawlspace/basement streaming with water.
I'm thinking this is roof leakage? Time for a serious seam and coating touch up? What do you all think?
On 2021-10-25 by inspectapedia.com.moderator
@PMR,
Certainly there could be a roof leak, but you need a thorough and detailed on-site inspection to diagnose that.
It's not something that we can say with confidence from your text though I agree that IF those streams of water appeared ONLY after you had rain that's very incriminating of the roof.
Leaks on flat roofs can be difficult to track down, so you may want to make use of both a moisture meter and thermography.
Your inspection should also check for leaks in the building siding such as around windows, doors, or other penetrations or openings.
Watch out: If water has run inside of wall cavities in the upper part of the building you could have a hidden mold problem as well.
...
Continue reading at FLAT ROOF LEAK REPAIR PREPARATION or select a topic from the closely-related articles below, or see the complete ARTICLE INDEX.
Or see FLAT ROOF LEAK REPAIR FAQs - questions & answers about finding leaks in flat and low slope roofs and how to fix them
Or see these
Recommended Articles
- BUILT UP ROOFS
- CONCRETE ROOFING
- DEFECTS LIST - ROOF LOW SLOPE
- EPDM, RUBBER, PVC ROOFING
- EPDM ROOF COATING REPAIRS
- EPDM ROOF LEAK REPAIRS
- EPDM ROOF SEAM REPAIR TAPE
- FLAT ROOF DRAINAGE SYSTEMS
- FLAT ROOF LEAK REPAIR
- FLAT ROOF MOISTURE & CONDENSATION
- LOW SLOPE ROOFING
- LOW SLOPE ROOF CONVERSION
- MEMBRANE & SINGLE PLY ROOFS
- MODIFIED BITUMEN ROOFING
- MODIFIED BITUMEN ROOF DEFECTS & ROOF LIFE
- ROLL ROOFING, ASPHALT & SBS
- ROOF LEAK DIAGNOSIS
Suggested citation for this web page
FLAT ROOF LEAK REPAIR at InspectApedia.com - online encyclopedia of building & environmental inspection, testing, diagnosis, repair, & problem prevention advice.
Or see this
INDEX to RELATED ARTICLES: ARTICLE INDEX to BUILDING ROOFING
Or use the SEARCH BOX found below to Ask a Question or Search InspectApedia
Ask a Question or Search InspectApedia
Questions & Answers diagnosing & repairing leaky roofs
Try the search box just below, or if you prefer, post a question or comment in the Comments box below and we will respond promptly.
Search the InspectApedia website
Note: appearance of your Comment below may be delayed: if your comment contains an image, photograph, web link, or text that looks to the software as if it might be a web link, your posting will appear after it has been approved by a moderator. Apologies for the delay.
Only one image can be added per comment but you can post as many comments, and therefore images, as you like.
You will not receive a notification when a response to your question has been posted.
Please bookmark this page to make it easy for you to check back for our response.
IF above you see "Comment Form is loading comments..." then COMMENT BOX - countable.ca / bawkbox.com IS NOT WORKING.
In any case you are welcome to send an email directly to us at InspectApedia.com at editor@inspectApedia.com
We'll reply to you directly. Please help us help you by noting, in your email, the URL of the InspectApedia page where you wanted to comment.
Citations & References
In addition to any citations in the article above, a full list is available on request.
- "Slips & trips and falls from height in
Great Britain, 2014" [PDF] , Health and Safety Executive, Health and Safety Executive
Redgrave Court
Merton Road
Bootle
Merseyside
L20 7HS U.K., - retrieved 9 Aug 2015, original source: http://www.hse.gov.uk/statistics/causinj/slips-trips-and-falls.pdf
Excerpt: falls from height were the most common cause of fatalities, accounting for nearly three in ten (29%) fatal
injuries to workers (RIDDOR); - U.S. CDC, "Worker Deaths by Falls, A Summary of Surveillance Findings and Investigative Case Reports", [PDF] U.S. DEPARTMENT OF HEALTH AND HUMAN SERVICES,
Public Health Service,
Centers for Disease Control and Prevention,
National Institute for Occupational Safety and Health,
September 2000, retrieved 9 August 2015, original source: http://www.cdc.gov/niosh/docs/2000-116/pdfs/2000-116.pdf
Excerpt: Based on the NTOF surveillance data, falls from elevations were the fourth leading cause of occupational
fatalities from 1980 through 1994. The 8,102 deaths due to falls from elevations accounted for 10% of all
fatalities and an average of 540 deaths per year. - Our recommended books about building & mechanical systems design, inspection, problem diagnosis, and repair, and about indoor environment and IAQ testing, diagnosis, and cleanup are at the InspectAPedia Bookstore. Also see our Book Reviews - InspectAPedia.
- Best Practices Guide to Residential Construction, by Steven Bliss. John Wiley & Sons, 2006. ISBN-10: 0471648361, ISBN-13: 978-0471648369, Hardcover: 320 pages, available from Amazon.com and also Wiley.com. See our book review of this publication.
- In addition to citations & references found in this article, see the research citations given at the end of the related articles found at our suggested
CONTINUE READING or RECOMMENDED ARTICLES.
- Carson, Dunlop & Associates Ltd., 120 Carlton Street Suite 407, Toronto ON M5A 4K2. Tel: (416) 964-9415 1-800-268-7070 Email: info@carsondunlop.com. Alan Carson is a past president of ASHI, the American Society of Home Inspectors.
Thanks to Alan Carson and Bob Dunlop, for permission for InspectAPedia to use text excerpts from The HOME REFERENCE BOOK - the Encyclopedia of Homes and to use illustrations from The ILLUSTRATED HOME .
Carson Dunlop Associates provides extensive home inspection education and report writing material. In gratitude we provide links to tsome Carson Dunlop Associates products and services.


