 Plaster Repair Methods
How to Diagnose & Repair Plaster Ceilings, Plaster Walls & Stucco Damage
- POST a QUESTION or COMMENT about how to diagnose & repair different types of interior wall & ceiling plaster damage
How to diagnose and repair damaged plaster walls or ceilings or damaged stucco surfaces.
Here we describe the types of plaster damage and plaster repair methods that vary depending on the damage cause and type and the plaster system that was used at your building.
In this article series we describe and discuss the identification and history of older interior building surface materials such plaster, plaster board, split wood lath, accordion lath, sawn lath, and expanded metal lath, Beaverboard, and Drywall - materials that were used to form the (usually) non-structural surface of building interior ceilings and walls.
InspectAPedia tolerates no conflicts of interest. We have no relationship with advertisers, products, or services discussed at this website.
- Daniel Friedman, Publisher/Editor/Author - See WHO ARE WE?
Guide to Plaster Repair Methods
 In North America plaster was widely used in building interiors and on some building exteriors from at least the 1700s right up through the 1940s, and continues in use in some buildings even today.
Early three-coat plaster systems (coarse, scratch coat, finish coat) up to about 1900 used a lime mix while later plaster systems and modern ones use a gypsum mix.
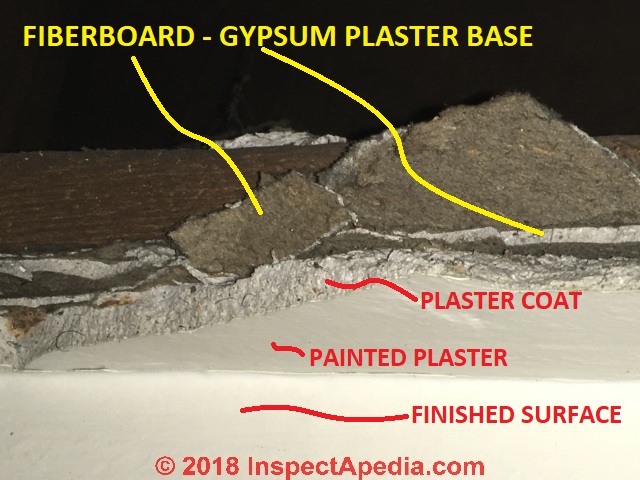
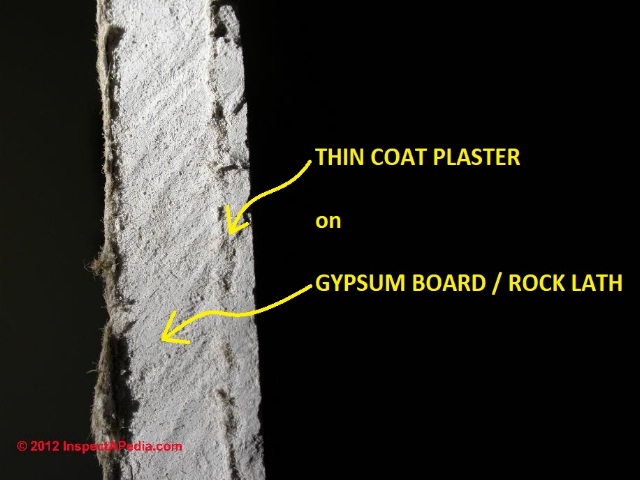
Our photo shows a more modern plaster system that used gypsum board as a base onto which a thin coat of plaster, usually gypsum-based, was applied.
[Click to enlarge any image]
Lime plaster consists of ground, heated lime (from limestone, or in some areas oyster shells), a strengthening fiber (sometimes animal hair or straw), and sand.
By 1900 gypsum could be used in place of the more-difficult and potentially more harmful lime. For a time both were used, lime plaster for the base or scratch coat and fine, hard, smooth gypsum based plaster for the top or finish coat in buildings.
Tip: If you see grains of sand in the finish plaster coat it's probably all lime and sand. If you see a very smooth finish, or if in an edge view (photo above) you see a plaster base made of paper-covered gypsum board, your plaster ceiling or wall covering is all-gypsum materials.
Details are at PLASTER INGREDIENTS, MIX, PROPERTIES
MacDonald (US NPS Preservation Brief No. 21) points out that while experienced plasterers are needed for any extensive plaster installation or repair work, minor repairs of stress cracks, small areas of loose plaster, and small holes or areas of lost plaster are well within the abilities of many building owners.
1. Diagnose the type of plaster damage
First, to make a successful (safe, durable, economical) repair of damaged plaster in buildings we should first do some diagnostic or detective work to understand the type of plaster damage failure that needs repair. Just how plaster can and should be repaired depends on the type of damage and its cause.
At PLASTER DAMAGE CAUSES, TYPES on this pafge we describe the basic types of plaster damage and their implications for repair.
2. Identify the plaster materials & system
Second, for a successful plaster repair job it's helpful to understand the type of plaster system that we are going to repair.
- Wood lath
- Expanded metal lath
- Gypsum board "rock lath"
- Plaster over fiberboard
- Stucco coatings on hard surfaces such as masonry block, brick, stone
For help figuring out what kind of plaster system was used in or on your building
see PLASTER TYPES & METHODS in BUILDINGS [separate article]
3. Choose plaster repair approach & extent
Third we choose methods and materials that fit the first to diagnostic steps.
At PLASTER REPAIR METHOD CHOICES on this page we review these steps in more detail here and we conclude with a list of plaster repair method standards and documents that you can download in free PDF format for still more-detailed plaster repair advice and step by step procedures.
At PLASTER REPAIR DETAILED GUIDES also on this page we provide links to free PDF downloads that offer more detail about the steps and products used to repair interior plaster ceilings & walls.
Portions of this discussion is particularly indebted to MacDonald (1989) cited in detail below.
Types of Interior Plaster Damage
This section describes plaster damage types & causes at building interior walls and ceilings.
If you are concerned about the condition of exterior plaster or stucco surfaces, see
STUCCO, HARD COAT INSTALLATION, INSPECTION, REPAIR - repair stucco on masonry or on exterior surfaces
- Plaster cracked or loose due to structural or other building movement
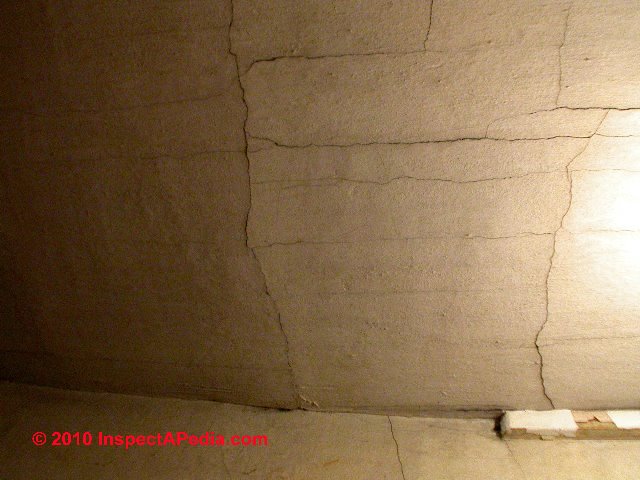
If the underlying structure of a ceiling or wall is bending or sagging or if you see gaps at the intersection of ceiling to wall or at wall corners, check first for underlying building movement. We need to understand the extent of movement and its cause before undertaking any repair.
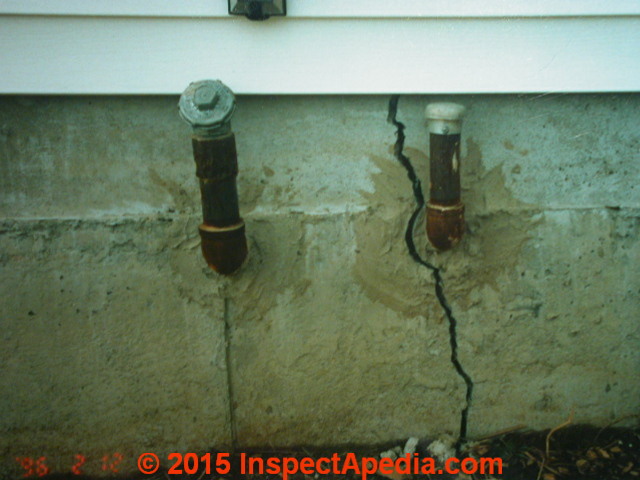
If plaster is cracked due to foundation settlement, frost heaves, expansive clay soil those conditions need to be addressed or we'll also find that our plaster repair will not be durable.
Watch out: if an inspection of the building shows significant and ongoing settlement cracking like that in our photo above, no plaster repair will be successful until the settlement cause has been corrected.
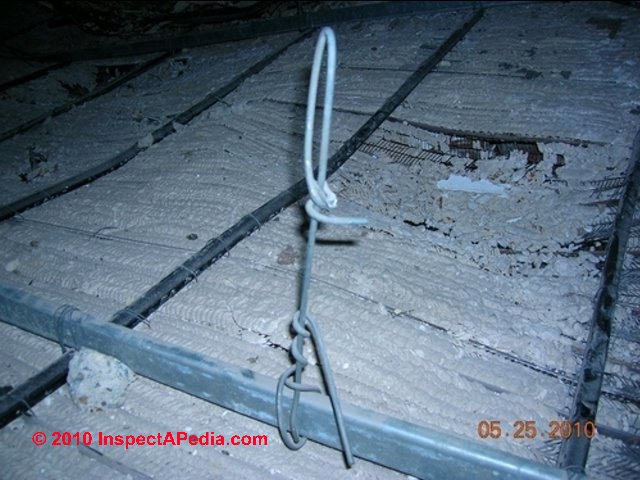
Below our photo shows a different type of movement that caused extensive plaster cracking: a suspended ceiling was hung from the framing of the building floor above, but without sufficient fasteners to remain rigid. Flexing in the ceiling caused the plaster ceiling to break and collapse, even though it was constructed using expanded metal lath.
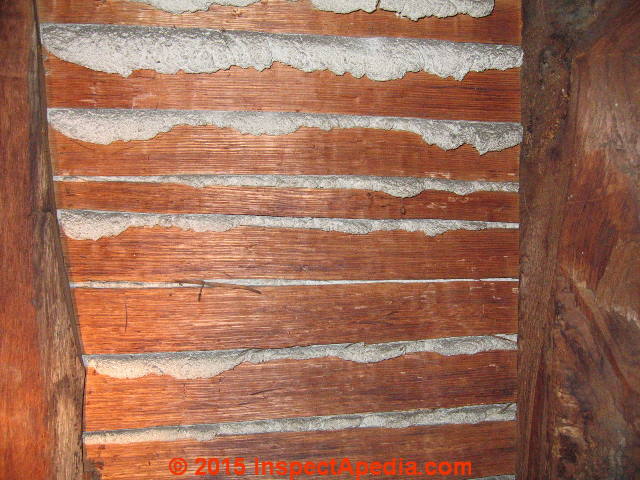
Below: plaster fallen from the underside of the roof of a pre-1900 New York Home.
- Plaster cracked or loose due to failures of the supporting lath
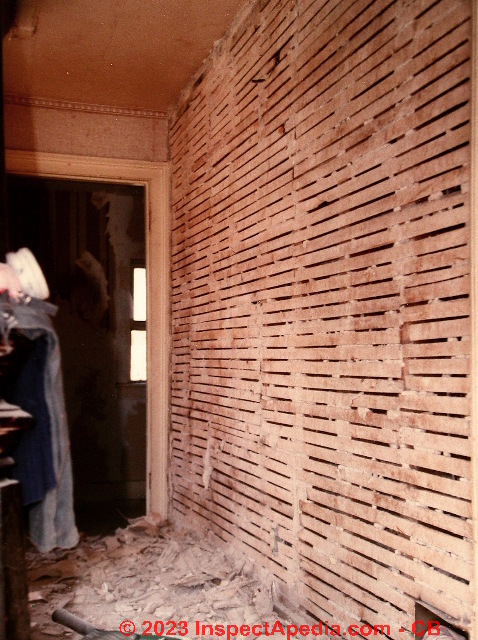
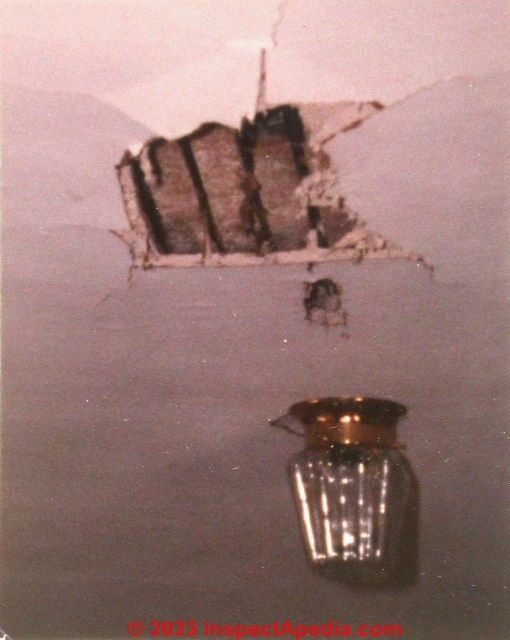
Wood lath, expanded metal lath, gypsum board lath, fiberboard underlayment may be loose due to building movement, leaks, rot, or simply inadequate fastening in the first place.
Before repairing the plaster shown in our photo above, the missing wood lath would need to be replaced.
- Plaster cracked, loose, fallen due to broken plaster ears
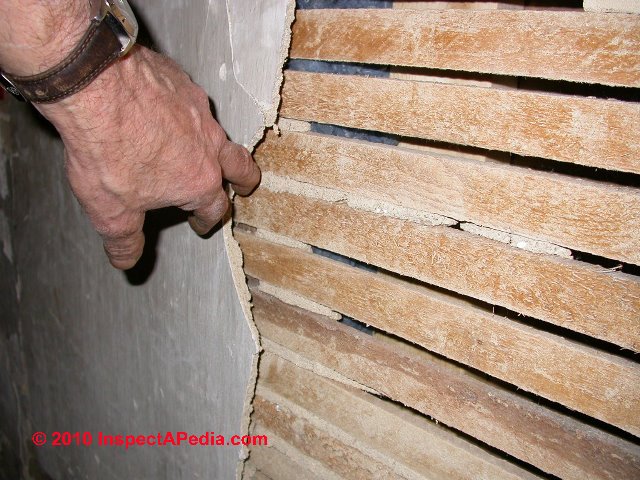
In our photo just above the author [DF] is gently pulling at loose plaster on the wall of a pre-1900 home in "the bleachery" in Wappingers Falls, New York.
When plaster is applied to wood lath some of the plaster rough-coat mix is pushed between slots between the wood lath strips where it curls over, hardens, and thus forms a mechanical lock or key that holds the plaster in place .
Building movement, mechanical impact, leaks, or other events can cause those "plaster ears" to break off. It may be possible to secure such plaster in place using plaster washers and repair screws provided that the plaster itself remains solid, not soft or crumbly.
Our photo below shows plaster ears that are still intact and holding plaster securely against a wall.
- Plaster soft or crumbling due to water leaks
If you see water stains where plaster is damaged or if you know that the building has had a history of leaks, you may have to remove the water-damaged plaster rather than trying to patch it in place.
Water can change plaster such that it will not remain stable, in place, nor can it be secured by a few plaster ears or washers and screws. It's just too soft. - Plaster soft or crumbling due to improper original mix
If your plaster is soft and crumbly (so not repairable) and there is no history of water damage, the original mix may have been improper. If so, check the extent of soft plaster before planning your repair.
More-extensive plaster replacement now may be wiser and ultimately less costly than having to repeat the plaster repair work every year or so.- Extent of plaster damage
Except in cases of historic preservation, if you find that most of the plaster on a wall or ceiling is loose or badly damaged (photo below, it's probably less expensive and faster to remove it and replace the surfaces with drywall.
Above: very extensive loose, damaged plaster in this Wappingers Falls NY Home (28 West St.) led us to simply remove all of the old plaster, replacing it with drywall fastened atop the remaining wood lath.
Watch out: if sections of plaster on ceilings or high on walls are loose or if ornamental plaster trim or rosettes on ceilings or walls are loose, those surfaces may be unsafe, as we explain
at PLASTER, LOOSE FALL HAZARDS but keep in mind that not all bulges in plaster walls and ceilings are from loose plaster. So also
see PLASTER BULGES & PILLOWS - Extent of plaster damage
Plaster Repair Methods
Repair of Small Cracks in Plaster or Portland Cement Plaster
Pruter (1995) focusing on portland cement plaster cracks, gave an accounting of plaster cracks by crack width and possibly underlying cause, suggesting different repair methods depending on crack width. In our opinion those categories can be reasonably applied to traditional interior plaster cracking as well.
- Minuscule cracks
less than 0.0005 in (0.127 mm) are "acceptable" and don't require treatment - Hairline shrinkage cracks
0.0005 in (0.127mm) to 0.10 in. (0.254 mm), also called crazing or checking cracks may expand or contract in response to temperature changes.
Repair: apply 15-18 dry mil thickness of a good elastomeric coating over the whole surface - Minor structural movement cracks
0.125 in - 0.250 in in width are usually structural in origin, opening and closing with building movement in the structure or in the finished surface materials.
Repair: as above for hairline shrinkage cracks + the addition of a crown of 1/16" of elastomeric coating centered over the crack - remarkably he approves this treatment for cracks up to 1/4" in width!
- Serious structural movement cracks
0.250" to 0.5 inch in width
Repair: after reviewing the cause of building movement and making any required repairs, fill the crack with plaster, masonry or concrete patch material improved with an additive of latex or acrylic to add flexibility and adhesion.
Some repairs may begin with a urethane sealant or high grade acrylic caulk - both flexible sealant materials.
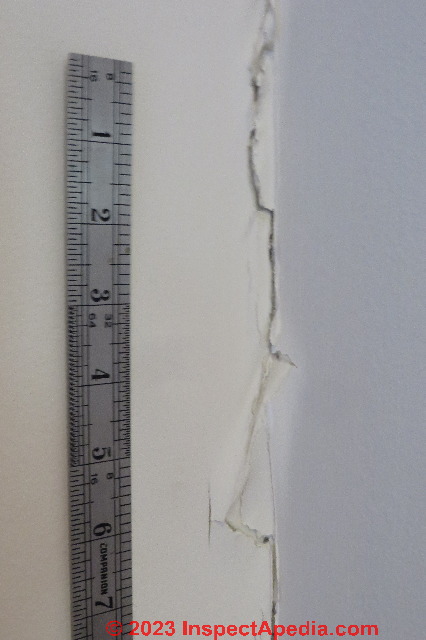
We used this method to repair the drywall corner crack shown here and traced to minor seasonal frost heave of a building's footing, after inspecting the building to convince ourselves that there was no more-serious damage to the building's structure. We think this same approach can work with plaster crack repairs.
Repairing the corner crack above we cleaned out all loose material, injected a flexible urethane sealant, then applied a heavy duty mesh tape, and finished the corner with a corner trowel and gypsum based joint compound.
Repair Mesh Tape or Screen for Small Holes in Plaster Surfaces
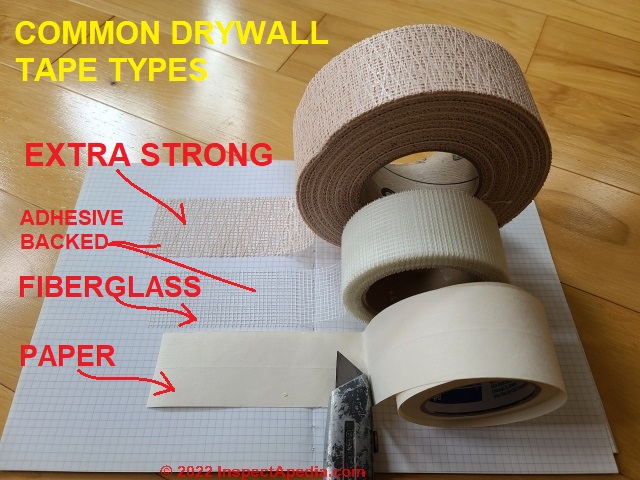
Sold also for drywall repair are a wide range of plastic or fiberglass mesh tape and aluminum screen that can be used to repair small holes in plaster (or drywall) surfaces.
Above: we use mesh tape or heavy-duty self-adhesive backed mesh tape for small plaster hole repairs and we may use it across cracks in plaster as well. But when patching plaster over expanded metal lath use paper tape.
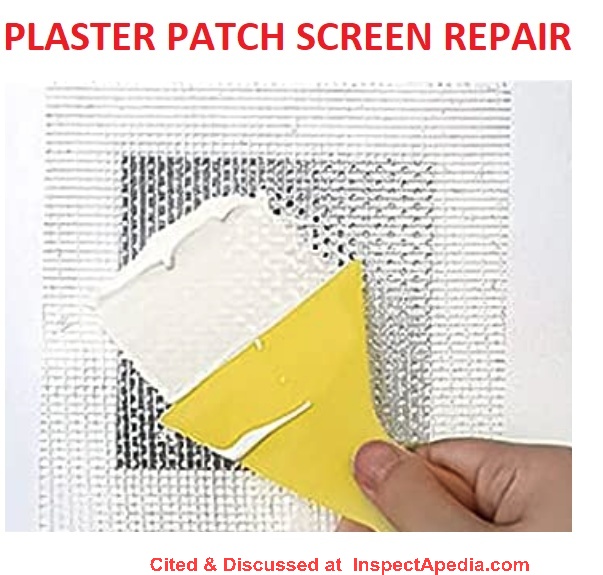
The surface is cleaned, sanded lightly, and the patch mesh is applied, then top-coated with plaster patch compound or with joint compound.
Shown here, plaster (or drywall) screen patch from Tuzazo.
Plaster Washers & Screws for Small Areas of Loose Plaster
Photo above: minor plaster damage can usually be repaired with plaster patch compound or even by cutting a small section of drywall that is screwed in place and top coated with plaster or joint compound.
For the area of damage shown (57 South Grand Ave., Poughkeepsie New York) we also used a few plaster repair washers and screws to be sure that the surrounding plaster remained firmly attached to the wood lath above.
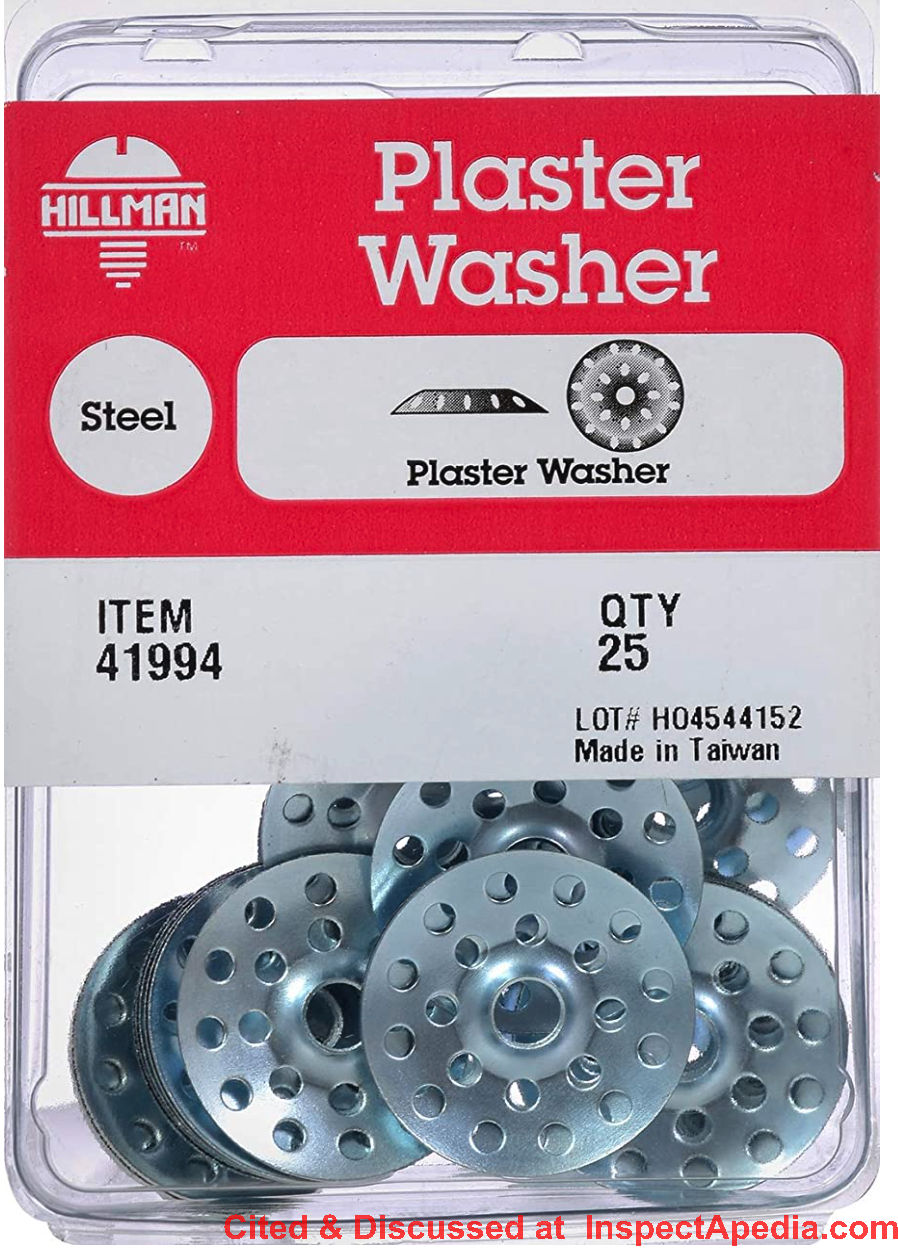
Below: One of several manufacturers, Hillman Group produces 1.6" diameter zinc-plated plaster repair countersunk washers that are used with 1-inch screws that are driven through the washer center and into the wood lath backing the plaster ceiling or wall.
Plaster repair washers are also sold in 1-inch diameter but in my OPINON I prefer the larger diameter as more-secure.
If your wall is much thicker, perhaps having had more than one generation of plaster repair, you may need to use longer screws.
The countersunk washer center means that using a proper bugle-headed repair screw will find the screw head set flush with the washer surface. The holes in the washer help assure that the top coat of plaster or joint compound will adhere to cover the repair washer and screw.
 \
\
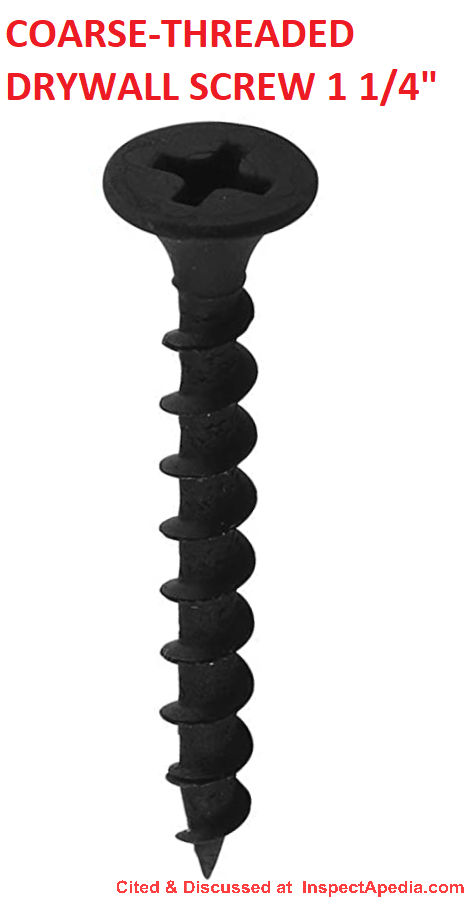
Watch out: be sure to use zinc-plated, stainless or other coated, non-corroding, coarse-threaded metal screws for this repair.
(Coarse-threaded anti-corrosion coated drywall screws can work.) Otherwise you may find rust stains bleeding through the repaired plaster surface.
Plaster Repair Compound for Small Plaster Damage Areas
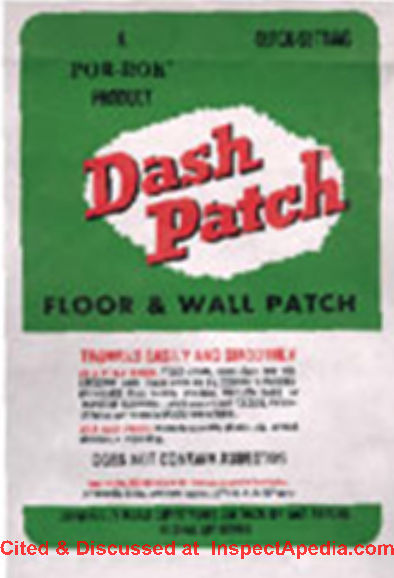
For very small holes in plaster or if you want to try your skill at smoothing a larger patch directly onto exposed wood or metal lath, use a premixed plaster patch compound, or try our old favorite, Dash Patch or an equivalent wall/ceiling patching product. These are gypsum based patching compounds that set and dry quickly to a smooth, hard surface.
You can apply this patching compound in thicknesses up to 1/2" in one pass.
Dash Patch does not shrink and has good adhesive properties.
You'll find the Dash Patch technical data sheet below from more than one manufacturer who claim that name.
Similar patching products are made by a blizzard of companies including Dap's ElastoPatch, Dap FastPatch, DAP Presto Patch, Por-Rok's "Dash Patch" floor and wall leveler, RapidSet Wall Repair.
Cut & Fill Drywall Patches for Larger Areas of Plaster Damage
For a homeowner or less-experienced handywoman/handyman who needs to repair a larger area of lost or loose plaster (loose to be removed first) our opinion is that it's probably easier to simply cut a rectangle of drywall to fit the area where you've removed loose, damaged plaster, then screw the damaged drywall to the wood lath or to wall studs or ceiling joists.
Then finish the job with drywall tape and a wide 18" skim coat across the perimeter of the patch.
Tip: mark the location of wall studs or ceiling joists in pencil on the edges around the plaster hole that you're patching. That makes it easy to see where to drive plaster or drywall screws when installing a drywall segment patch to fill large holes.
Plaster Repair Method Guides, Manuals, Standards
- Amico, METAL LATH SPECIFICATIONS, SPECIFICATION FOR METAL LATH AND ACCESSORIES, LATH AND PLASTER [PDF] Amico, 3245 Fayette Ave.
P.O. Box 3928, Birmingham, AL 35208, (205) 787-2611, (800) 366-2642 and in Canada: 1080 Corporate Drive, Burlington, Ontario L7L 5R6, Canada, (905) 335-4474, (800) 663-4474. Amico is the largest metal lath producer in North America. Website: http://amico-lath.com/
Amico is lath and plaster accessory producer. - Ashurst, John and Ashurst, Nicola. Practical Building Conservation, English Heritage Technical Handbook, Volume 3. Mortars, Plasters and Renders. New York: Halsted Press, 1988.
- ASTM C 842
- ASTM C 841 Metal Lath or gypsum lath installation
- CGM Por-Rok DASH PATCH PRODUCT SPECIFICATIONS [PDF] CGM Inc., 1445 Ford Rd., Bensalem, PA 19020 USA, Tel: 215-638-4400 - aka Por-Rok, Novatek, retrieved 2023/12/23, original source: http://www.homasote.com/assets/files/installation/dash_patch.pdf
Excerpt:
DASH PATCH is a gypsum based powder which, when mixed with water forms a plastic composition that can be troweled onto most surfaces to provide a smooth base for resilient or hard surfaces. DASH PATCH is designed to have rapid setting, high strength, adhesion and workability. DASH PATCH will not shrink or expand. - CMP, DASH PATCH PRODUCT SPECIFICATIONS [PDF] CMP Specialty Products, 1445 Ford Road Bensalem, PA 19020 USA, Tel: 267.522.8000 Web: www.cmpsp.com
- Flaharty, David, PRESERVING HISTORIC ORNAMENTAL PLASTER (Updated) [PDF] (1990)
- Grimmer, Anne E., The PRESERVATION & REPAIR of HISTORIC STUCCO [PDF], (current version) National Park Service Preservation Brief No. 22., retrieved 2018/06/18, original source: https://www.nps.gov/tps/how-to-preserve/briefs/22-stucco.htm
- Grimmer, Anne, DETERIORATED PLASTER FINISHES - REPAIR STANDARDS [PDF], U.S. National Park Services, ITS No. 19, retrieved 2018/06/18, original source: https://www.nps.gov/tps/standards/applying-rehabilitation/its-bulletins/ITS19-DeterioratedPlaster.pdf
Interpreting the secretary of the interior's standards for rehabilitation, applicable standards.
Excerpt:
Issue: Finished plaster walls and ceilings are important in defining the character of many historic buildings.
But deteriorated plaster surfaces are not character-defining and they are not representative of the historical appearance of a building.
Just as removing plaster to reveal brick which was never exposed historically does not meet the Standards, leaving a historic plaster wall in a deteriorated condition also does not meet the Standards.
Deteriorated plaster should always be repaired, or replaced with gypsum board, in a rehabilitation project. - Isham: "An Example of Colonial Paneling", Norman Morrison Isham, The Metropolitan Museum of Art Bulletin, Vol. 6, No. 5 (May, 1911), pp. 112-116, available by JSTOR
- Jowers, Walter. "Plaster Patching, Part Il." Restoration Primer. New England Builder, November, 1987, pp. 4143.
- Leeke, John. "Problems with Plaster, Part One." Landmarks Observer, Vol. 12. March/April, 1985., pp. 10,14. Also "Problems with Plaster, Part Two." Vol. 12., May/June, 1985, p. 12.
- Leeke, John. "Saving Irreplaceable Plaster." Old House Journal. Vol. XV, No. 6, November/December, 1987, pp. 5155.
- MacDonald, Mary Lee, REPAIRING HISTORIC FLAT PLASTER WALLS & CEILINGS [PDF] (1989) [Print Version - we recommend this copy] U.S. National Park Service, Preservation Briefs, No. 21, Flat Plaster
This plaster repair guide focuses on plaster repair methods for historic (and thus older) homes, particularly where plaster is based on wood lath, metal lath, or rock lath.
The author guides us through first identifying the type of plaster problem being addressed, then suggests a range of plaster patch or repair methodsds, and for historic buildings, she discusses plaster replacement options when the original plaster is beyond repair. - MacDonald, Mary Lee, REPAIRING HISTORIC FLAT PLASTER WALLS & CEILINGS [PDF] (1989) [Web version] U.S. National Park Service, Preservation Briefs National Park Service, U.S. Department of Interior, Preservation Brief No. 21, retrieved 2018/06/17, original source: https://www.nps.gov/tps/how-to-preserve/briefs/21-flat-plaster.htm
- National Gypsum Co., LATH & PLASTER SYSTEMS, [PDF] 092300/NGC, National Gypsum Lath and Plaster Systems, National Gypsum Corporation, 800-628-4662 describing National Gypsum's Kal-Kore brand plaster base
- National Gypsum Corporation, Gypsum Construction Guide, NG, 2001 Rexford Road, Charlotte, North Carolina 28211, Tel: 704-365-7300, Email: ng@nationalgypsum.com, Website: http://www.nationalgypsum.com
- National Gypsuym Co., MSDS: GOLD BOND® BRAND GYPSUM BOARD PRODUCTS, [PDF] plaster base, National Gypsum Corporation. Other drywall MSDS sheets are found
at Drywall MSDS. - Poore, Patricia. "The Basics of Plaster Repair." Old House Journal, Vol. 16, No. 2, March/April, 1988, pp. 2935
- Pruter, Walter F, PORTLAND CEMENT PLASTER CRACK ANALYSIS & REPAIR [PDF] Building Standards, September/October 1995 pp. 22-24
Note: This article appeared originally in Walls and Celilings Magazine, June 1993.
- US Gypsum, PLASTERING PRODUCT & SYSTEMS TECHNOLOGY - VENEER PLASTER JOINT REINFORCEMENT SYSTEMS, [PDF] PM 5, Product & Systems Technology, US Gypsum, May 1998, retrieved 10.5.2010, original source: http://www.usg.com/rc/technical-articles/plaster/
plastering-technical-guide-veneer-plaster-joint-reinforcement-systems-en-PM5.pdf United States Gypsum Company, 125 South Franklin ST., PO Box 806278, Chicago, IL 60680-4124,
Excerpt:
Two methods of joint reinforcement are utilized in USG vbeneer plaster suystems>
Where normal drying conditions exist and the systemn framing provides high rigidity (I.e. wood framing and 16" o.c. spacing) a glass fiber tape reinforcement system is suitable and most expedient.
However, where rapid drying conditions exist, a paper tape and setting-type joint compound system is recommended.
Also note that a paper tape and setting type joint compund must also be used with steel framing systems and with certain specific systems on 24" o.c. framing spacing.
Paraphrasing from this document:
USG uses the term shadowing in this document in describing the visual effect over gypsum board joints caused by the lower moisture absorption rate (take-up) and lower capacity than gypsum base face paper.
Shadowing at joints occurs where veneer plaster is applied over tape joints, requiring a second coat to completely hide the tape, providing a visually uniform surface. USG Advises: "This [second] cover coat must be allowed to harden and dry before plaster application is started. - US Gypsum, Gypsum Construction Handbook [purchase at Amazon.com] H17, Technical Folder SA920 and PM2, PM3 and PM4, United States Gypsum Company, 125 South Franklin ST., PO Box 806278, Chicago, IL 60680-4124,
- Van Den Branden, F., Thomas L. Hartsell, Plastering Skills [purchase at Amazon.com]Amer Technical Pub (July 1, 1985), ISBN-10: 0826906575, ISBN-13: 978-0826906571 [purchase at Amazon.com]
- Weaver, Martin. "Nuts and Bolts: Properly Plastered." Canadian Heritage. Aug./Sept., 1981, pp. 3436. Also "Nuts and Bolts: Fixing Plaster." Oct., 1981, pp. 3335.
- Worsham, Gibson. "Exterior Plaster Restoration at the Lord Morton House, Lexington, Kentucky." Association for Preservation Technology Bulletin. Vol. XIII, No. 4 (1981), pp. 2733
...
Continue reading at PLASTER INGREDIENTS, MIX, PROPERTIES or select a topic from the closely-related articles below, or see the complete ARTICLE INDEX.
Or see these
Recommended Articles
- DRYWALL, FIBERBOARD, PLASTER INTERIORS - home
- PAINT on STUCCO, FAILURE
- PLASTER TYPES & METHODS in BUILDINGS
- PLASTER ASBESTOS CONTENT
- PLASTER BULGES & PILLOWS
- PLASTER DUST EXPOSURE HEALTH HAZARDS
- PLASTER INGREDIENTS, MIX, PROPERTIES
- PLASTER, LOOSE FALL HAZARDS
- PLASTER TYPES & METHODS in BUILDINGS - identify the type of plaster or plaster system installed
- PLASTER VENEER Best Practices
- STUCCO, HARD COAT INSTALLATION, INSPECTION, REPAIR - repair stucco on masonry or on exterior surfaces
- STUCCO WALL METHODS & INSTALLATION - types of exterior stucco systems
Suggested citation for this web page
PLASTER REPAIR METHODS at InspectApedia.com - online encyclopedia of building & environmental inspection, testing, diagnosis, repair, & problem prevention advice.
Or see this
INDEX to RELATED ARTICLES: ARTICLE INDEX to BUILDING INTERIORS
Or use the SEARCH BOX found below to Ask a Question or Search InspectApedia
Ask a Question or Search InspectApedia
Try the search box just below, or if you prefer, post a question or comment in the Comments box below and we will respond promptly.
Search the InspectApedia website
Note: appearance of your Comment below may be delayed: if your comment contains an image, photograph, web link, or text that looks to the software as if it might be a web link, your posting will appear after it has been approved by a moderator. Apologies for the delay.
Only one image can be added per comment but you can post as many comments, and therefore images, as you like.
You will not receive a notification when a response to your question has been posted.
Please bookmark this page to make it easy for you to check back for our response.
IF above you see "Comment Form is loading comments..." then COMMENT BOX - countable.ca / bawkbox.com IS NOT WORKING.
In any case you are welcome to send an email directly to us at InspectApedia.com at editor@inspectApedia.com
We'll reply to you directly. Please help us help you by noting, in your email, the URL of the InspectApedia page where you wanted to comment.
Citations & References
In addition to any citations in the article above, a full list is available on request.
- In addition to citations & references found in this article, see the research citations given at the end of the related articles found at our suggested
CONTINUE READING or RECOMMENDED ARTICLES.
- Carson, Dunlop & Associates Ltd., 120 Carlton Street Suite 407, Toronto ON M5A 4K2. Tel: (416) 964-9415 1-800-268-7070 Email: info@carsondunlop.com. Alan Carson is a past president of ASHI, the American Society of Home Inspectors.
Thanks to Alan Carson and Bob Dunlop, for permission for InspectAPedia to use text excerpts from The HOME REFERENCE BOOK - the Encyclopedia of Homes and to use illustrations from The ILLUSTRATED HOME .
Carson Dunlop Associates provides extensive home inspection education and report writing material. In gratitude we provide links to tsome Carson Dunlop Associates products and services.


