 Cinderella Incinerating Toilet Installation Details
CLEARANCES & WALL CUTS
Photo Guide to Details of Steps to Install the Cinderella Toilet
- POST a QUESTION or COMMENT about the installation of incinerating toilets
Here we provide photos and notes giving details of a successful installation of the Cinderella Incinerating Toilet.
This is article #3 of seven articles in this series. The full list of seven is included in the Recommended Articles list at the end of this page.
This article series describes the brands, properties, installation, and maintenance of incinerating toilets
- a waterless system for onsite waste disposal where a septic system cannot be installed.
Incinerating toilets use electricity or gas to produce heat which literally incinerates the waste.
InspectAPedia tolerates no conflicts of interest. We have no relationship with advertisers, products, or services discussed at this website.
- Daniel Friedman, Publisher/Editor/Author - See WHO ARE WE?
Cinderella Incinerating Toilet Installation Details
 Above: the cover of the instruction manual for the Cinderella Comfort incinerating toilet.
The manufacturer provides excellent instruction manuals for the installation of each Cinderella incinerating toilet model. Be sure to obtain and read and follow those instructions.
Failure to do so could mean that your installation doesn't work properly or worse, that the installation is unsafe. Always start by reading the instructions.
[Click to enlarge any image]
In this article series we provide detailed photos and notes that expand on the manufacturer's instructions to show how we implemented them in a specific case.
We include a few tricks of the trade that solve special problems such as how to make exact measurements when cutting the through-wall vent opening for the toilet's exhaust chimney, how to mount a flat exhaust vent cover on a curved log exterior wall, and how to set up chimney sections to measure the correct lengths to which you should cut the material.
These added "how to" details explain and illustrate exact details of every step in the installation of an incinerating toilet.
We also include details on adding additional chimney/vent bracing at the roof edge to solve what in our OPINION was a very wobbly and potentially problematic exterior vent installation.
Article Series Contents
Please visit the above link to this topic's home page for a complete list of all the steps included in the installation of a Cinderella incinerating toilet.
For ease of page loading and reading we have divided the entire incinerating toilet installation procedure into a series of web pages listed there.
If you prefer to have all of this information together in a single printable document simply download CINDERELLA TOILET INSTALLATION INSTRUCTIONS - ALL [PDF]
Article Contents
- CHECK INCINERATING TOILET CLEARANCE DISTANCES
- CINDERELLA TOILET VENT OPENINGS: CUT LOCATIONS
- CINDERELLA TOILET CUT VENT OPENINGS - AIR INLET & EXHAUST VENT
...
Minimum Clearances Between Construction and the Cinderella Incinerating Toilet
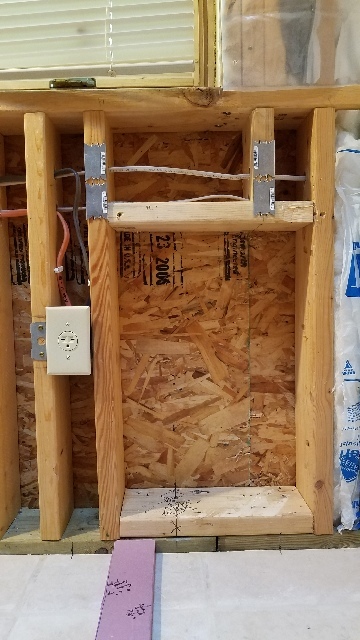
Notice that the exterior wall rough framed opening is just a few inches from wall at the right side of the photo.
Minimum clearances from construction to the toilet are given by the manufacturer as:
- 2" (50 mm) from the toilet sides. (We spaced the toilet about six inches from that right-hand wall).
- 2" (50 mm) from the rear of the toilet to the wall.
If you think you need to reduce these clearances, the company refers you to NFPA-82 Standard on Incinerators and Waste and Linen Handling Systems and Equipment.
This standard presents the minimum fire protection requirements for the construction, installation, maintenance, and use of waste and recyclables storage rooms, containers, handling systems, incinerators, compactors, and linen and laundry handling systems. - NFPA
The company also cites a requirement
- 18" from flue pipe (see NFPA-82 "Standard on Incinerators and Water and Linen Handling Systems and Equipment" for reduced clearances) but we note that as the flue pipe is, per the company's own instructions, able to pass right through a wood-framed wall and building siding, this requirement is a bit confusing.
Above: not wanting to mark on the tiled floor surface, we made a measuring "stick" out of a scrap of left-over foam insulation onto which we measured and marked the required toilet rear clearance distance from the building framing, adding 1/2" for a wall finish drywall or wood panels.
That let us see how far into the room the front of the toilet would project and allowed us to give a bit of extra space (more than 2") behind the toilet.
You will need these measurements when placing the toilet and connecting it to its horizontal air inlet and exhaust outlet pipes that you'll then run "wild" out through the wall so that you can measure the desired cut-off length of those pipes during installation.
...
Measure and Mark the Locations of Cutouts for Toilet Air Inlet & Exhaust Vent
Watch out: measure twice and cut once to be sure that the round openings for the air supply and exhaust vent for your incinerating toilet are located exactly correctly.
You will see that we check our measurements several times before actually cutting the large diameter round holes in the building wall.
Inaccurate measurements can cause you to end up with ugly over-cut openings in the building wall and a risk of unwanted leaks as well.
We used a couple of measuring methods to double check the location of the through-wall holes to be drilled.
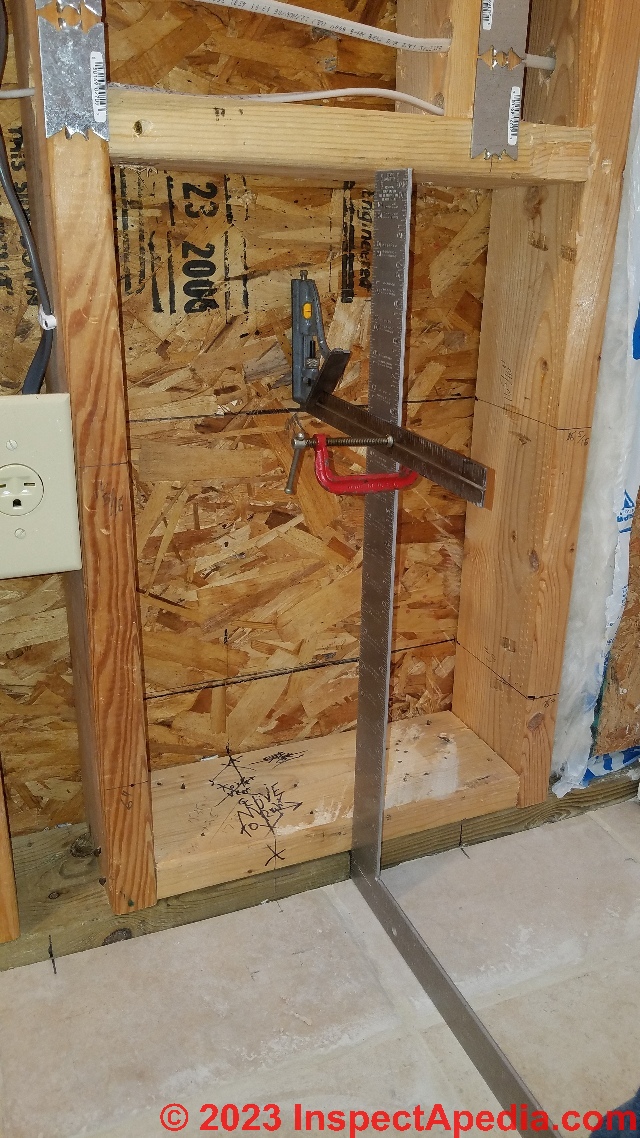
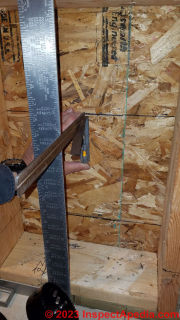
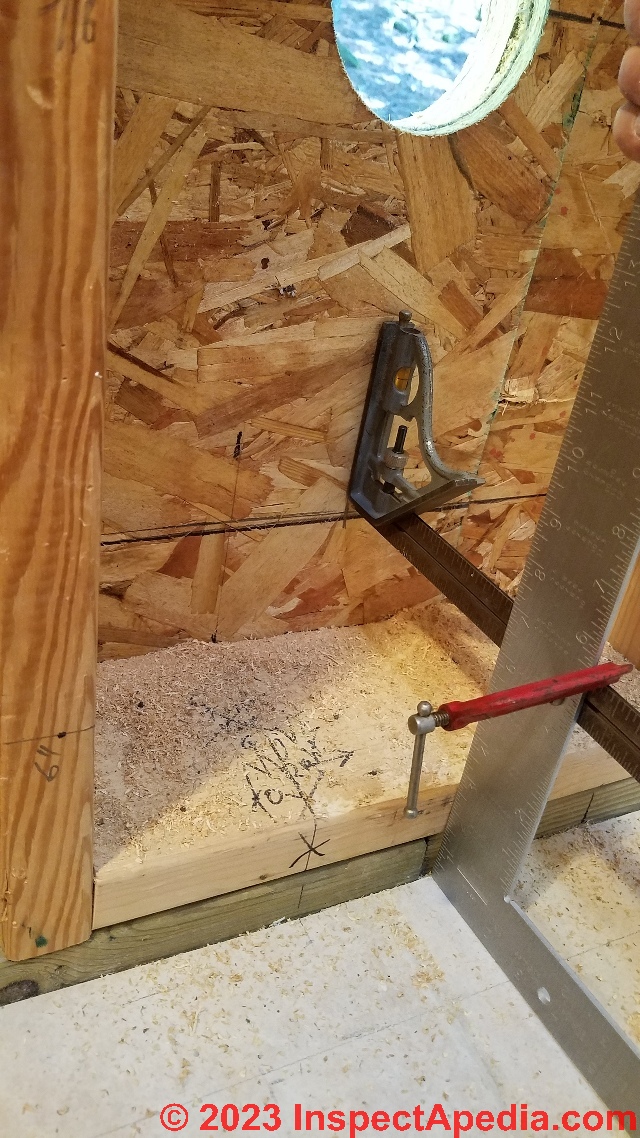
Shown above, we clamped a framing square together with a set square and a level so that we could double check the toilet vent and air intake hole center points on the inside surface of the building wall sheathing.
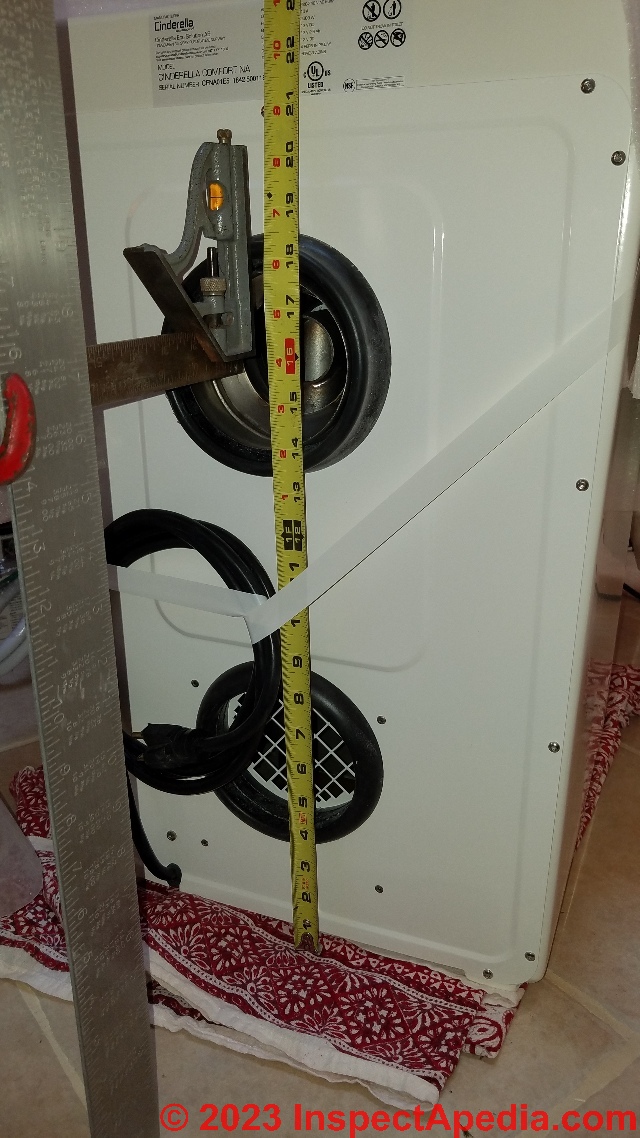
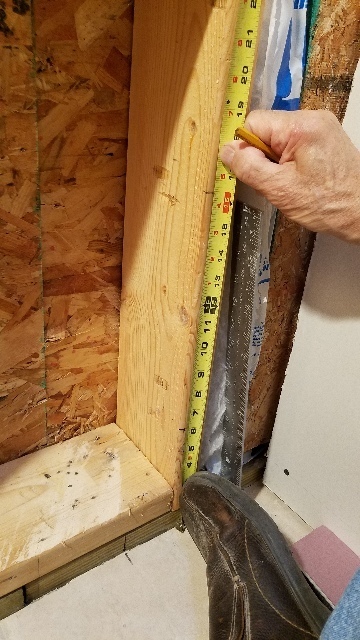
Below: using the same tools and measuring up from the finished floor to points on the back of the toilet, we confirmed the exact above-finish-floor height to the center of the two openings on the back of the toilet.
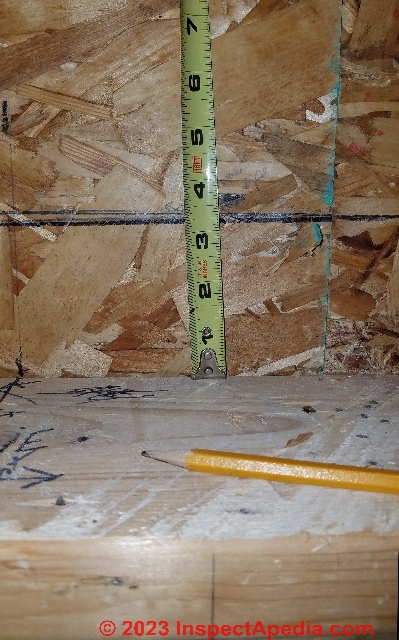
Below: we show the black horizontal line marking the correct above-floor height for one of the round wall cutouts to be made.
Below, measuring from the finished floor up to the correct height for the upper toilet exhaust vent.
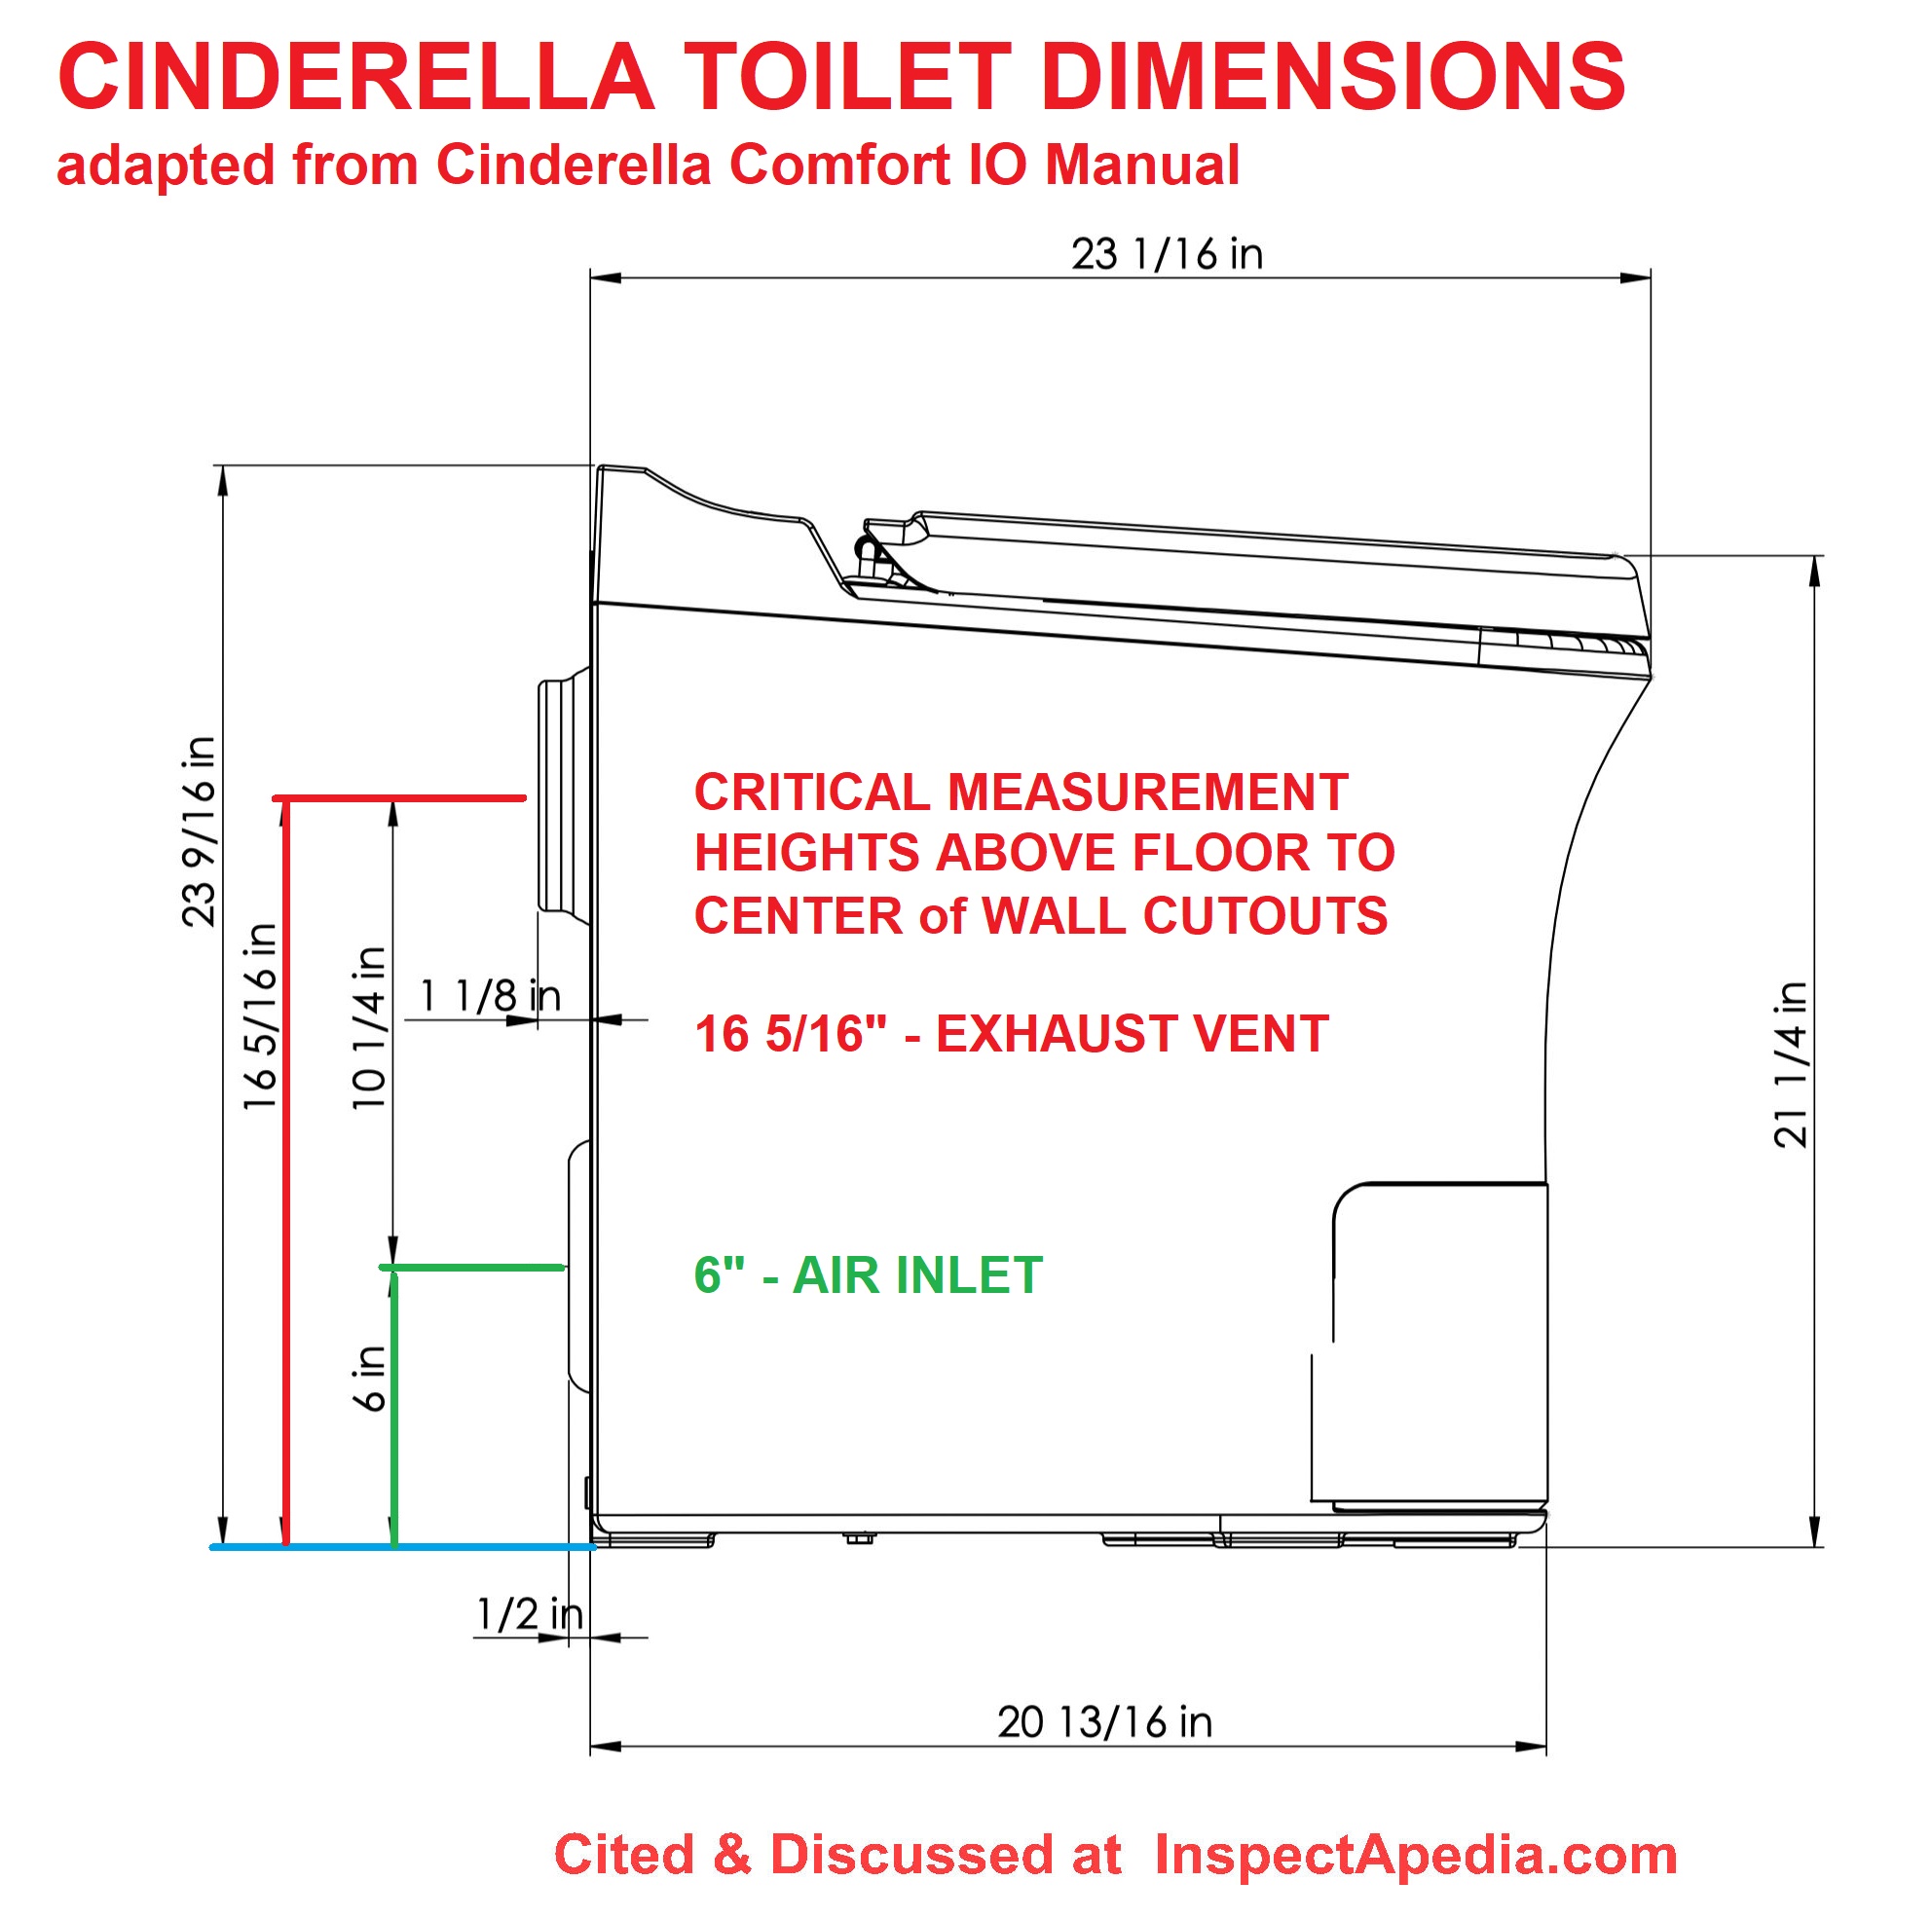
This data is given in the toilet instructions and was measured again from the floor to the actual toilet as we illustrated just above.
We wanted to be dead certain that our cutout opening was at exactly the right height above the finished floor - the surface onto which the toilet will be set.
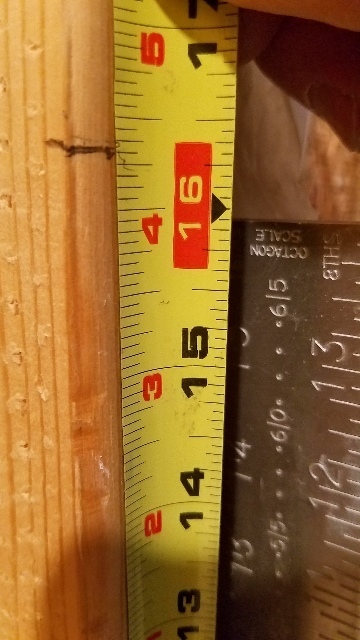
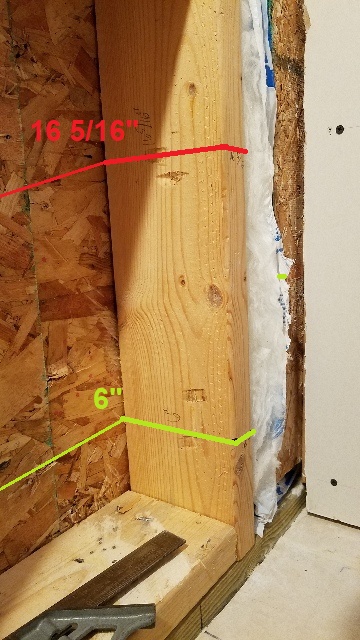
Above we're using 16 5/16" from the finished floor to the center of the upper hole.
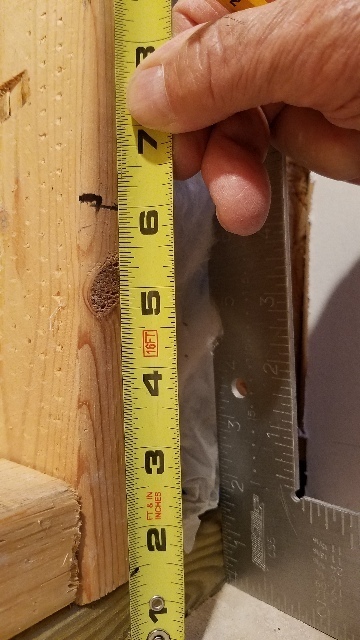
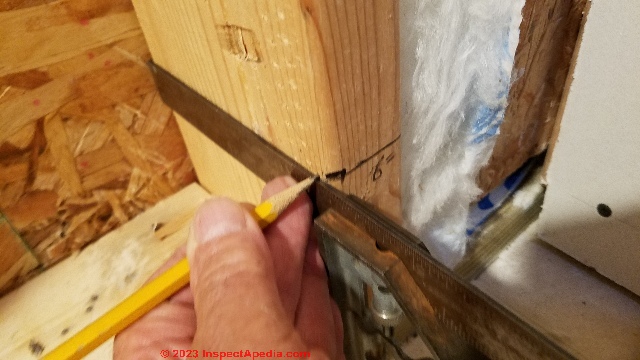
Below: we're marking, again on the framing at one side of our framed-in rough opening,
the height above the finish floor to the center of the lower hole. 6" in this instance.
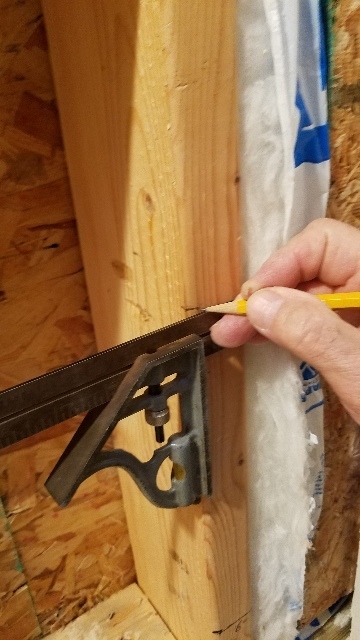
After carefully marking the opening hole center heights above the finished floor onto the face of a stud, we use our set square to extend that line across the side of the stud and from there along the inner surface of the exterior wall sheathing (at left in the photo above).
Above: the hole center lines have been marked on the stud.
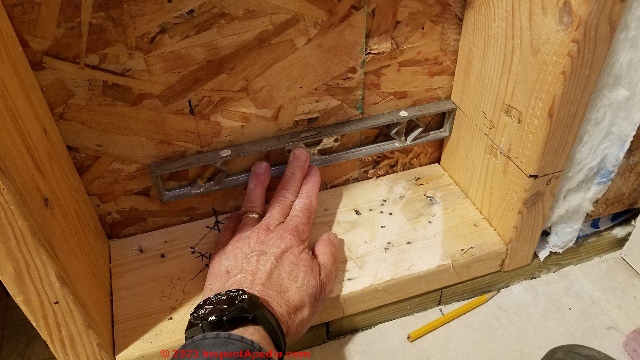
Above: we used a small level to extend the cut line across the inner face of the exterior sheathing. This will locate the proper height above the finished floor to the center of each cutout hole. We have not yet marked the horizontal or left-right distance.
If the studs are properly plumb/vertical you could also use a set square to carry the horizontal cut line height from the marking on the stud face.
Watch out: when extending marking lines around framing lumber it's too easy for error to creep in. Double check your measurements.
Above: notice that the height of the hole center-line above the wall's sill plate is of course less than the height above the finished floor.
Watch out: Take care to make all measurements from the same surface. Don't confuse height above the floor from height above the upper surface of the sill plate.
Your toilet is going to be set on the floor, at floor level, not at that the higher level of the upper surface of the wall's sill plate.
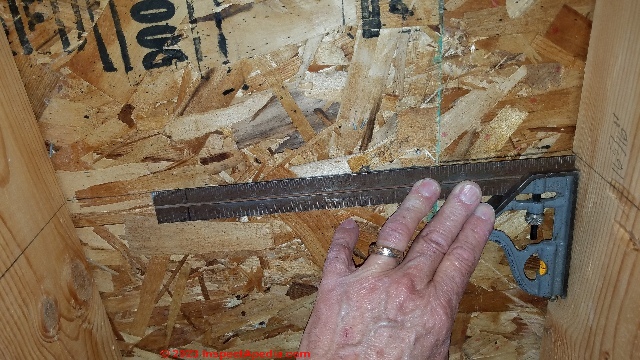
Above: with the horizontal height lines marked on the wall, we double check once more the height of the line above the finished floor surface.
We used a combination of a framing square and a try square to measure accurately from the finished floor surface up to the required center of the holes to be cut through the exterior wall.
Because we're measuring into the wall cavity, this combination of tools avoids any error in placing the drill mark location.
Measure twice, cut once.
Below: let's double check the diameter of the hole saw that we will need to make the openings for these vent pipes.
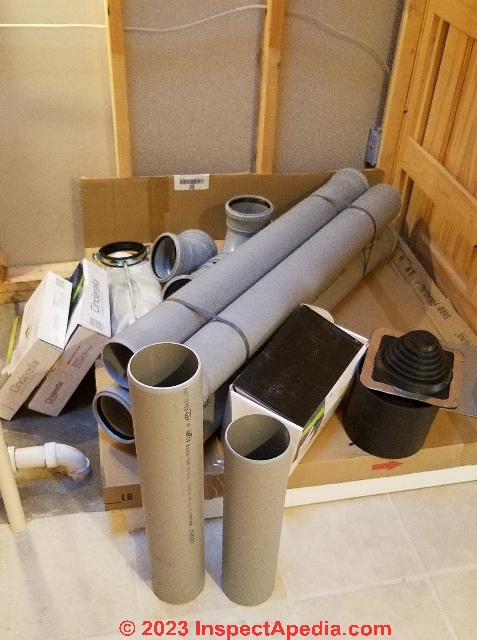
Notice that Cinderella has provided two short lengths of plastic pipe intended to be used for the horizontal runs of toilet air inlet (the shorter pipe) and exhaust outlet (the longer pipe).
In the background are the contents of the toilet's installation kit including four more longer pipe sections, a Tee and tee bottom cap, and two 45 degree elbows that will form the vertical chimney assembly.
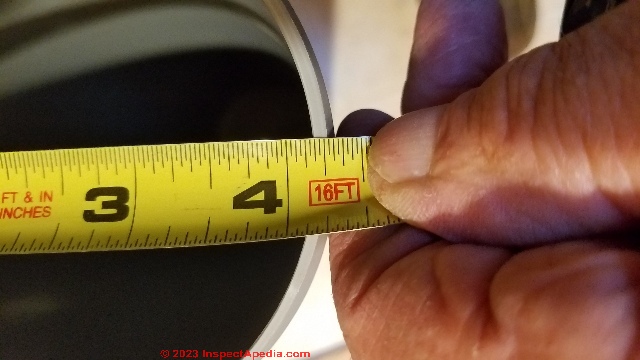
Below we measure the outside diameter of this nominal 4 inch plastic pipe. The OD of the pipe is actually about 4 1/4".
Below is a close-up of our measuring tape. Take care to adjust your tape measuring point across the end of the pipe so as to find the greatest measurement amount: that will be the widest or actual pipe diameter.
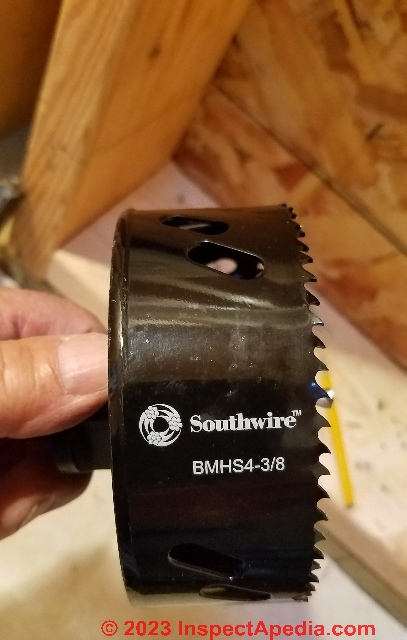
Below is the round hole saw that we purchased from Southwire. It's designed to cut a hole that is 4 3/8" in diameter, very slightly larger than the measured outer diameter of the pipes themselves.
Is this a problem? No.
The slight opening around that pipe will be closed up with the sealant you will use in a later installation step.
Below: with the horizontal lines marked to give proper height for our incinerating toilet vent openings we're ready to mark the left-to right center point of these two holes.
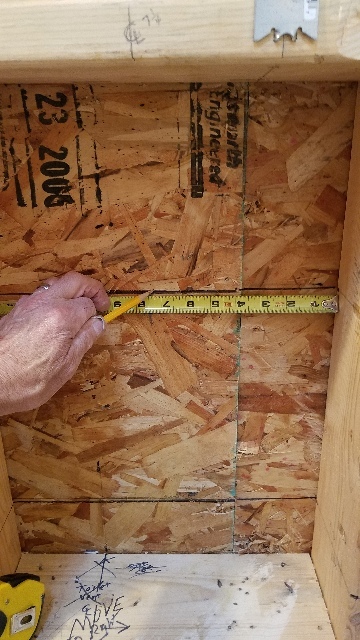
After confirming that we could center the cutout openings in the rough opening framed into the wall and that that would give us the desired left-to-right position of the toilet once it was installed, we marked the left-to-right location of the center of each hole (7 1/2" from the right hand stud).
Above we mark the upper hole center line (the point of my pencil above the tape) and below the lower hole center line (pointed to by my pencil).
Watch out: take care to make the left to right centering of the hole identical for the upper and lower openings: they must be directly on the same vertical line as well as being at the proper height from the finished floor.
Otherwise you will not be able to connect the toilet to the two pipes as they pass through the wall.
...
Cut the Air Inlet & Toilet Exhaust Pipe Openings
Now we're ready to start drilling the holes.
Watch out: take care to center the pilot drill bit of the hole saw on the cut line that you marked earlier, both in height and at the proper left-to-right position.
Above I'm holding the hole saw in position to show where the cut will pass. Notice that the bottom of the lower hole (in our photo) is not much above the sill plate of the framed wall rough opening.
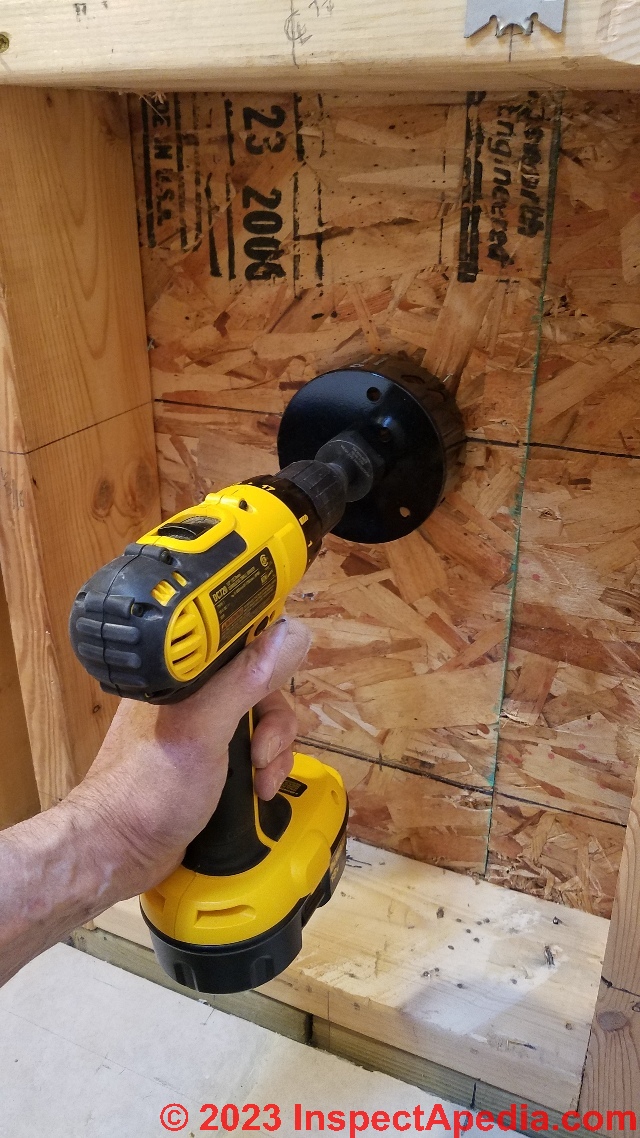
Above: cutting the round upper hole for the exhaust vent opening for a Cinderella incinerating toilet.
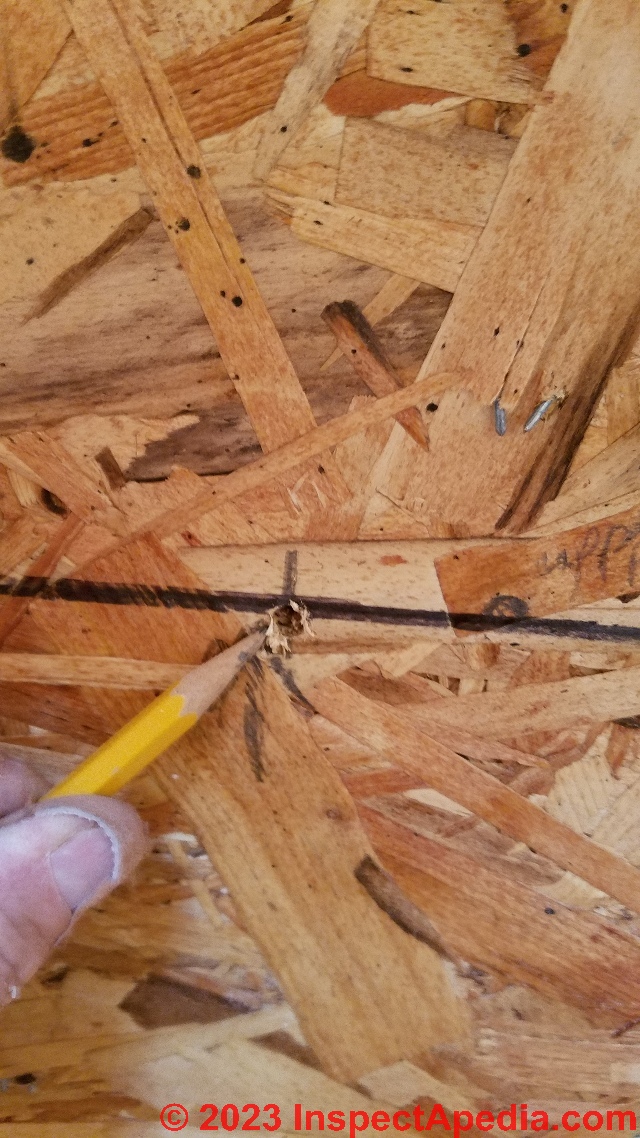
Below: After just starting to cut the hole I pulled back the hole saw to see the location of the pilot hole: it was within a 16th of an inch of exact.
Stopping here to check the location of the pilot hole gives you one last chance to adjust slightly the hole saw location if you didn't start it precisely on target.
Below: We have cut through the OSB exterior sheathing of the building wall and exposed the housewrap on the building's exterior.
We remove the OSB plug from our hole saw and then we can continue sawing but
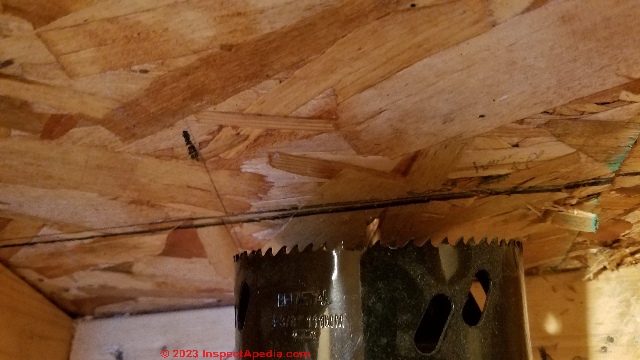
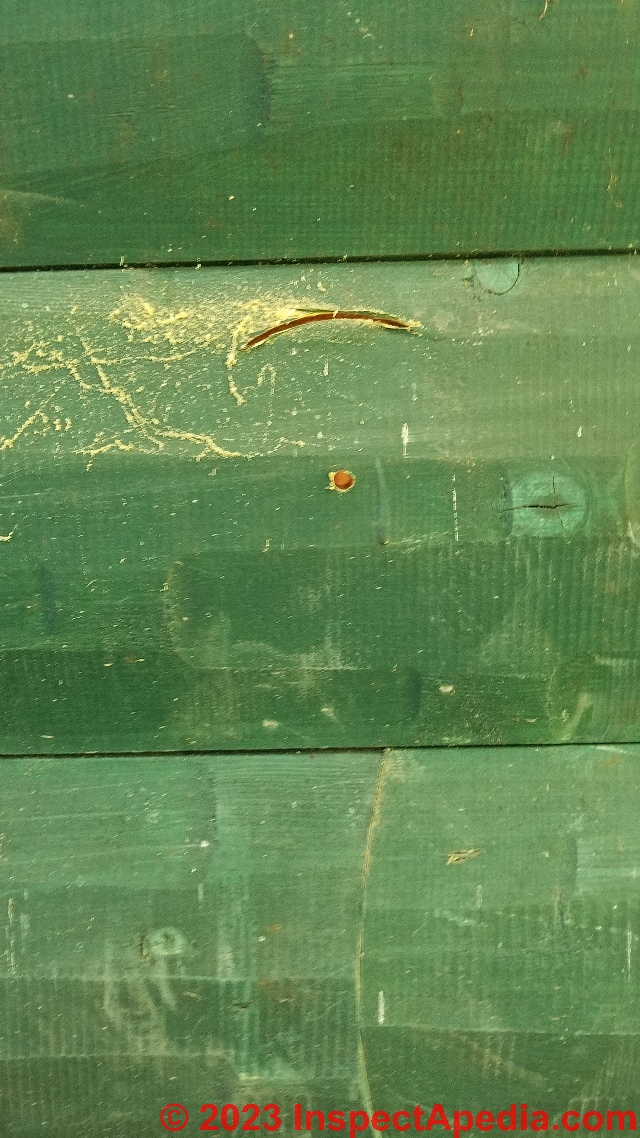
Watch out: we stop before passing completely through the exterior wall. Shown in the photo below you can see the upper arc of the opening being cut by the hole saw.
As this building uses rounded log siding on its exterior, the hole saw won't come through the exterior all at once.
Once the pilot bit has penetrated all the way through the exterior wall we prefer to stop drilling from the inside.
Why stop here? If you continue cutting from just the building interior there is a danger that your cutter splits and shreds the finished surface of the exterior wall.
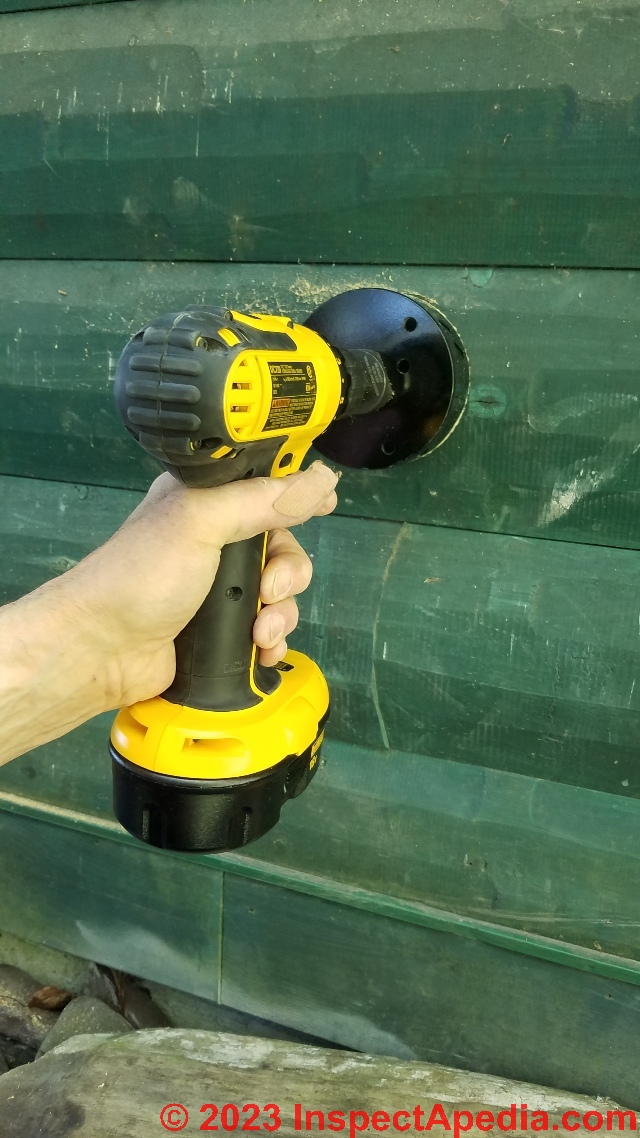
Below: by using the pilot bit hole as a guide we continue our hole saw cutout from the building exterior. This avoids shredding or splitting of the exterior edges of the hole.
Below: I've finished cutting the round hole in the wall through which the Cinderella toilet upper vent will pass. Notice that the edges of the hole are smooth - the outside cut matched perfectly with the cut that began inside: because we used the pilot bit hole as our starting point when making the outside cut.
Below we make a final check of the height location and left-to-right location of the Cinderella toilet's lower air inlet (combustion air) opening before making that cut.
And below we begin using our drill to cut out the lower wall opening for this toilet installation.
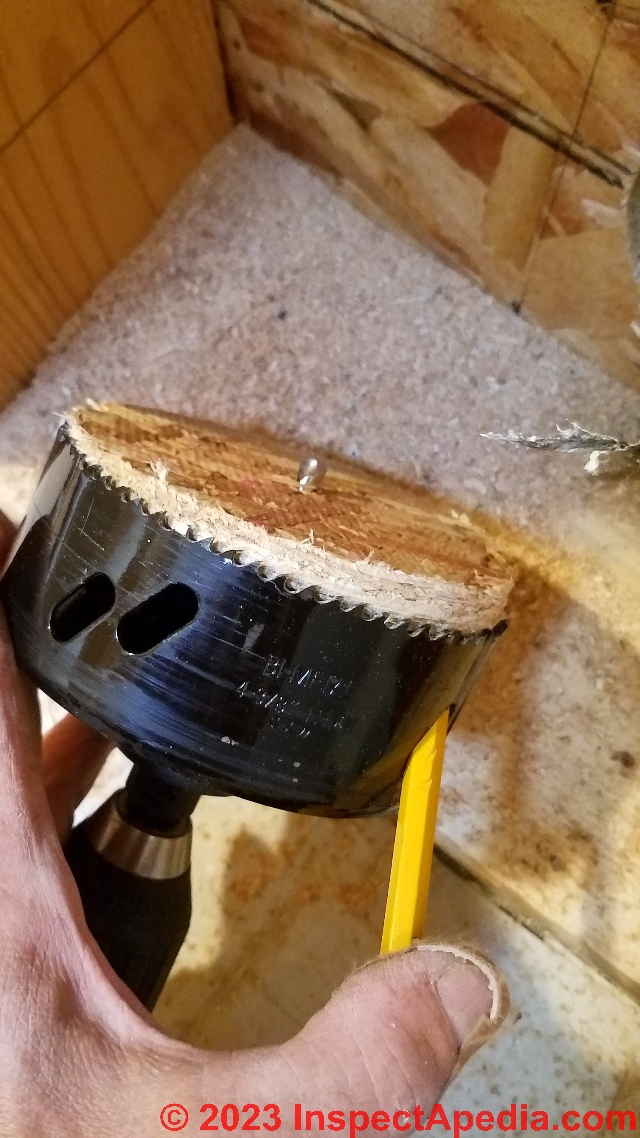
Tip: the OSB or plywood sheathing cutout wants to stay jammed inside the round circular hole saw bit.
That's why the manufacturer of the hole saw provides those staggered slots in the sides of the hole saw. \
Use a screw driver (or I'm using a pencil) to push out the plug of cutout material before continuing to cut through the wall.
Once you've tipped up one edge of the round hole saw plug it's easy enough to remove the plug entirely by hand.
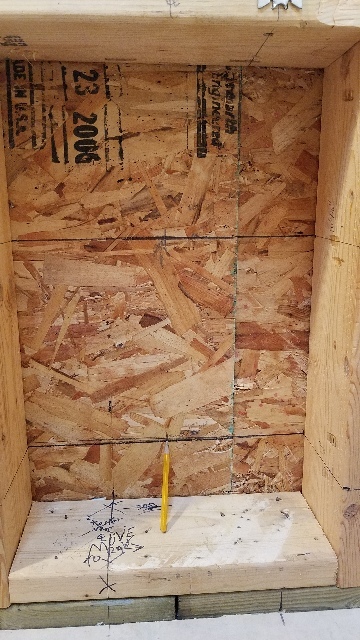
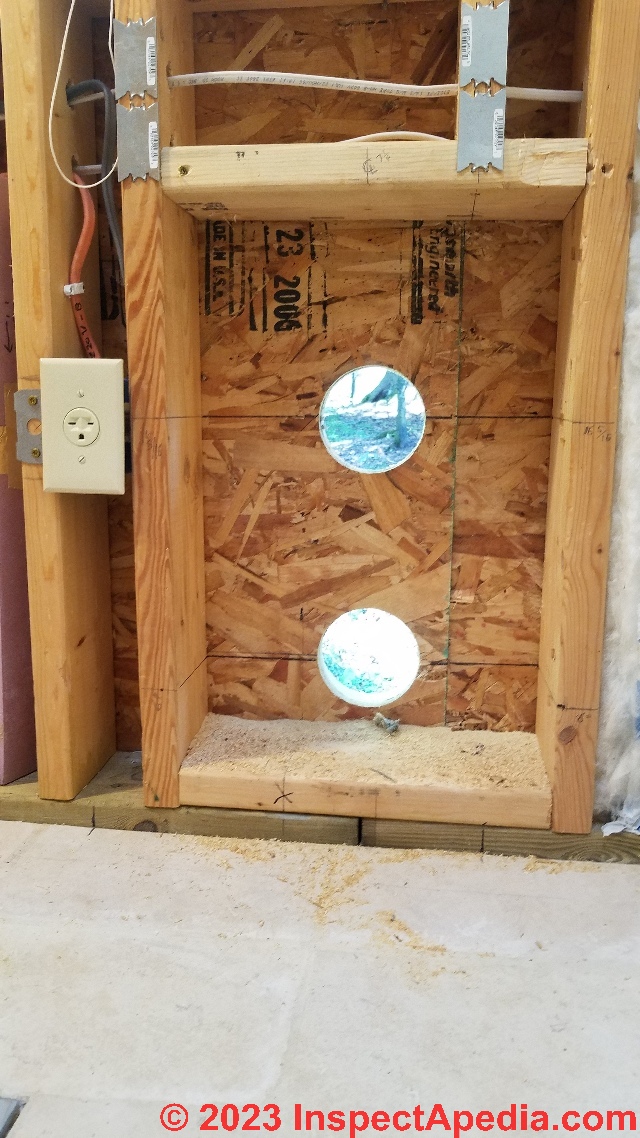
Below you can see the two completed holes for this Cinderella toilet.
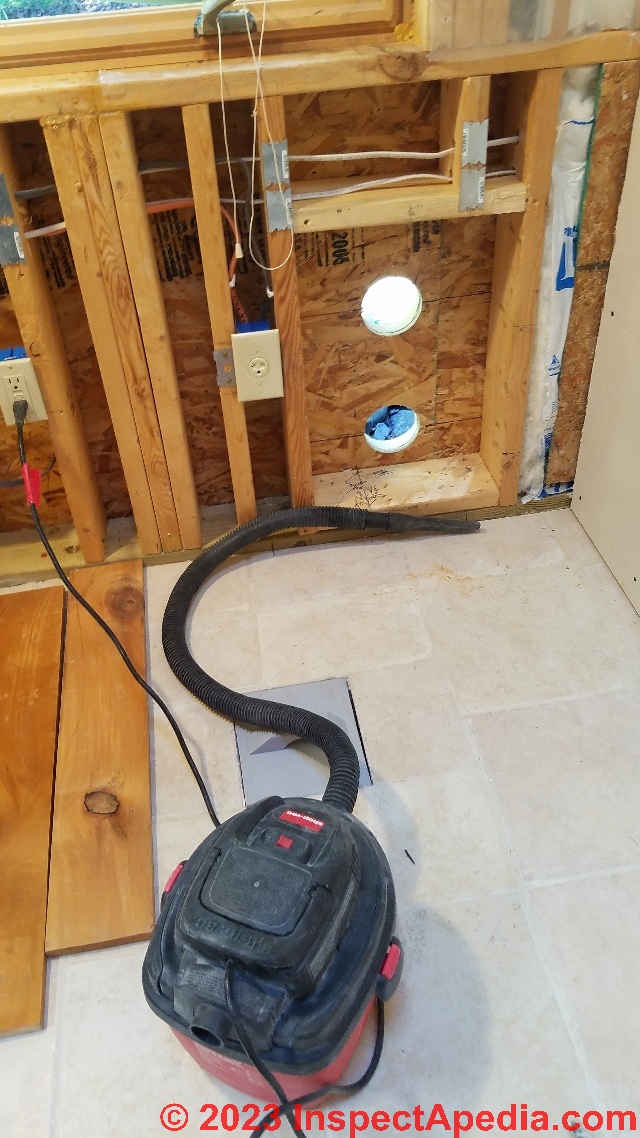
Before continuing we vacuum up sawdust and debris from the interior floor.
This is more than just being compulsive and fussy (to which I plead guilty). It also assures that later when we're applying sealant or foam insulation we'll get good surface contact and adhesion: we've removed extraneous dust and debris.
Below are the same two incinerating toilet vent and air intake openings viewed from outside. You can see that we avoided splintering the log siding: the hole edges are neat and clean.
Please continue reading the next article in this series on installing a Cinderella incinerating toilet - the link is just below.
© 2023 InspectApedia.com
...
Continue reading at CINDERELLA INCINERATING TOILET INSTALLATION - AIR INLET & EXHAUST VENT INSTALLATION or select a topic from the closely-related articles below, or see the complete ARTICLE INDEX.
Or see these
Recommended Articles
- INCINERATOR TOILET SYSTEMS
- INCINERATOR TOILET CODES
- INCINERATOR TOILET SOURCES & BRANDS
- CINDERELLA INCINERATING TOILET - home
- CINDERELLA INCINERATING TOILET INSTALLATION
- Cinderella Installation: DELIVERY
- Cinderella Installation: LOCATION
- Cinderella Installation: CLEARANCES & WALL CUTS - you are on this page
- Cinderella Installation: AIR INLET & EXHAUST VENT INSTALLATION
- Cinderella Installation Page - CHIMNEY INSTALLATION Part 1
- Cinderella Installation Page - CHIMNEY INSTALLATION Part 2
- Cinderella Installation Page - FINAL STEPS
- CINDERELLA INCINERATING TOILET INSTALLATION [PDF] copy of entire Cinderella installation process
- CINDERELLA INCINERATING TOILET USE GUIDE
- CINDERELLA INCINERATING TOILET CLEANING GUIDE
- ECO-JOHN INCINERATING TOILET
- EcoJohn OPERATING TROUBLES
- INCINERATING TOILET RESEARCH STUDIES
- INCINOLET TOILET
- DESTROILET INCINERATING TOILETS
- STORBURN SCANLET INCINERATING TOILETS
- SUN BIO INCINERATING TOILET
- OTHER INCINERATING TOILET COMPLAINTS
Suggested citation for this web page
CINDERELLA INCINERATING TOILET INSTALLATION - CLEARANCES & WALL CUTS - at InspectApedia.com - online encyclopedia of building & environmental inspection, testing, diagnosis, repair, & problem prevention advice.
Or see this
INDEX to RELATED ARTICLES: ARTICLE INDEX to TOILET INFORMATION
Or use the SEARCH BOX found below to Ask a Question or Search InspectApedia
Ask a Question or Search InspectApedia
Questions, answers, FAQs, and reader comments about incinerating toilets.
Try the search box just below, or if you prefer, post a question or comment in the Comments box below and we will respond promptly.
Search the InspectApedia website
Note: appearance of your Comment below may be delayed: if your comment contains an image, photograph, web link, or text that looks to the software as if it might be a web link, your posting will appear after it has been approved by a moderator. Apologies for the delay.
Only one image can be added per comment but you can post as many comments, and therefore images, as you like.
You will not receive a notification when a response to your question has been posted.
Please bookmark this page to make it easy for you to check back for our response.
IF above you see "Comment Form is loading comments..." then COMMENT BOX - countable.ca / bawkbox.com IS NOT WORKING.
In any case you are welcome to send an email directly to us at InspectApedia.com at editor@inspectApedia.com
We'll reply to you directly. Please help us help you by noting, in your email, the URL of the InspectApedia page where you wanted to comment.
Citations & References
In addition to any citations in the article above, a full list is available on request.
- In addition to citations & references found in this article, see the research citations given at the end of the related articles found at our suggested
CONTINUE READING or RECOMMENDED ARTICLES.
- Carson, Dunlop & Associates Ltd., 120 Carlton Street Suite 407, Toronto ON M5A 4K2. Tel: (416) 964-9415 1-800-268-7070 Email: info@carsondunlop.com. Alan Carson is a past president of ASHI, the American Society of Home Inspectors.
Thanks to Alan Carson and Bob Dunlop, for permission for InspectAPedia to use text excerpts from The HOME REFERENCE BOOK - the Encyclopedia of Homes and to use illustrations from The ILLUSTRATED HOME .
Carson Dunlop Associates provides extensive home inspection education and report writing material. In gratitude we provide links to tsome Carson Dunlop Associates products and services.


