 Cinderella Incinerating Toilet Installation Details:
AIR INLET & EXHAUST VENT
Photo Guide to Details of Steps to Install the Cinderella Toilet
- POST a QUESTION or COMMENT about the installation of incinerating toilets
Here we provide photos and notes giving details of a successful installation of the Cinderella Incinerating Toilet.
This is article #4 of seven articles in this series.
The full list of seven is included in the Recommended Articles list at the end of this page.
This article series describes the brands, properties, installation, and maintenance of incinerating toilets - a waterless system for onsite waste disposal where a septic system cannot be installed.
Incinerating toilets use electricity or gas to produce heat which literally incinerates the waste.
InspectAPedia tolerates no conflicts of interest. We have no relationship with advertisers, products, or services discussed at this website.
- Daniel Friedman, Publisher/Editor/Author - See WHO ARE WE?
Cinderella Incinerating Toilet Installation Details
 Above: the cover of the instruction manual for the Cinderella Comfort incinerating toilet.
The manufacturer provides excellent instruction manuals for the installation of each Cinderella incinerating toilet model. Be sure to obtain and read and follow those instructions.
Watch out: Failure to do so could mean that your installation doesn't work properly or worse, that the installation is unsafe. Always start by reading the instructions.
[Click to enlarge any image]
In this article series we provide detailed photos and notes that expand on the manufacturer's instructions to show how we implemented them in a specific case.
We include a few tricks of the trade that solve special problems such as how to use a pencil scribe to cut wood filler needed to mount a flat vent cover on a curved log exterior wall, and how to set up chimney sections to measure the correct lengths to which you should cut the material.
These added "how to" details explain and illustrate exact details of every step in the installation of an incinerating toilet.
We also include details on adding additional chimney/vent bracing at the roof edge to solve what in our OPINION was a very wobbly and potentially problematic exterior vent installation.
Article Series Contents
Please visit the above link to this topic's home page for a complete list of all the steps included in the installation of a Cinderella incinerating toilet.
For ease of page loading and reading we have divided the entire incinerating toilet installation procedure into a series of web pages listed there.
If you prefer to have all of this information together in a single printable document simply download CINDERELLA TOILET INSTALLATION INSTRUCTIONS - ALL [PDF]
Article Contents
- CINDERELLA TOILET HORIZONTAL AIR INLET & EXHAUST VENT PIPE INSTALL
- CINDERELLA AIR INLET PIPE COVER INSTALLATION
- CINDERELLA VENT PIPES: SEAL & INSULATE INSIDE
...
Install Horizontal Air & Vent Pipes
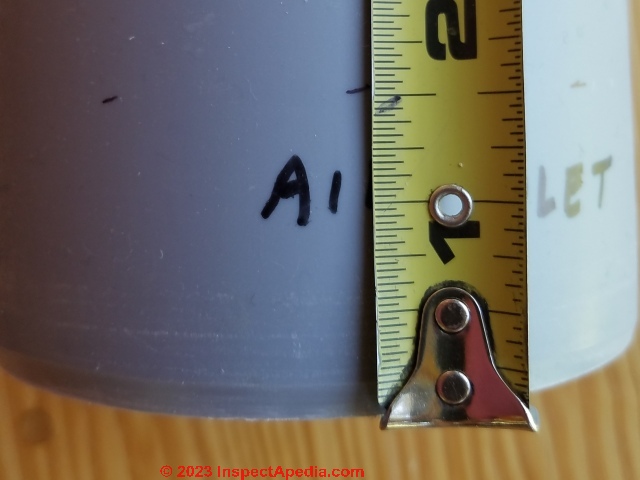
Below: we note Cinderella's instructions for the amount by which these pipes will insert into the gasketed openings on the rear of the toilet.
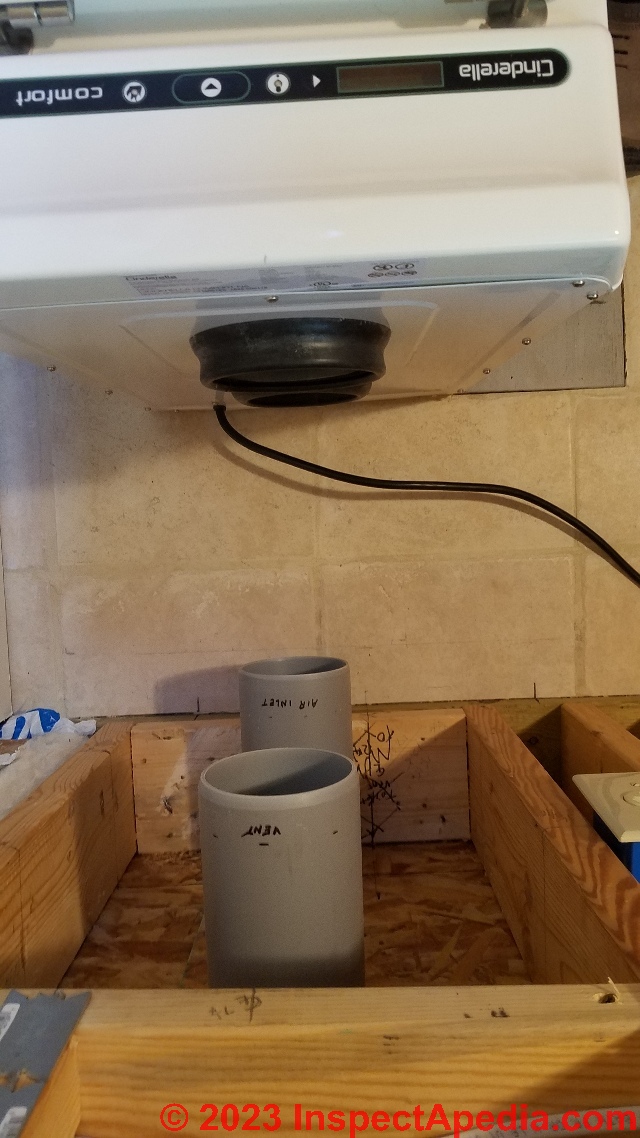
Above is the air inlet pipe end and below the exhaust vent pipe end.
We marked these pipes before cutting to avoid mixing up or cutting the wrong pipe to the wrong length.
From the factory these pipe ends have been chamfered. You'll need that feature when pushing the toilet onto these pipes or the pipes into the toilet.
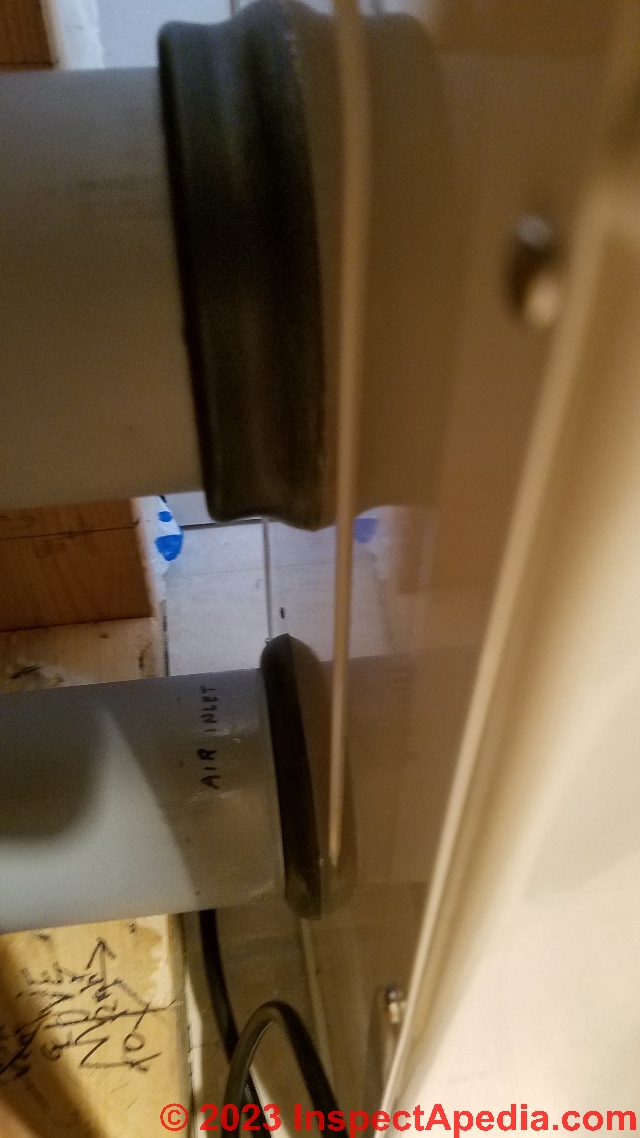
Below: a bit of dish soap in water is used to wet the pipe ends before assembling these pipes into the toilet or into the gasketed hubs of the tee or elbows outside.
With the pipe and hub dampened with soapy water we assemble the pipes and toilet.
Watch out: take care that the two pipes are seated fully into their respective openings in the rear of the toilet.
Notice that the in-room projection of the air intake and vent pipes allows for the future installation of the finished wall surface, such as 1/2" drywall or 2/4" paneling, plus the required clearance distance between the back of the toilet and the finished wall surface.
With the pipes connected to the toilet and fully-seated, we place the toilet at our intended distance from the interior surface of the rear wall.
(Minimum of 2"). That will allow us to mark the point on each pipe where it exits the wall.
The lower or air inlet pipe is going to be cut just slightly longer than flush with the end of the wall so that we have a good surface to which we can later apply sealant.
Special tricks of the trade when trimming the Cinderella air intake and vent pipes to fit a curved log exterior wall. Mark the point on the vent pipe where the curved log wall surface projects outwards the most.
Add to that distance the required horizontal clearance distance so that when the tee and vertical riser chimney or vent are added, the vertical chimney will be the required distance from the building's exterior wall surface.
Then having marked that cut point on the lower air inlet pipe we remove it from the toilet and wall and finish marking it so that we can cut that pipe to proper length.
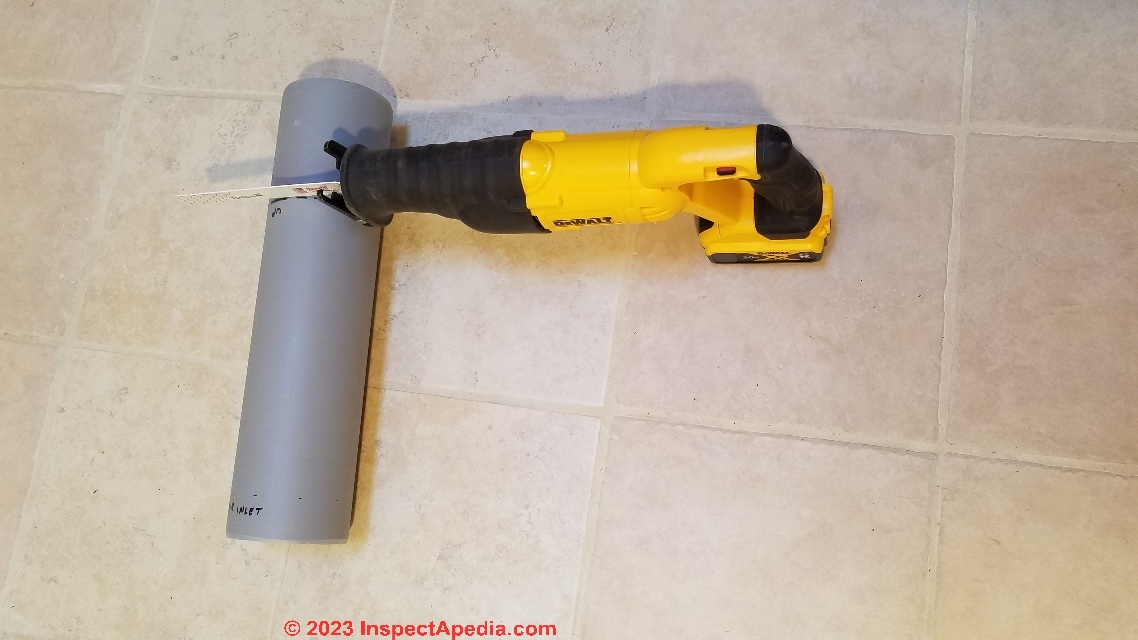
Watch out: Notice that I use the set square to extend our cut line around the pipe.
That guide helps keep our saw blade straight and assures that the end cut of the pipe is square, not angled.
With our cut line marked on the air inlet pipe we cut it to length.
Tip: to avoid cutting into the floor (you'll be so sorry), just cut about half way through the plastic pipe, then stop and rotate it before continuing your saw cut.
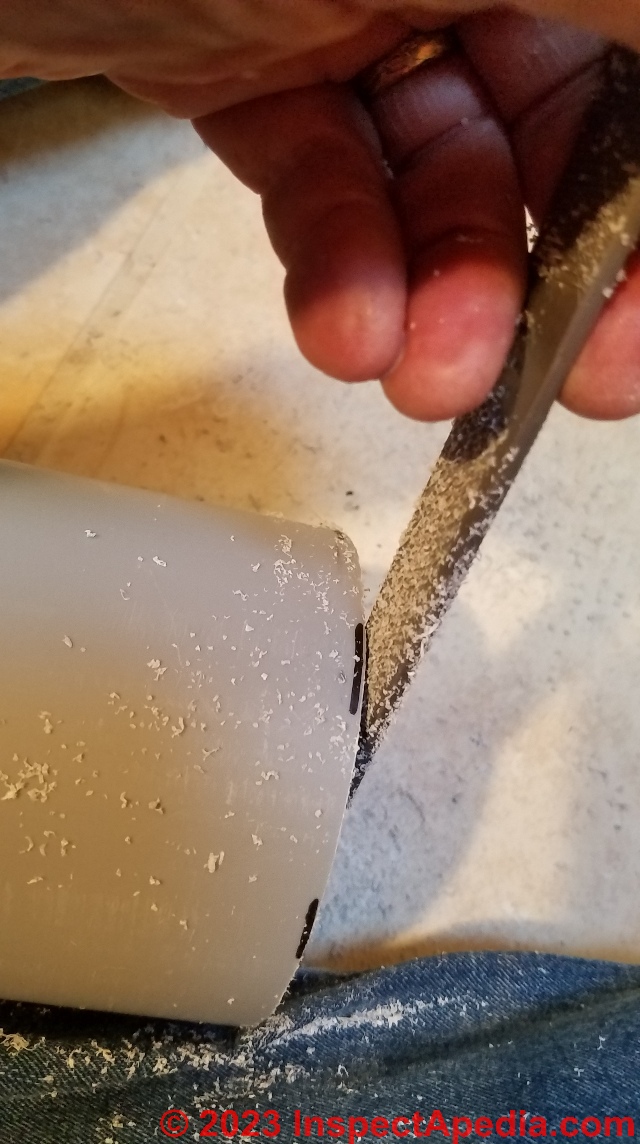
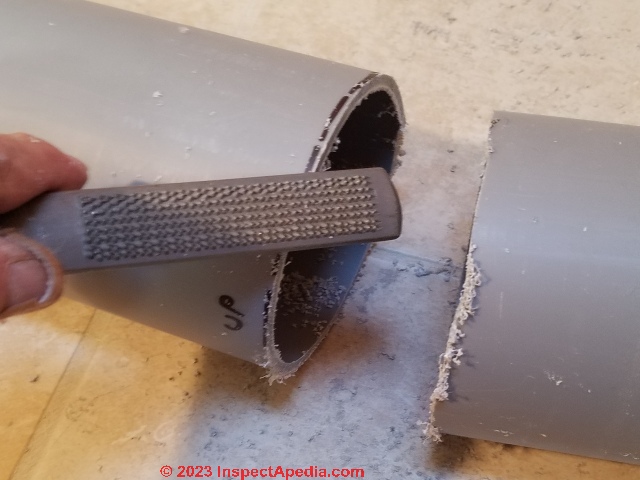
Below: before chamfering the edges of our horizontal pipes for this incinerating toilet installation, we flatten and perfect the squared end of our pipe with a rasp.
Once we've cut the pipe to length, we use a wood rasp and perhaps a bit of sand paper to restore the chamfered edge to the exhaust pipe so that, as noted earlier, it will be easier to push the pipe into its gasketed opening on the rear of the Cinderella toilet or for the exhaust vent pipe, into the face of the outlet tee.
The outdoor edge of the lower air inlet pipe does not need to be chamfered. It can be left flat, but should be cleaned of burrs and loose bits of plastic.
Below: with our two horizontal pipes cut to length we assemble them fully into the rear of the toilet and pass them through the wall to the building exterior.
The Cinderella toilet will have to be removed to permit installation of the finished wall surface and later it will occasionally be removed to permit extra cleaning steps required by the toilet maintenance instructions.
Below: the combustion air inlet pipe shown protruding just enough through the log wall that its upper surface gives us a lip to which we can apply sealant.
Watch out: before globbing up the wall with sealant, we measure and mark the exact location of the steel cover that will mount over the air inlet pipe. That avoids messing up our caulk job and avoids getting sealant onto the cover or ourselves.
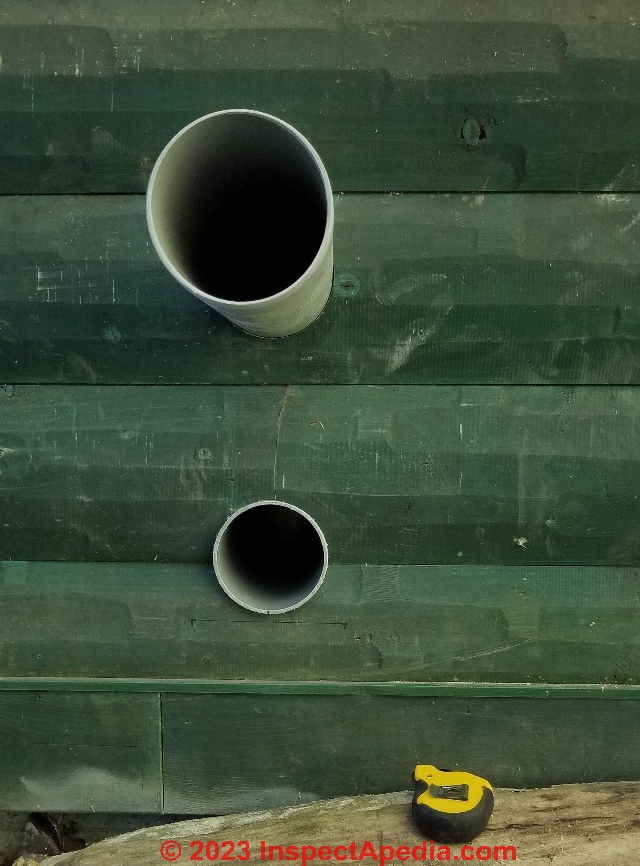
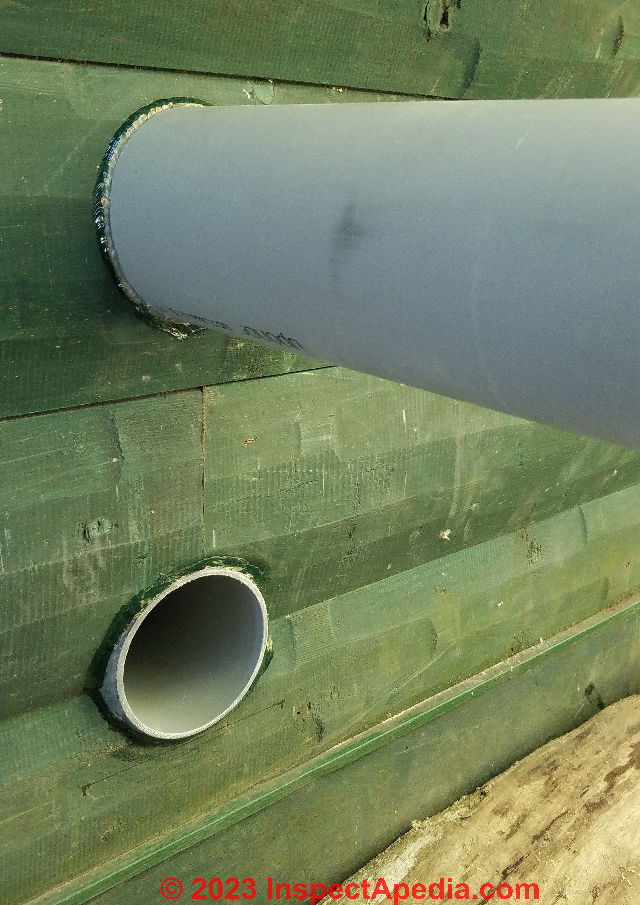
Below the two pipes, air inlet below and the longer exhaust above, seen from the building exterior.
...
Seal Pipes at Exterior Wall
Below: before applying sealant to the lower air inlet pipe, we wipe away any remaining scraps of plastic from our rasp filing and pipe edge cleanup.
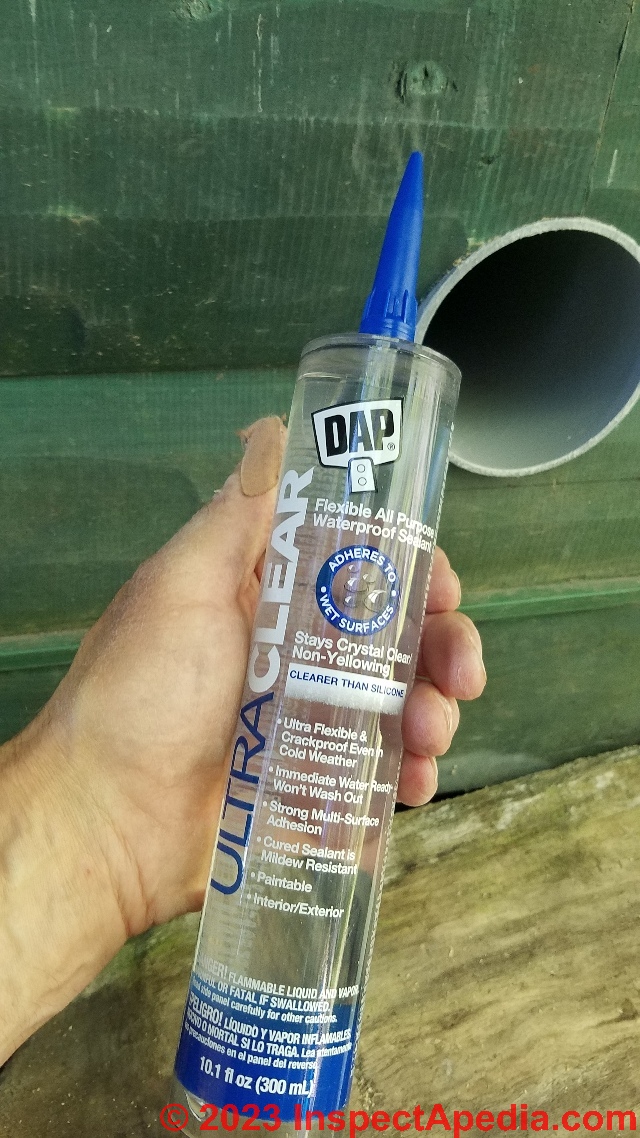
We took care to choose an exterior sealant that would bond well to both the wood surface and the plastic pipe material. We're using DAP Ultra Clear sealant, rated for these surfaces. Provided you've cleaned the surfaces properly, silicone sealant should work as well.
But unlike typical silicone sealants, this clear DAP sealant is also paintable.
FYI, here is the
- DAP ULTRA CLEAR Flexible All Purpose Waterproof Sealant Technical DATA SHEET [PDF] (2019) - retrieved 2023/08/25, original source: dap.com/media/4368/ultra-clear-tdb-5-0-fl-oz-final_tds_-2-25-19.pdf
Above you can see our sealant applied around the lower air intake for the Cinderella toilet.
Cinderella's instructions say to cut the air inlet pipe flush with the exterior wall but on a curved log wall we let the lower portion of the pipe remain square and thus protruding a bit - to be covered by the steel cover shown next.
If the pipe projects about 1/8" you may find that easier to get a reliable water seal with sealant that we've applied in this photo.
Watch out: failure to seal all wall penetrations risks leak into the building walls that can lead to expensive rot, insect damage, or mold contamination. Neatness counts.
Watch out: Take care not to let the pipe extend out past the wall surface or it will interfere with the installation of the cover (shown below) and worse, it may block the in-flow of combustion air, making the installation ineffective or unsafe.
Watch out: the company also warns "do not install a mosquito net over the end of the outlet air pipe. We think they meant as well, over the combustion air inlet pipe.
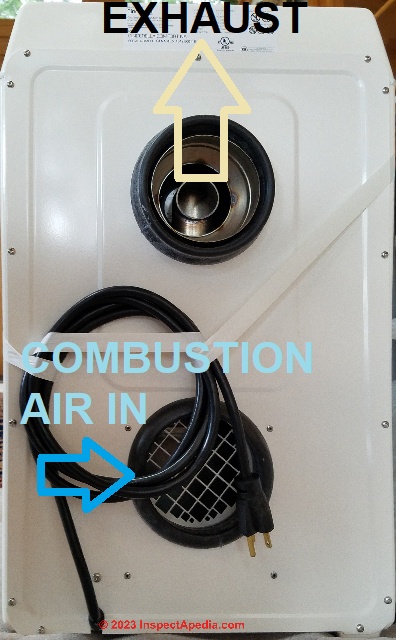
We were a little worried that local rodents might climb up into the pipe to find shelter and thus block the combustion air inflow - a problem that has not yet occurred. We note that a screen is provided on the back of the toilet so rodents and pests can't enter the toilet itself (blue arrow in our photo above).
...
Tips for Mounting the Cinderella Air Inlet Cover on a Log Wall
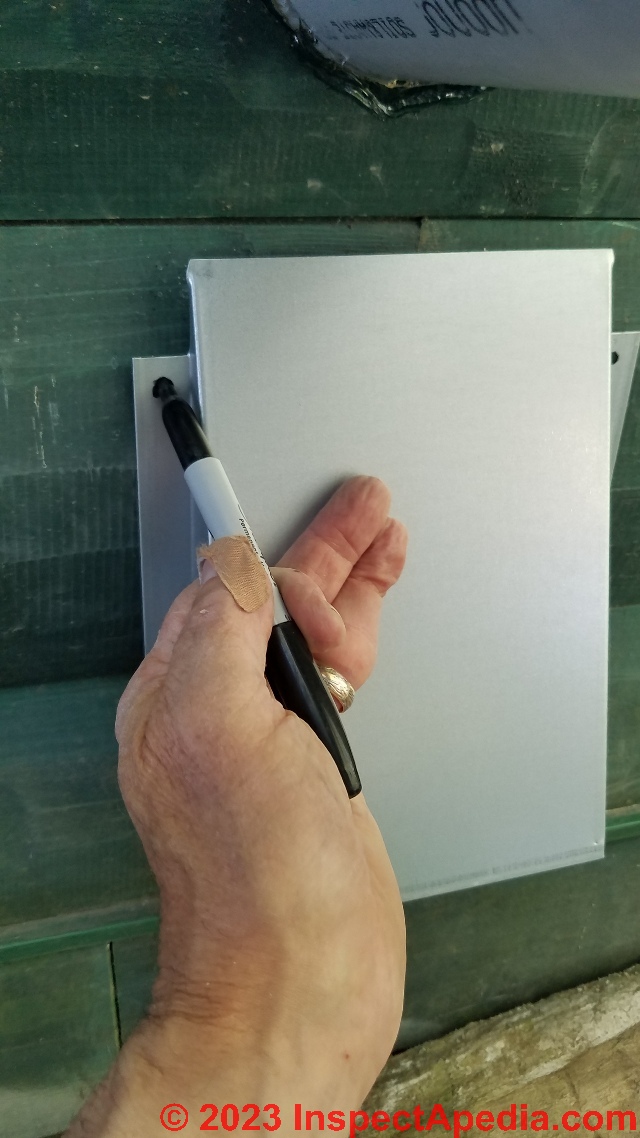
Below we mark the clearances and center line of the air intake cover so that we'll be able to place it properly on the exterior wall.
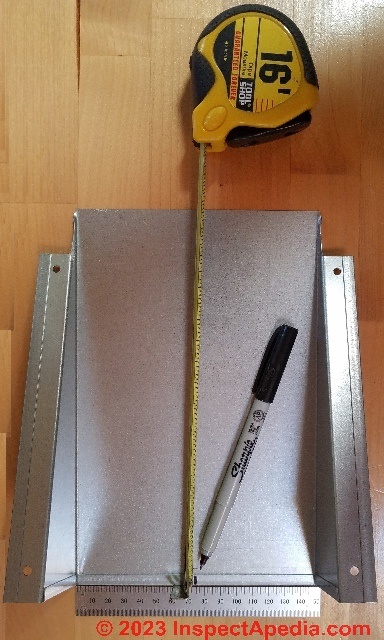
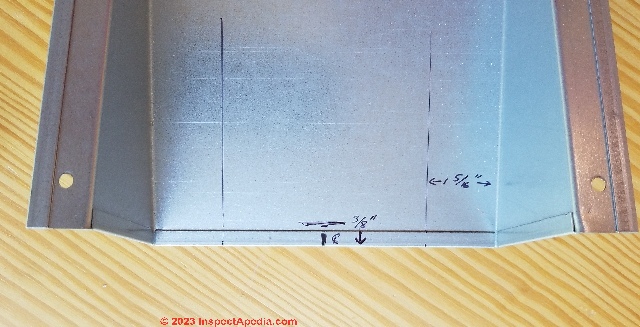
Below: centering details and alignment distances - unnecessary markings but reminding us that the cover's bottom edge should extend 3/8" below the bottom of the Cinderella toilet air inlet pipe.
Cinderella tells us to extend the bottom edge of the air inlet cover 3/8" below the bottom of the air inlet pipe itself and, of course, to center the cover over the pipe. That places the cover bent edges (not its flanges) 5/8" from the left and right vertical edges of the air inlet pipe.
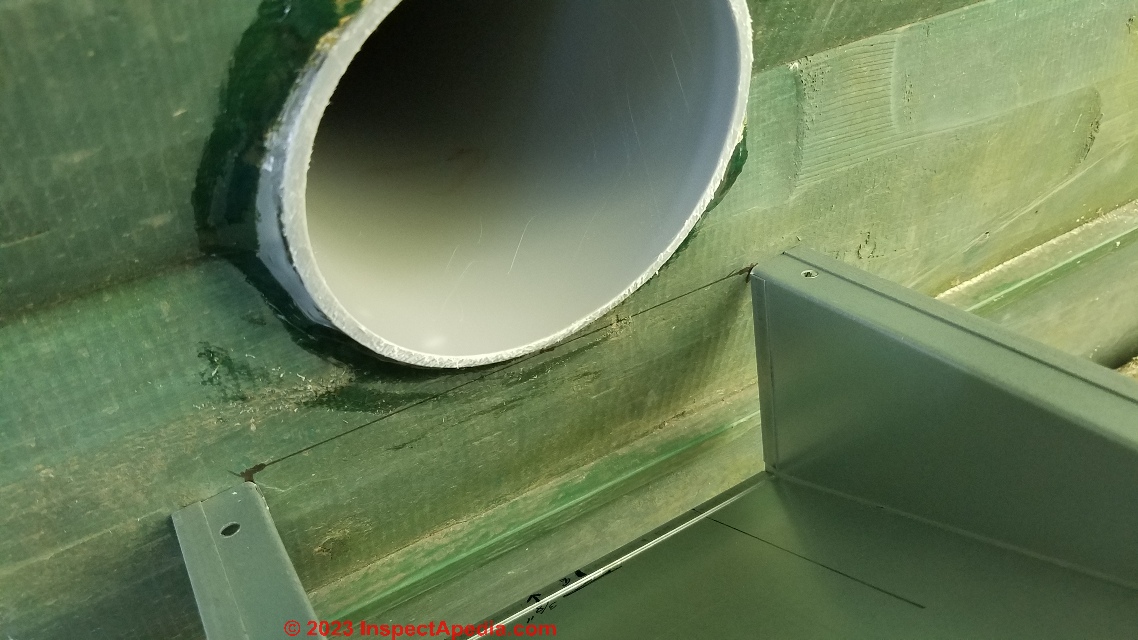
Below we are holding the cover in place with the bottom edges of its flanges on a line that is 3/8" below the bottom edge of the air inlet pipe for the toilet. You can see our horizontal locating line on the wall.
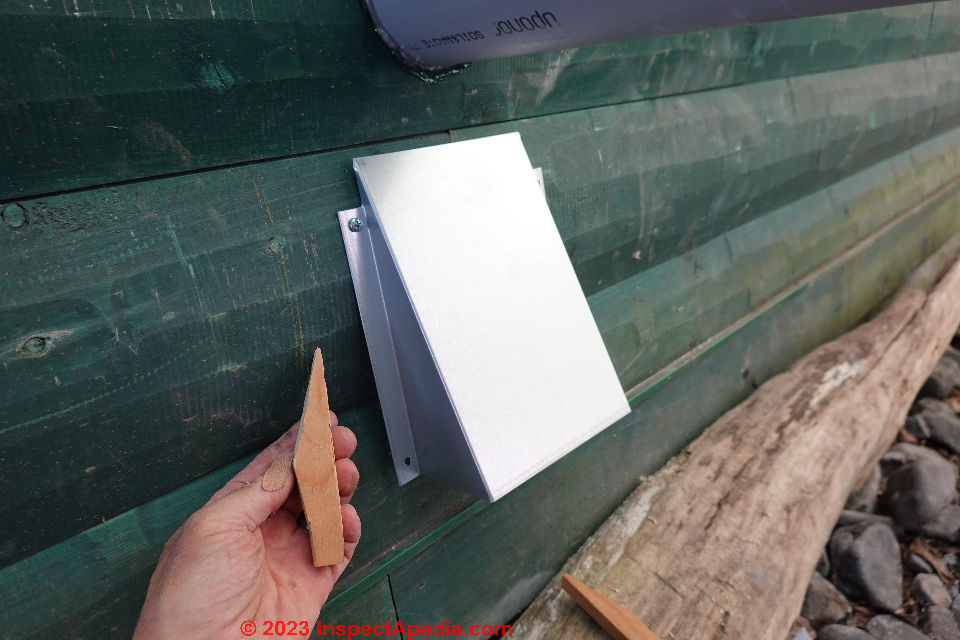
Because a log wall exterior isn't flat, the air inlet cover is not going to mount nicely, nor flat, nor be sealable (without ugly blobs of sealant) unless we do something fancier. Here's how we proceed.
Below: now tipping up the air inlet cover, we mark its upper screw locating holes on the wall and we temporarily screw it in place using just the two upper holes.
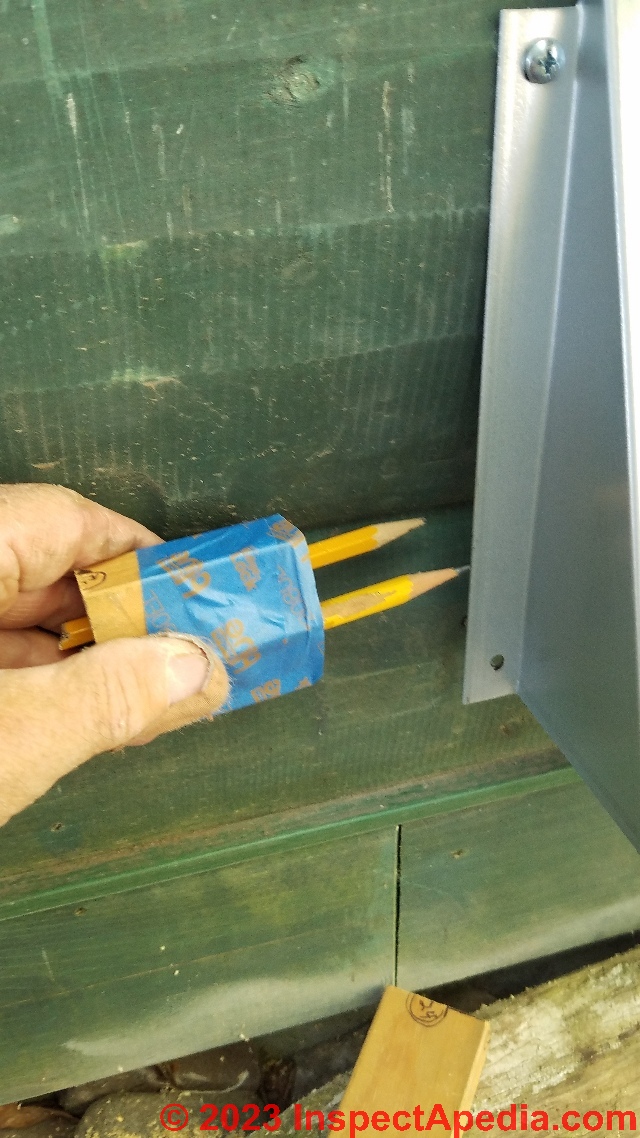
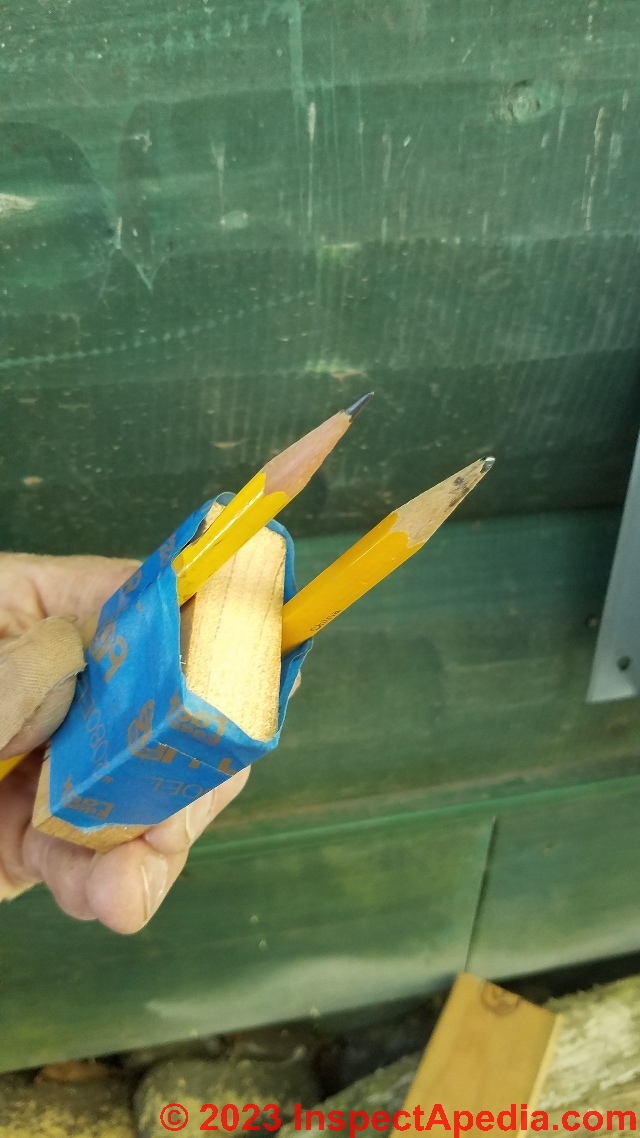
Next we fabricate a pencil scribing tool that will let us mark the curvature of the wall onto a block of wood that will then be cut to fill in the curved space between the air inlet cover and the log wall surface.
Below: this is a stunningly simple tool.
Key however is to choose a block of wood of adequate thickness to let us scribe the wall curve that will accommodate the deepest or most-open part of the curved surface.
Space the pencils, or a pencil and a scribe, far enough apart that the scribe can follow the surface contour of the wall and the marking pencil draw a corresponding line along your block of wood that will be cut to form the fill-in spacer.
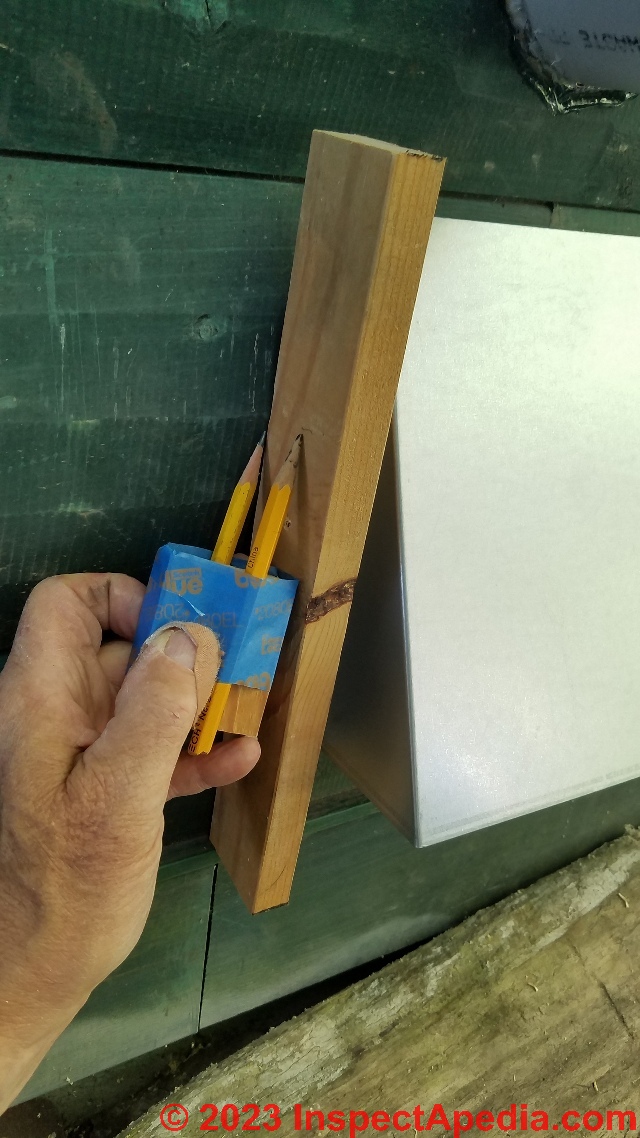
Keep in mind that we'll need to make two of these filler blocks, for the left and right sides of the air inlet cover.
Now holding a block of wood in place edge down against the log wall exterior we simply scribe a curved line that follows the contour of the log wall exterior.
Take care to keep your scribe in uniform contact with the wall surface - don't change the angle with which you hold it while drawing the scribe line.
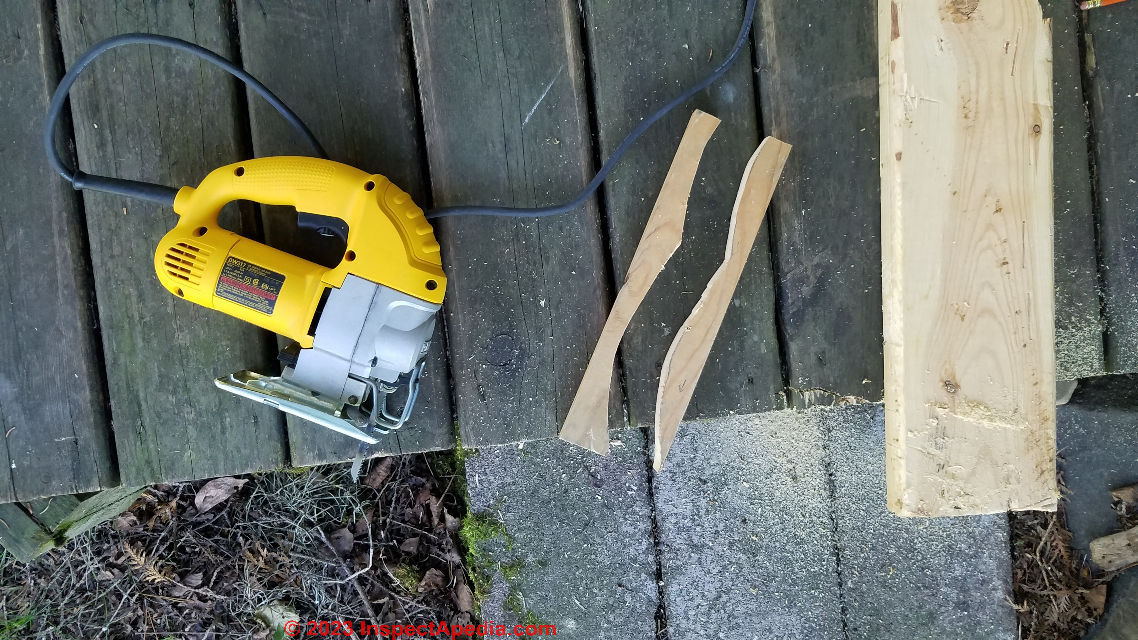
Below: using a jig saw I've cut my first log wall filler from a length of 1x3 common pine. (We'll later paint this for durability).
If you don't have a power jig saw an inexpensive alternative is a simple coping saw.
Next, below, I've cut off just the length of scribed arced wood necessary to fit under the air inlet cover so that it will rest perpendicular on the wall surface.
Below you can see the trimmed curved wood filler in place.
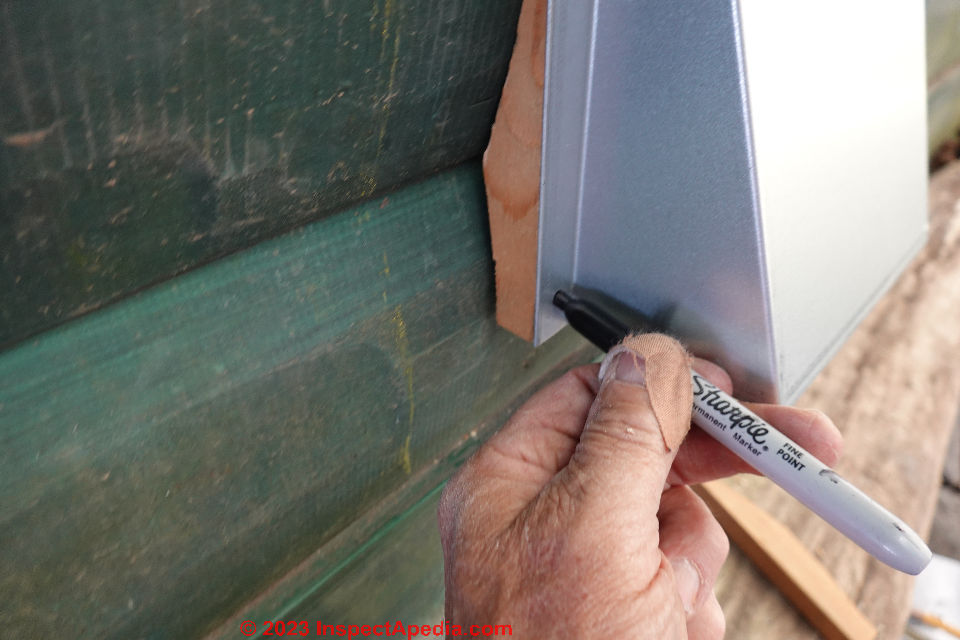
Next we mark the location of the screw hole that must pass through this wood filler.
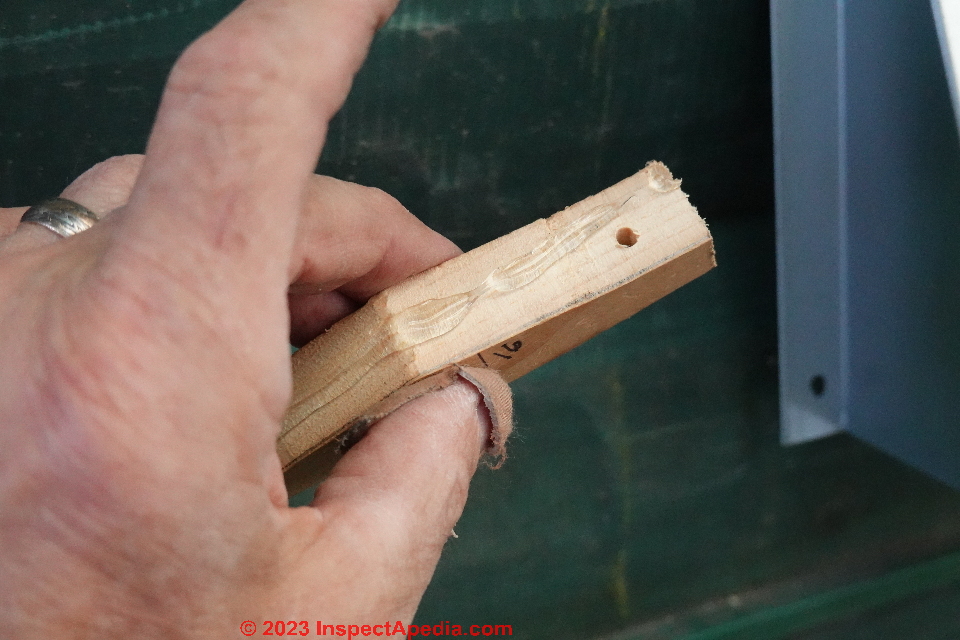
And below we pre-drill the wood filler to the diameter of the cover mounting screw.
Watch out: if you don't pre-drill this little piece of filler wood you're probably going to split it when screwing the Cinderella air inlet cover to the wall and you'll have to make another one.
Next we apply a generous bead of our wonderful Dow sealant to both the log-side and the cover-flange side of our two wood filler strips that have been pre-drilled as well.
Below: I'm ready to insert the wood filler strip in place,
and below, holding the filler strip in place so that it doesn't rotate out of position as the air inlet cover bottom screw is installed, we screw the air inlet cover flange through the filler strip and to the low wall behind.
We used a stainless steel screw to avoid corrosion and chose a screw long enough to pass through the cover flange, the wood filler block, and about 3/4" into the wood log wall siding.
Below is an underside view of this installation. Noticing that we could see a bit of daylight at the upper edge of the flange we will apply sealant all around the flange.
Below: detail of sealant applied around the Cinderella combustion air inlet cover top and along its mounting flanges and along our wood shims.
...
Seal & Insulate the Cinderella Toilet Pipes Inside the Building
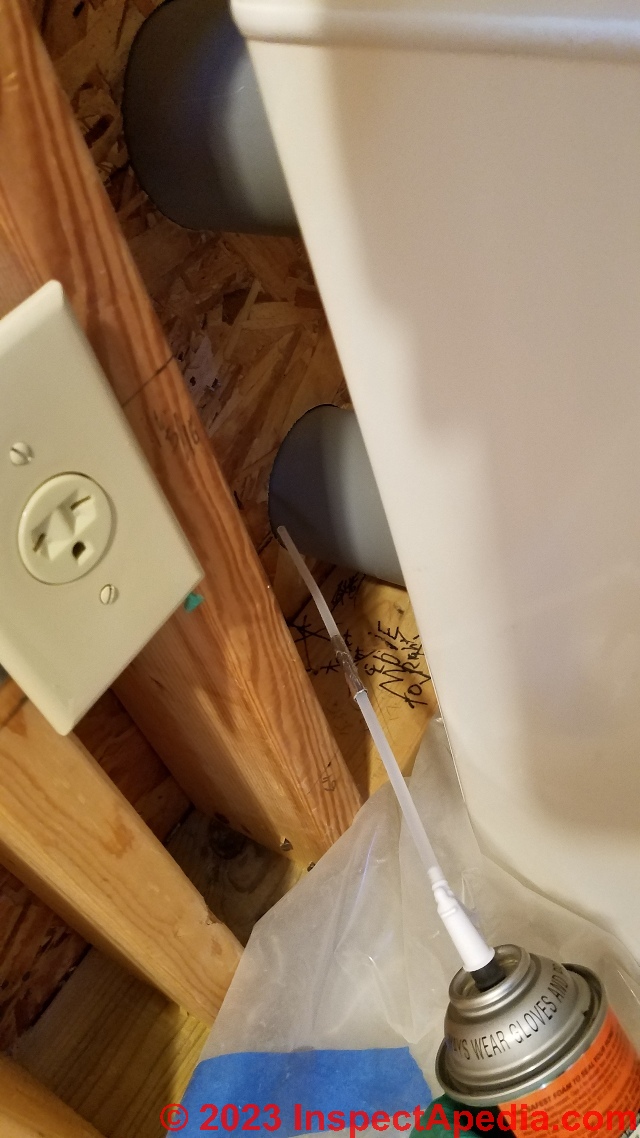
Now that we've got our toilet in place and its air inlet and horizontal exhaust pipes in place we use fire-block foam to seal around the pipes where they pass through the building wall. Later we'll add fiberglass insulating batts to this wall cavity.
An advantage of using FireBlock foam here is that it's more heat-resistant than other foam sealants and it might make our building inspector happy, too.
Neat tip: A more subtle advantage of the foam insulating step, lest you think I'm gilding the lily of this toilet, is that it "glues" the horizontal pipes in place, making later removal and re-installation of the Cinderella toilet easy to accomplish without disturbing the whole pipe and chimney arrangement.
If you haven't read all of Cindy's installation and maintenance instructions yet you might not have noticed that periodic maintenance of the Cinderella toilet requires that it be pulled off of its pipe connections for further cleaning.
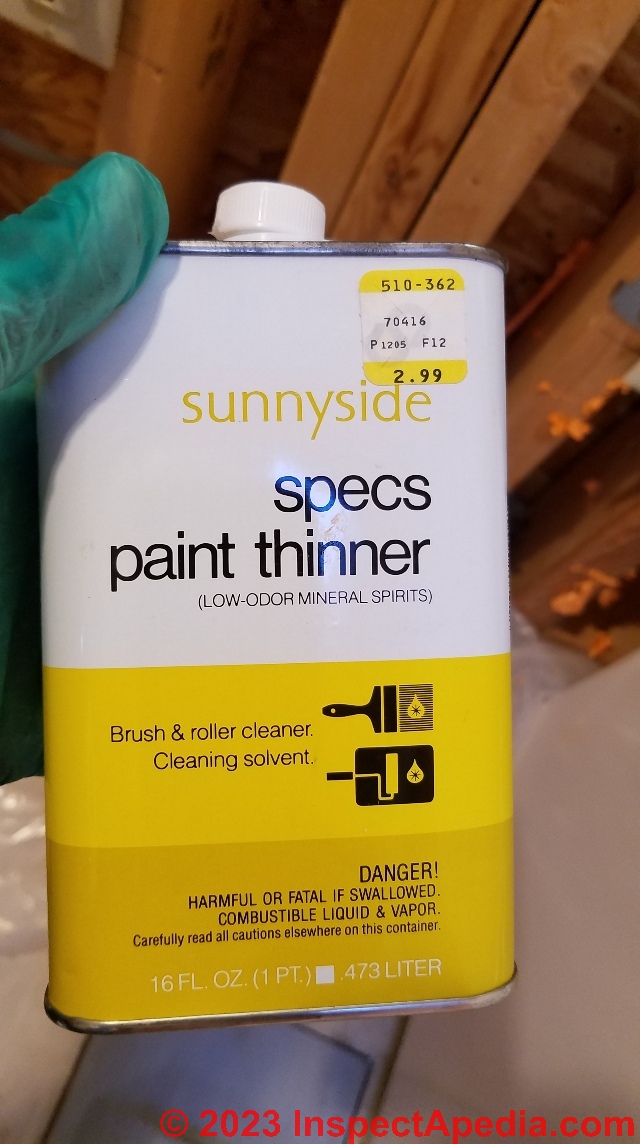
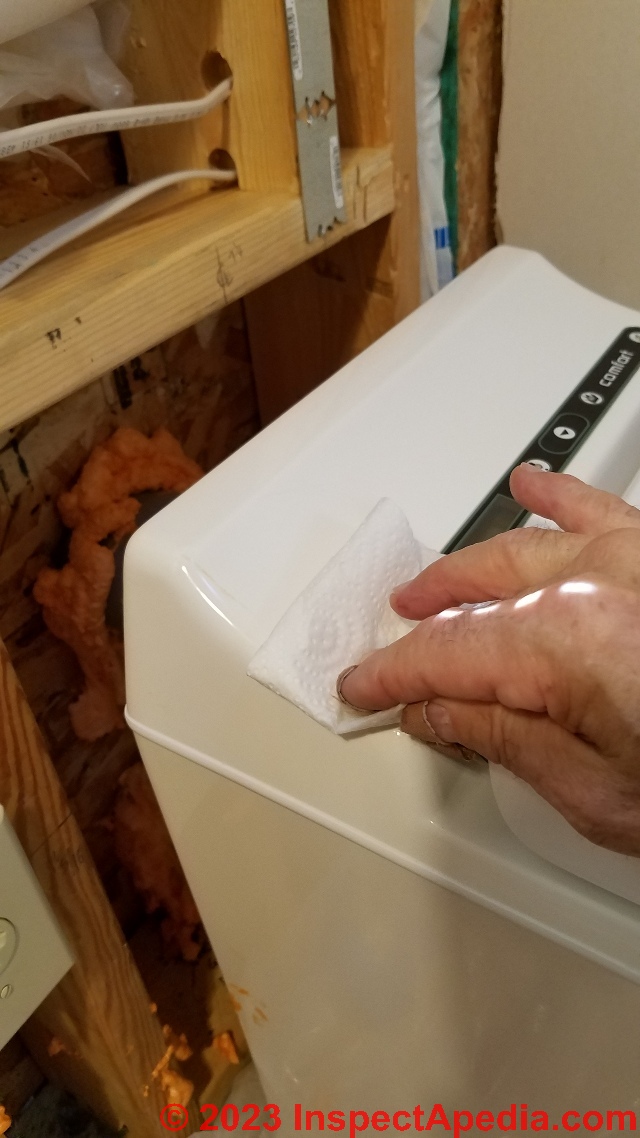
Watch out: use paint thinner, or preferably odorless paint thinner to clean off any fire-block foam that you splashed onto the Cinderella toilet itself. Do this right away - before the foam has hardened. Otherwise you'll have a sticky mess.
Watch out: do not try using other solvents like acetone to clean spray foam off of the Cinderella toilet as doing so is likely to dissolve and damage its exterior finish.
Please continue reading the next article in this series on installing a Cinderella incinerating toilet - the link is just below.
© 2023 InspectApedia.com
...
Continue reading at CINDERELLA INCINERATING TOILET INSTALLATION - CHIMNEY INSTALL Part 1 or select a topic from the closely-related articles below, or see the complete ARTICLE INDEX.
Or see these
Recommended Articles
- INCINERATOR TOILET SYSTEMS
- INCINERATOR TOILET CODES
- INCINERATOR TOILET SOURCES & BRANDS
- CINDERELLA INCINERATING TOILET - home
- CINDERELLA INCINERATING TOILET INSTALLATION
- Cinderella Installation: DELIVERY
- Cinderella Installation: LOCATION
- Cinderella Installation: CLEARANCES & WALL CUTS
- Cinderella Installation: AIR INLET & EXHAUST VENT INSTALLATION - you are on this page
- Cinderella Installation Page - CHIMNEY INSTALLATION Part 1
- Cinderella Installation Page - CHIMNEY INSTALLATION Part 2
- Cinderella Installation Page - FINAL STEPS
- CINDERELLA INCINERATING TOILET INSTALLATION [PDF] copy of entire Cinderella installation process
- CINDERELLA INCINERATING TOILET USE GUIDE
- CINDERELLA INCINERATING TOILET CLEANING GUIDE
- ECO-JOHN INCINERATING TOILET
- EcoJohn OPERATING TROUBLES
- INCINERATING TOILET RESEARCH STUDIES
- INCINOLET TOILET
- DESTROILET INCINERATING TOILETS
- STORBURN SCANLET INCINERATING TOILETS
- SUN BIO INCINERATING TOILET
- OTHER INCINERATING TOILET COMPLAINTS
Suggested citation for this web page
CINDERELLA INCINERATING TOILET INSTALLATION - AIR INLET & EXHAUST VENT INSTALLATION - at InspectApedia.com - online encyclopedia of building & environmental inspection, testing, diagnosis, repair, & problem prevention advice.
Or see this
INDEX to RELATED ARTICLES: ARTICLE INDEX to TOILET INFORMATION
Or use the SEARCH BOX found below to Ask a Question or Search InspectApedia
Ask a Question or Search InspectApedia
Questions, answers, FAQs, and reader comments about incinerating toilets.
Try the search box just below, or if you prefer, post a question or comment in the Comments box below and we will respond promptly.
Search the InspectApedia website
Note: appearance of your Comment below may be delayed: if your comment contains an image, photograph, web link, or text that looks to the software as if it might be a web link, your posting will appear after it has been approved by a moderator. Apologies for the delay.
Only one image can be added per comment but you can post as many comments, and therefore images, as you like.
You will not receive a notification when a response to your question has been posted.
Please bookmark this page to make it easy for you to check back for our response.
IF above you see "Comment Form is loading comments..." then COMMENT BOX - countable.ca / bawkbox.com IS NOT WORKING.
In any case you are welcome to send an email directly to us at InspectApedia.com at editor@inspectApedia.com
We'll reply to you directly. Please help us help you by noting, in your email, the URL of the InspectApedia page where you wanted to comment.
Citations & References
In addition to any citations in the article above, a full list is available on request.
- In addition to citations & references found in this article, see the research citations given at the end of the related articles found at our suggested
CONTINUE READING or RECOMMENDED ARTICLES.
- Carson, Dunlop & Associates Ltd., 120 Carlton Street Suite 407, Toronto ON M5A 4K2. Tel: (416) 964-9415 1-800-268-7070 Email: info@carsondunlop.com. Alan Carson is a past president of ASHI, the American Society of Home Inspectors.
Thanks to Alan Carson and Bob Dunlop, for permission for InspectAPedia to use text excerpts from The HOME REFERENCE BOOK - the Encyclopedia of Homes and to use illustrations from The ILLUSTRATED HOME .
Carson Dunlop Associates provides extensive home inspection education and report writing material. In gratitude we provide links to tsome Carson Dunlop Associates products and services.


