 Photo Guide to Fixing Window & Door Air Leaks - Air Sealing Procedure Indoors
- POST a QUESTION or COMMENT about the best methods for sealing leaks around windows & doors
This article describes step by step procedures for sealing air leaks and gaps around building windows and doors, working from indoors to save energy costs and stop air leaks.
We describe how to find and close gaps and leaks around building windows & doors. We illustrate how we remove interior trim, find gaps and leaks, insulate or caulk gaps, & replace window or door trim to improve building energy efficiency.
We show to remove & replace interior trim around windows and doors in a series of simple steps that permits aadding insulation and then sealant around leaky windows/doors
Working indoors, these building energy savings steps are actually an easy air leak sealing project that can be completed by many homeowners or by a meticulous handyman.
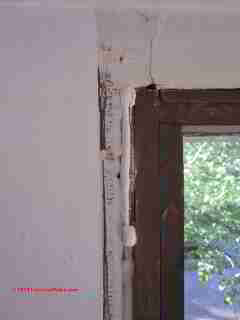
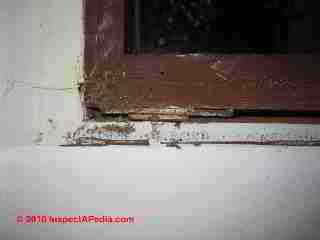
Our page top photograph demonstrates a common point of air leakage around windows on a New York home constructed in the 1960's.
InspectAPedia tolerates no conflicts of interest. We have no relationship with advertisers, products, or services discussed at this website.
- Daniel Friedman, Publisher/Editor/Author - See WHO ARE WE?
Step by Step Guide to Sealing Air Leaks at Windows, Working from Inside a Building
 Working from Indoors to Provide Air Sealing at Leaky Windows Can Cut Heating Bills
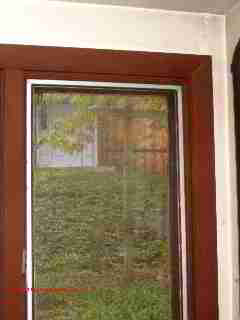
We took advantage of the plan to replace 1960's vintage painted clamshell interior window and door trim with new custom cut wood trim to also expose and seal gaps around the windows and doors of a Poughkeepsie New York home.
Here we provide a step by step photographic guide to how we pulled trim, found gaps, and sealed them before installing new window trim. We include extra details on trimming back drywall at floor level to reduce the chances of future mold growth behind floor trim baseboards.
At left our photo shows an example of the original common pine clamshell window trim that was installed when this home was built for a Vassar College professor in the 1960's.
On a cold windy winter day, at leaky windows it is sometimes possible to actually feel cold air movement at building windows and doors.
But more often, warm air is leaking out at some openings just as cold air is leaking in at others. So relying on your open hand to feel for and detect window air leaks is less obvious than using more
sophisticated
HEAT LOSS DETECTION TOOLS.
At ENERGY SAVINGS RETROFIT CASE STUDY we include the air sealing results for an older, costly-to-heat home for which simply adding insulation didn't do the trick. But here we provide an example of an easy, low-cost, low tech energy savings step that is likely to benefit many older homes.
The sequence of steps in this building air leak sealing project was simple and can be accomplished by most homeowners with only basic handyman skills and simple tools.
Step 1 in Window & Door Air Leak Seal-Up - Remove the Old Trim Boards
Our photos below show the basic tools you'll need to remove window or door interior trim (below left) and how we use a putty knife and mini pry bar together to remove window trim without damaging it (below right).

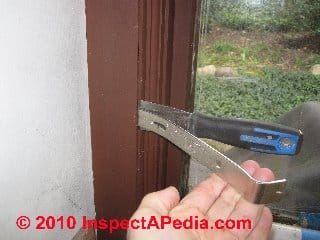
- Working carefully so as not to damage the drywall surrounding windows and doors, remove the interior trim. We use a few simple tools for this project:
A stiff putty knife, perhaps gently tapped with a hammer, is inserted between the window trim and the window opening frame or jamb, prying just enough to create a gap that will permit us to insert a mini pry bar, or for large or heavy trim, a heavier pry bar. You can also use a pair of mini pry bars together where more leverage is needed. If you pry as close to the trim nails as possible you can be sure of removing the trim without damaging it - important if you plan to re-use the trim after sealing window or door leaks. - Insert the pry bar in the gap opened by the putty knife, and to avoid damaging the window jamb wood (that will remain in place), we pry against the metal of the putty knife if necessary. (Photo above left)
- Continue working around the wood trim until each piece can be removed.
- Pull off any remaining window trim nails that happened to remain in the window or door jamb - most of the nails will usually come off with the trim itself.
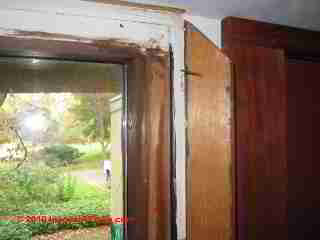 Our photo (left) shows a section of clamshell window trim just after it's been pried away from the window opening.
From left to right you can see:
The window glazing (and a view outdoors), parting strips that are holding the window glazing in place (painted brown)
The window jamb frame itself - this is the frame into which the window glass was set.
A gap between the window jam and surrounding drywall.
[Not visible] the 2x lumber framing the window rough opening is behind the drywall and behind the piece of trim we're holding up.
The wall side (previously hidden) of the clamshell window trim with a rusty finishing nail protruding at the top of the trim piece.
Watch out: don't drop boards with nails on the floor where you'll step on a nail! And if working overhead, wear eye protection so you don't drop debris into your eyes.
Step 2 in Window & Door Air Leak Sealing - Find the Air Gaps, Clean Out Debris
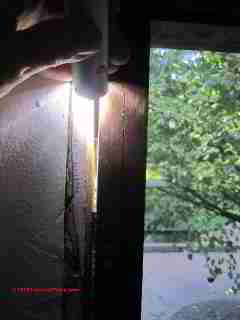
At left we are shining our little flashlight to explore the gap between the window jamb and rough opening framing.
Watch out: As we discuss at ENERGY SAVINGS RETROFIT LEAK SEALING GUIDE, at the same time that you are removing and replacing window or door trim and sealing around windows and doors, you (or your contractor) should be keeping a lookout for evidence of existing or potential building moisture problems.
Telltale signals are peeling paint on the building exterior - here are some places where you can reaad about paint failure:
see PAINT FALURE, DIAGNOSIS, CURE, PREVENTION
see SIDING WOOD, FAILURES OVER FOAM BOARD
and in extreme cases, mold - see MOLD in BUILDINGS
or building rot - see ROT, TIMBER FRAME
Our photo at below left shows a typical gap between window jamb and rough opening framing.
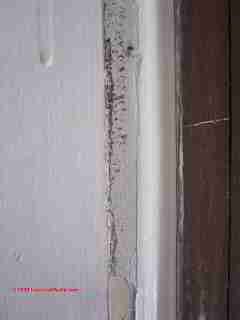
Notice that "sawdust-like" stuff in our photo at below left? That's carpenter ant frass. Look closely (click to enlarge) and you may even see some insect fragments in this mix.
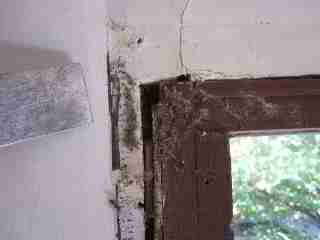 Previous exterior leaks at this window or in the wall above it invited carpenter ants into the structure.
We made sure that the roof, wall, or window leaks had been sealed from outside, that there was no significant damage requiring structural repair, and then we wiped away the debris from the inside surface. We also sprayed a little ant killer insecticide into the wall in this area, "just in case".
Find the gaps between the window or door jamb and the drywall or other wall covering. Large gaps, 3/16" to 1/4" or more will be filled with fiberglass insulation. Smaller gaps will be sealed with a sealant-caulk.
Our second photo, below right, shows the beginning of caulking.
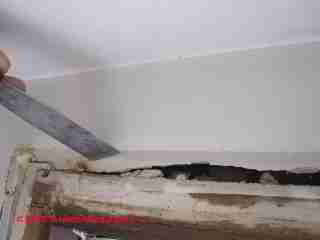
Remove loose joint compound over gaps: In most cases it's easy to use a putty knife or the small pry bar to remove the joint compound that partly closes off some of these gaps, giving plenty of room to then insert our insulating material (photo below left)
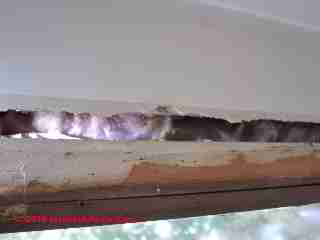
Inspect for existing insulation: Looking into the gap between jamb and framing, you will sometimes see a bit of insulation that was installed by someone working on the window or door trim from outside (photo below right) - this procedure can be accomplished from either indoors or outside.
In our project we found that a little insulation had been added from outdoors when the outdoor trim was replaced at some window openings, but because most of the space was still empty, we decided to add a bit more fiberglass to reduce air leaks and improve the insulating space around the window.
[Note: if replacing exterior rather than indoor window or door trim, meticulous sealing with a high grade sealant caulk will also minimize air leaks at the opening.]
Step 3 In Air Leak Sealing at Windows & Doors - Insulate & Seal Gaps
Large window or door gaps are sealed with fiberglass as we demonstrate above, or you can also seal these gaps with with expanding foam insulation from a spray can.
Using fiberglass, gently push fiberglass strips into the exposed gaps between the window or door jamb and the rough opening. (Photos above).
Using expanding spray foam provides a superb seal against air leaks, but adds time to the job as you need to wait for the foam to expand and harden, then you'll need to cut off any excess protruding from the wall before you can proceed.
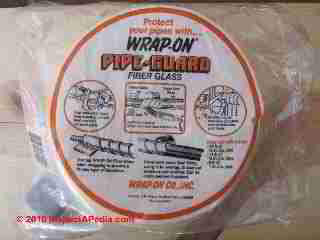
If we're going to use fiberglass to fill large gaps around windows and doors we like to use pre-cut strips of fiberglass pipe wrap - this minimizes the ripping, cutting, and dust from chopping up fiberglass building insulation batts. Wear a dust mask, gloves, eye protection when working with fiberglass.
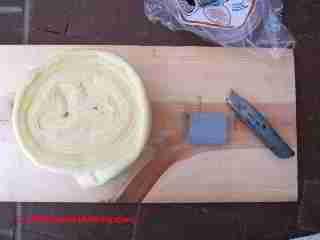
Our photos below show how we insert fiberglass insulation into the gaps between window jamb and rough opening framing.
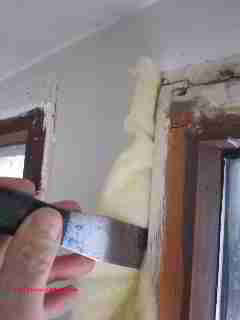
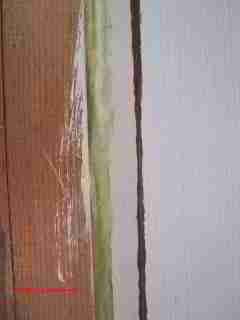
Watch out: a famous mistake made by enthusiastic amateur building air leak doctors is to pound or push too much insulation into the gaps around windows or doors.
If you overdo it you will find that later you can't open or can't re-close your windows because you've bulged the window jamb.
Also, over-packed fiberglass insulation may lose some of its R-value.
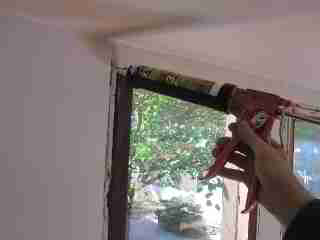 Small window or door gaps are sealed with a sealant/caulk as we show in the photographs below.
Because the sealant/caulk used to seal gaps around windows and doors from inside the building will never be exposed to weather, we took this as an opportunity to use up all of the old caulk we had around home.
Since the caulk or sealant was still in good condition, it seemed ok to use it.
Our photo at below left shows that we injected caulk into the gap along the left side of this window, followed by cleaning off excess caulk with our putty knife.
Keep some paper towels handy to wipe your putty knife off so that caulk doesn't dry on the blade - otherwise making smooth joints is more difficult.
Our photo below shows caulk-sealant blobbed into the window jamb/framing gap before smoothing.
Below we show the smoothed caulk / sealant and the cleaned-off window jamb surface (so we don't interfere with later trim installation).
Watch out: Don't mistake joint compound for insulation at window and door gaps: often you'll find joint compound partly closing off a large gap between the window jamb and nearby framing. That's because the installer simply shimmed the jamb to the framed rough opening where the jamb was being nailed.
The rest of the space around the window jamb was simply left open. (In current construction practices good buildings seal this space with fiberglass insulation or with expanding foam insulation to make an airtight window or door installation.)
Clean off excess sealant or caulk at the jamb/wall surfaces to leave a smooth surfaces. Otherwise protruding sealant may interfere with a neat trim installation by holding it off of the wall surface.
Watch out: don't rush. Seal thoroughly, and then be sure your sealant has dried enough that it won't glue the new window trim in place. Otherwise, if you need to remove the trim again in the future, say to replace a fixed glass window at an opening, you may have to ruin your trim in the course of its removal.
Tip: Extra Step to Reduce Future Water & Mold Damage to Drywall
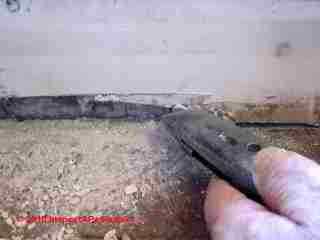
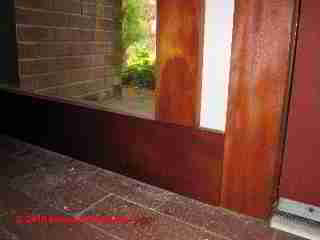
In addition to sealing windows and doors to stop air leaks, if you are replacing floor baseboard trim in an older home, consider cutting off the bottom 1/2" of drywall in contact with the finish floor.
If you eliminate contact between the bottom edge of drywall and the floor surface, in the event of a future water spill in the building you will have reduced the chances of wetting the bottom of the drywall, and thus you'll have avoided a water damage or mold problem in the lower walls.
This step won't prevent drywall damage if the building is actually flooded, but it can protect against wetting the drywall (and inviting mold growth) following a wet floor spill or event.
If you are installing new drywall, use a drywall jack or make your own temporary "carpenter's helper" shim to keep drywall about 1/2" off of the floor as you nail or screw it up to the wall studs.
Step 4 in Building Air Leak Seal-Up: Install new Window or Door Interior Trim
If you are re-using your old window trim, which saves time in cutting and fitting pieces, you'll have to have taken extra care not to damage the trim when you removed it.
In our project the original intent was to install new, more attractive window and door trim, cut to fit.
Our photo above shows the completed window gap seal and re-trim project after our new wood trim has been installed.
Just as the open and leaky gaps around the building's windows had been hidden behind the old painted clamshell interior trim, the now-weather-tight seal around the same openings is hidden beneath the new trim.
By air testing, temperature, or thermography would it be easy to know that these window openings have been sealed.
But the occupants could tell the difference on the first cold windy winter day, when they no longer felt drafts around the windows.
Be sure to read the companion article WINDOW INSULATION OPTIONS.
...
Reader Comments, Questions & Answers About The Article Above
Below you will find questions and answers previously posted on this page at its page bottom reader comment box.
Reader Q&A - also see RECOMMENDED ARTICLES & FAQs
Comment:
(Oct 2, 2012) Jason said: Amazing article and great pictures, very very informative, it will help me in Australia where we have the same problem in our house.
...
Continue reading at AIR SEALING STRATEGIES - topic home, or select a topic from the closely-related articles below, or see the complete ARTICLE INDEX.
Or see these
Building Air Leakage Articles
- AIR LEAK SEALING STRATEGIES - home
- AIR MOVEMENT in BUILDINGS
- BLOWER DOORS & AIR INFILTRATION
- CONVECTIVE LOOPS & THERMAL BYPASS LEAKS
- ENERGY SAVINGS in BUILDINGS - home
- HEAT LOSS in BUILDINGS - home
- HOUSE DOCTOR, how-to be
- INSULATION AIR & HEAT LEAKS
- PASCAL CALCULATIONS
- SMOKE GUNS for AIR LEAK DETECTION
- SPONTANEOUS GLASS BREAKAGE NiS
- THERMOGRAPHY IR Infra Red & Thermal Scanners
- THERMAL IMAGING, THERMOGRAPHY
- THERMAL TRACKING & HEAT LOSS
- WIND WASHING INSULATION at EAVES
- WINDOW INSULATION OPTIONS
Suggested citation for this web page
WINDOW / DOOR AIR LEAK SEALING HOW TO at InspectApedia.com - online encyclopedia of building & environmental inspection, testing, diagnosis, repair, & problem prevention advice.
Or see this
INDEX to RELATED ARTICLES: ARTICLE INDEX to BUILDING ENERGY SAVINGS
Or use the SEARCH BOX found below to Ask a Question or Search InspectApedia
Ask a Question or Search InspectApedia
Try the search box just below, or if you prefer, post a question or comment in the Comments box below and we will respond promptly.
Search the InspectApedia website
Note: appearance of your Comment below may be delayed: if your comment contains an image, photograph, web link, or text that looks to the software as if it might be a web link, your posting will appear after it has been approved by a moderator. Apologies for the delay.
Only one image can be added per comment but you can post as many comments, and therefore images, as you like.
You will not receive a notification when a response to your question has been posted.
Please bookmark this page to make it easy for you to check back for our response.
IF above you see "Comment Form is loading comments..." then COMMENT BOX - countable.ca / bawkbox.com IS NOT WORKING.
In any case you are welcome to send an email directly to us at InspectApedia.com at editor@inspectApedia.com
We'll reply to you directly. Please help us help you by noting, in your email, the URL of the InspectApedia page where you wanted to comment.
Citations & References
In addition to any citations in the article above, a full list is available on request.
- In addition to citations & references found in this article, see the research citations given at the end of the related articles found at our suggested
CONTINUE READING or RECOMMENDED ARTICLES.
- Carson, Dunlop & Associates Ltd., 120 Carlton Street Suite 407, Toronto ON M5A 4K2. Tel: (416) 964-9415 1-800-268-7070 Email: info@carsondunlop.com. Alan Carson is a past president of ASHI, the American Society of Home Inspectors.
Thanks to Alan Carson and Bob Dunlop, for permission for InspectAPedia to use text excerpts from The HOME REFERENCE BOOK - the Encyclopedia of Homes and to use illustrations from The ILLUSTRATED HOME .
Carson Dunlop Associates provides extensive home inspection education and report writing material. In gratitude we provide links to tsome Carson Dunlop Associates products and services.


