 How to Install or Replace a Room Thermostat
12 steps & 15 minutes to install a new thermostat
- POST a QUESTION or COMMENT about how to change out or replace an existing room thermostat with a new one
How to install a heating or cooling room thermostat quickly and successfully:
This article describes 12 easy steps in removing a room thermostat and installing, then wiring-up its replacement. We show how simple it is to replace a wall thermostat. We add a few warnings that can help avoid trouble along the way to an easy 15-minute procedure to install the new thermostat.
All you need is your new wall thermostat, a medium or small flat head ro phillips screwdriver, and perhaps the patience to read the instructions from the thermostat manufacturer. We also include toll-free numbers that allow you to call the thermostat manufacturer's hot line in case you have a question or a difficulty.
InspectAPedia tolerates no conflicts of interest. We have no relationship with advertisers, products, or services discussed at this website.
- Daniel Friedman, Publisher/Editor/Author - See WHO ARE WE?
Step by Step Photo Guide to Removing the Old and Installing the New Room Thermostat
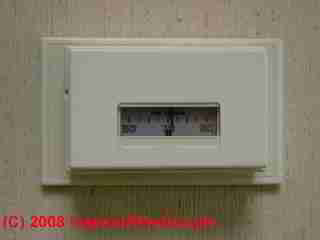 Before Buying Your New Thermostat be sure you actually need one
First are you sure you actually need a new thermostat? If you are buying a new unit because the old thermostat is "not working" be sure you have checked a few things:
- If the existing thermostat is an electronic model and its display is blank, is there power to the heating system it controls?
Is there power to its transformer?
Does the unit need batteries? It would be a shame to buy a new unit only to realize all you needed to fix the old thermostat was a couple of AA or AAA batteries.
See HEAT WON'T TURN ONor if needed
see LOW VOLTAGE TRANSFORMER TEST. - Is the thermostat turned on and in the proper HEAT or COOL position?
See FAN ON AUTO MAN Thermostat Switch. - You'll also want to double check that the problem is with the thermostat itself and not its wiring. It's usually trivially easy to check most of these problems at once by disconnecting the thermostat wires at the heating system and then jumping the two terminals (or something equivalent).
If the heat runs then the problem is indeed in the thermostat, its wiring, or its transformer.
Over at our lead article on this topic
THERMOSTAT WIRE CONNECTIONS we describe problems with broken thermostat wires, shorted wires, or blown fuses.
Also see LOW VOLTAGE TRANSFORMER TEST.
Ok so forget all that, we're ready to plow ahead.
How to Choose & Buy your New Thermostat
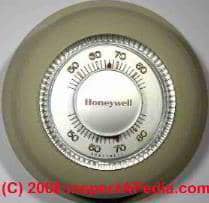
You may have already purchased the replacement thermostat you want. If not, the number of choices is both small (in some big box stores) or huge (more than 250 choices at an online store like Grainger.com).
Watch out: Most new low voltage thermostats can operate almost any kind of heating and cooling system, but here are some things to watch out for:
- Some thermostats are for "heating only" systems
- A low voltage thermostat would be the wrong type if you are controlling electric baseboard heat.
- If your thermostat needs to control both heating and cooling be sure that the product you buy can do so.
- If your system uses a heat pump, note that some thermostats will indicate on the package that they are not intended for that use.
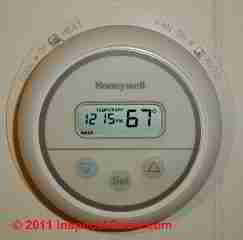
- If you want to take advantage of automatic thermostat set-back programming (a feature that can make substantial reduction in home heating costs) you'll want a programmable thermostat.
- Take a look at the programmable features to convince yourself that the thermostat is sophisticated enough to do what you want (do you want a custom program for every day or just for weekends?) but not so fancy that you or your husband will simply give up before trying to program the thermostat's schedule.
For my mom, who can't handle the buttons on her telephone, I'd buy a thermostat like the traditional, exquisitely simple round dial type unit shown at above-left. For myself, I'd buy my favorite, The Honeywell RTH2300 / RTH221 series room thermostat shown above in this article.
Here is a copy of the Honeywell RTH2300/RTH221 Series Programmable THERMOSTAT OWNERS MANUAL [PDF] - For someone I didn't like very much I would buy the Honeywell CT2700 thermostat shown just above at left..
At THERMOSTATS, HEATING / COOLING we describe different types of room thermostats, including both very simple models and more sophisticated programmable room thermostats.
Technical Details about Thermostat Features
At HEAT ANTICIPATOR ADJUSTMENT we describe choices among thermostats that have a heat anticipator and those that don't, and we explain the situations for which you might want a thermostat that has this feature (such as if your heating system tends to overshoot or make the room hotter than the thermostat setting). Usually you can skip worrying about this.
But if you know you want this feature,
see WHERE TO BUY a Room Thermostat with a HEAT ANTICIPATOR. That same article explains why you would or would not care about heat anticipators.
At THERMOSTAT CYCLE RATE SWITCH you'll see a summary of some hidden or internal switches that are found in most replacement thermostats and that adapt the thermostat to a variety of uses including the control of fans and heat pumps or backup heat for heat pumps.
OK so you've already got your new thermostat. We've already spent about as much time reading the above as it should take to remove the old and install tine new room thermostat.
Remove the Old Room Thermostat
Below we've simply popped off the thermostat face.
Here are the steps to follow when replacing a thermostat:
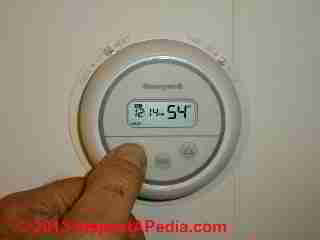
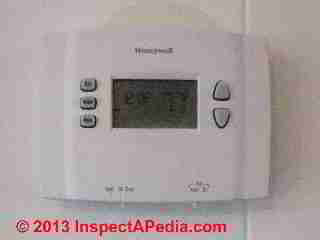
1. Turn off power: At above left, here's the old thermostat that we're going to replace.
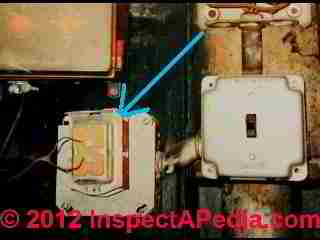
You can see by the fact that the display contains numbers that I have not yet turned off electrical power. If I short wires together maybe nothing will happen, but there's a chance I'll damage other heating system components or possibly blow the transformer (blue arrow in our photo).
So we turn off power before going any further.
Watch out: Turn off electrical power to the heating or cooling system before messing with thermostat wires. If you need help
see ELECTRICAL POWER SWITCH FOR HEAT.
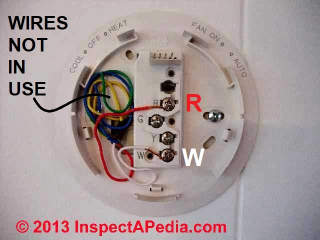
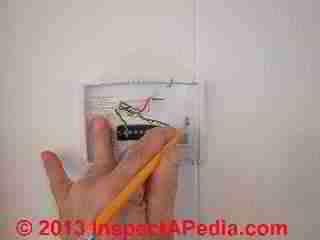
2. Pull off the thermostat assembly. You can see the neat job I did in wiring the old unit to be removed - at above right.,
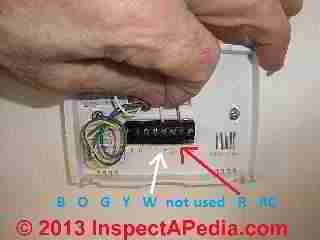
3. Take note of the wires that are connected in the old thermostat: note the wire colors and the identify of the terminals to which each is connected.
Watch out: because heaven knows what fools may have messed with thermostat wiring before, do not assume anything.
Indeed in this case we can see that just two wires are being used: a red wire and a white wire. But also check to confirm that on the old thermostat the red wire was connected to the R terminal and the white ware was connected to the W terminal. But you might find something else.
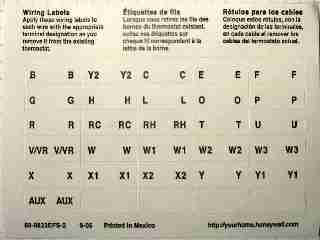
4. Disconnect the old wires and label them if necessary
Honeywell and just about any other thermostat manufacturer will give you a set of stick-on labels that you should use to indicate not the actual color of the wire but the ID of the thermostat terminal to which the wire was connected on the old thermostat.
Since I had just two wires, red and white, and because the red was connected to R and the white to W on the old thermostat, I didn't use these labels. But if wire colors didn't match the terminal IDs or if I had multiple wires I would use the labels.
Notice that I pulled the wires out and un-kinked them. Power was off so I didn't worry about taping bare wire ends.
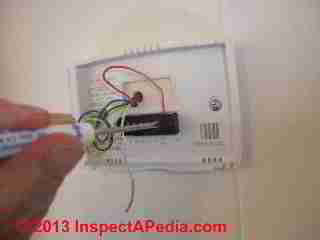
5. Position the new room thermostat mounting base in place & mark for drilling pilot holes for screws. You've already unpacked it - and read the installation instructions, right?
I'm holding the thermostat base on the wall as close to level as I can get it. Notice those two orange lines I added to the photo?
Those mark the screw openings for mounting the thermostat base. Notice that the left screw hole is oblong and horizontal in shape while the one at right is vertical - these openings will allow slight adjustment of the backing plate to perfectly level when I install the mounting screws.
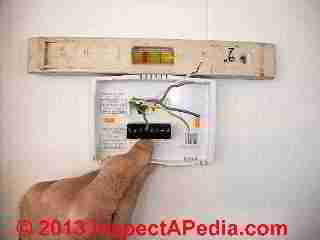
With older mercury bulb thermostats the unit would be out of calibration if not mounted level.With newer thermistor-type thermostats the unit will work properly if not perfectly level, but if it looks crooked on the wall it'll be annoying.
Use a pencil to mark where you will need to drill pilot holes for the mounting screws.
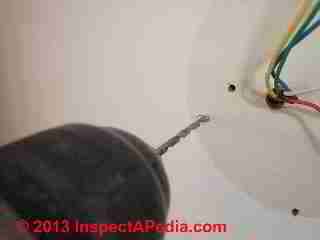
6. Drill pilot holes for the mounting screws. In drywall you might need to use the plastic anchors and sheet metal screws provided by the manufacturer in which case you'll select an appropriately sized drill bit.
Watch out: Don't make the hole too big or the anchor will turn or push right through the wall. In my case I'm mounting the thermostat on a wall covered with wood paneling so I skip the plastic anchors and screw right to the paneling.
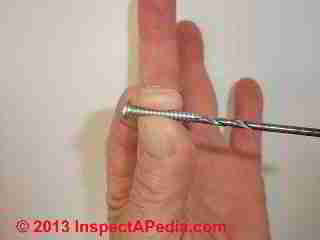
At left is a little trick for selecting the right sized drill bit without having to be very smart. I hold the drill bit behind the screw. If I can see screw threads sticking out past the edges of the drill bit my bit is probably OK.
In hard materials like wood or metal a perfect size drill bit would be about the size of the solid core of the screw but smaller than the outer diameter of the screw threads. Just sayin ...
Above you can see I've begun to drill with care right in the center of the hole I marked on the wall. And I've pushed the thermostat wires well out of the way for obvious reasons.
7. Mount the thermostat base to the wall using the new screw pilot holes.
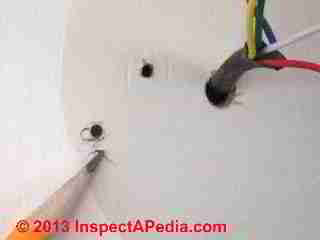
Above you can see the result of my precision drilling. It's a little off, yes? Now we understand why the mounting plate holes allow for about 3/16" of adjustment as we mount the thermostat plate to the wall.
Below in my photo you'll see that I've hand-started the two screws in place before using the screwdriver - this helps keep the thermostat mounting plate more or less level and in place while I drive in the screws (below).
Notice that we centered the plate so that the thermostat wires are not pinched nor damaged as the mounting plate is secured to the wall. Also notice that even though I know the power is off, I keep those red and white wires carefully separated.
Watch out: if screwing into drywall make sure that you don't over-tighten screws and end up loosening the mount of the thermostat to the wall or you'll be starting over (or using larger screws) - the thermostat is going to be poked and prodded with years of use so it needs to be securely mounted on the wall.
8. Level the thermostat and prepare the thermostat wires for attachment
I get the thermostat plate level by eye or by actually using a level, and then snug up the mounting screws (below left).
Watch out: Before attaching my red and white thermostat wires I notice that the stripped-back ends are nicked and a little too long for the new connectors.
A nicked wire might break off later, and a wire too long leaves uninsulated wire exposed where I don't want it. So I trim off extra wire end and material (below).
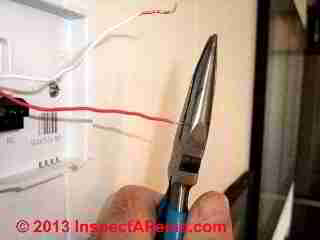
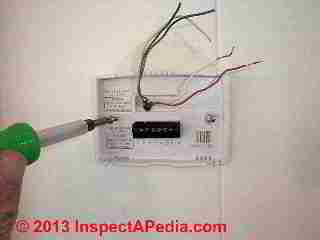
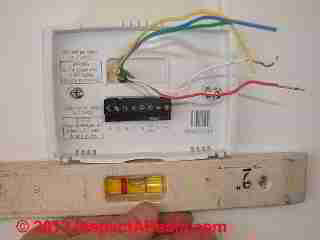
9. Attach the thermostat wires to the proper terminals on the thermostat mounting plate.
Watch out: I know we prefer to use them to kneel on or hold a sandwich but really, it's a good idea to read the instructions from the manufacturer before connecting up wires.
For example in this thermostat the manufacturer has included a jumper between the rightmost terminal and the second from right.
My red wire is to go in the second from right terminal (marked R) and I'm to leave the jumper in place (photo at below left).
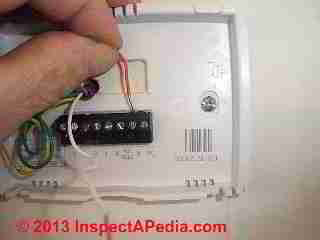
I attach the white wire next, to the terminal marked W (photo above right). Notice that I tried to make a neat coil of the un-used wires and that they are cut with no stripped-back insulation.
I want these to be safely out of the way of touching any thermostat parts when I button up the installation.
If you need help figuring out the wiring for your thermostat see the instructions that came with your unit, or if you've already thrown those away, see our detailed thermostat wiring guide
at THERMOSTAT WIRE CONNECTIONS.
10. Check the settings of any internal switches in the thermostat.
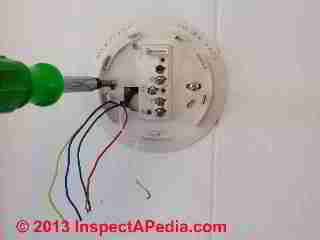
A small screwdriver is the right tool for snugging up the wire screws. Tight but not cut or damaged. (below left).
Now we should check to see if there are any internal switches in the thermostat and if so, we need to be sure they are set correctly. (below right).
Examples of how these switches should be set for this and other thermostat models are given
at THERMOSTAT SWITCHES, INTERNAL but also you should check the instructions for your own thermostat model.
Watch out: This is another good time to read the instructions as many thermostats have one or two little switches that you might need to change from their factory settings. In this case factory settings were fine.
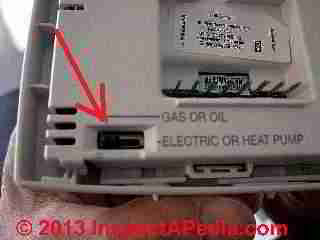
11. Install batteries in the thermostat and mount it to the backing plate. Use fresh batteries so you don't have to re-visit the whole operation any time soon.
This thermostat uses two AA batteries to remember its program should there be a power failure.
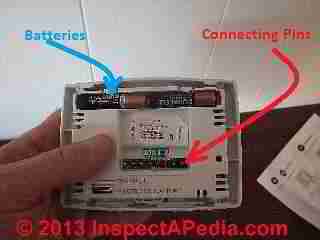
As soon as you insert batteries you will see the thermostat come alive.
Most but not all current room thermostats consist of a backing plate that is screwed to the wall and the thermostat body that mounts to the backing plate by pushing a connector (red arrow in photo at left) onto receiving pins on the backer plate. Plastic clips secure the thermostat to the backing plate.
Watch out: you should not have to use great force to mount the thermostat and its connector to the backing plate. Watch out to avoid bending pins or pinching wires.
A few thermostat models such as 3M's Filtrete instead mount the entire thermostat body to the wall and then cover various connections and switches with smaller plastic covers.
Watch out: the Filtrete™ 3M-22 is a battery-operated thermostat. If the batteries fail the thermostat may fail to provide heating or cooling and the building may suffer accordingly.
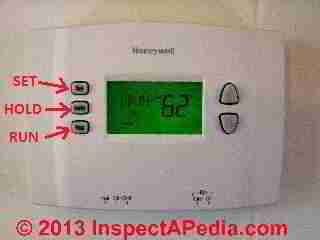
12. Set the thermostat clock, day, time, and then set up the set-back program
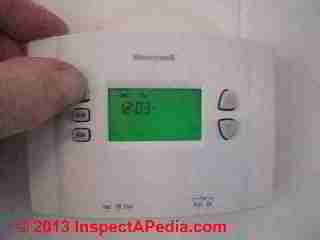
As soon as I touched the SET button (under my thumb in the photo) I saw the display light up - which told me that the thermostat was properly connected to its thermostat wires and was receiving low voltage power from the heating system.
A couple of minutes to set the clock and choose my program and we were in business.
Verify that the thermostat actually turns on your heating or cooling system. If the set temperature is higher than the room temperature and we are in heating mode, the heating system should come on.
If the set temperature is lower than room temperature and we are in cooling mode the A/C should come on (though in this example we were hooking up this thermostat for heating only).
Remember to check the HEAT OFF COOL and FAN AUTO ON switches (located on the bottom of this unit). If you need help those switches are explained at
...
Reader Comments, Questions & Answers About The Article Above
Below you will find questions and answers previously posted on this page at its page bottom reader comment box.
Reader Q&A - also see RECOMMENDED ARTICLES & FAQs
On 2017-11-28 by (mod) - Thermostat won,t shut off
Beek
See HEAT WON'T TURN OFF - things to check if you turn the thermostat down but the heat keeps running
since chances are replacing the thermostat won't fix the trouble. I suspect shorted thermostat wires or incorrect wiring.
On 2017-11-28 by beekmen
Thermostat won,t shut off and had it ever sense, should I replace with New.
On 2017-02-23 by (mod) -
Lynne:
Your new thermostat should have installation instructions that say exactly where Red White and Green connect on their device. If you don't have that, give me the brand and model of your thermostat and together one of us can find its instructions.
On 2017-02-23 by Lynne
We are changing an old room thermostat and there are 2 red wires and a green wire ,on new thermostat you have L.. N and a1 and a2 what connects to where?
On 2016-11-29 by Anonymous blue wire in the r slot
My old honeywell thermostat had a blue wire in the r slot. I just installed a nest thermostat
and used the blue in the r again. Does this seem ok? It seems to work, I haven't been able to test the air yet.
On 2016-09-05 1 by Sheila Emmett
How is an old RS thermostat fixed to the wall? There is no obvious way of removing for a replacement.
On 2016-04-15 by (mod) - dark display on a thermostat typically means power is off
Grant: dark display on a thermostat typically means power is off at the heater (or to the circuit that powers the low voltage transformer that powers the thermostat). Start by checking that power is on to your heating system.
On 2016-04-14 by Grant Loomis
We got back from vacation and our Honeywell wall thermostat RTH2410B1019 won't work. The digital readout is dark. I tried flipping the breaker and changing the batteries and it's still dark/blank. We have a natural gas furnace. Please help. 3:25PDT Thanks.
On 2016-02-09 by (mod) -
LInda I'm not sure what help you need: repair, replacement or wiring. For a typical 4-wire Lin-Stat thermostat if you are replacing it with a "heat only" thermostat you'd use the red, white, and green wires. If your thermostat was wired correctly to start, you'll find you can match Red to R, White to W and Green to G terminals on the new unit. If you are also controlling an air conditioner there of course more wires to connect.
If your Lin-Stat is for electric heat you may find wiring or operating instructions online searching for
PSG Lin-stat tdlv-240h line voltage electric heat thermostat 240vac, 22a
For electric heat typically Line 1 = blue, Load 2 = yellow, Line 2 = red, Load 2 = black.
WATCH OUT: mis-wiring can cause fire, shock, death.
On 2016-02-09 by (mod) -
RE-posting:
AUTHOR:Linda (no email)
COMMENT:I have an old Lin Stat thermostat I need help with.
On 2015-01-23 by Milrose - Honeywell PRO TH3110D, Digital Non Programmable wiring connections
Replacing General Controls T91F, 3-wire Thermostat on a Lennox ES1-391 Electric Forced Air Heater, 50 plus years old, with a Honeywell PRO TH3110D, Digital Non Programmable.
Removed wires at Thermostat without recording what colors to which Terminals. Checked inside heater control panel and discovered original installer did not necessarily follow color coding on printed schematic sheet affixed to inside panel cover. And, colors and terminal designations are not common to new any newer thermostats.
Honeywell unit said use terminal
R for 24 vac power from heating transformer which is V on heater;
Terminal G on Honeywell unit from Blower/Fan Relay which is F on heater;
and Terminal W on Honeywell unit from Heating Relay from heater which is H on heater.
The old thermostat board only has three terminals (machine screws) marked
V, F, and H.
I determined heater components from schematic which were clearly labeled. Question: Does this sound correct? Make sense? I have not purchased the thermostat yet and the heater does work well--expensive to run, the old thermostat is ugly, dark brown, and most markings are either worn off or covered with paint.
...
Continue reading at THERMOSTAT WIRE TERMINAL ID CODES / FUNCTIONS or select a topic from the closely-related articles below, or see the complete ARTICLE INDEX.
Or see
Where to Get More Help with Thermostat Wiring or Installation?
- Thermostat Wiring help: If you need help figuring out the wiring for your thermostat see the instructions that came with your unit, or if you can't find the instructions (the dog ate the thermostat installation guide), see our detailed thermostat wiring guides at
- HEAT WON'T TURN ON - more things to check if you've got no heat
- HEAT WON'T TURN OFF - things to check if you turn the thermostat down but the heat keeps running
- THERMOSTAT WIRE CONNECTIONS - detailed room thermostat installation & wiring guide for each heating or cooling system type and each thermostat wiring specification, from the simple 2-wire thermostat through 3, 9 and 9-wire thermostat hookups
- THERMOSTAT WIRE TERMINAL ID CODES / FUNCTIONS - what each thermostat wire controls or does.
- THERMOSTAT WIRING COLOR CODES - methods for identifying which thermostat wires
- LOW VOLTAGE TRANSFORMER TEST - separate article
- LINE VOLTAGE THERMOSTATS - separate article for 120V and 240V heat controlling thermostats
- Thermostat Switch Setting Help:
- COOL OFF HEAT, THERMOSTAT SWITCH - external switches
- FAN ON AUTO MAN Thermostat Switch - external switches
- HEAT ANTICIPATOR Adjustment - internal setting, not present on all thermostats
- THERMOSTAT SWITCHES, INTERNAL - internal switches
- Help from the Thermostat Manufacturer
- 3M customer help line: 1-888-607-5824 for the Filtrete thermostat . Watch out: the Filtrete™ 3M-22 is a battery-operated thermostat. If the batteries fail the thermostat may fail to provide heating or cooling and the building may suffer accordingly.
- Emerson Technologies (White-Rodgers products): http://www.emersonclimate.com (they don't seem to want you to call)
- Honeywell customer help line: 1-800-468-1502
- Robertshaw customer help line: 1-800-304-6563
Suggested citation for this web page
THERMOSTAT INSTALLATION STEPS at InspectApedia.com - online encyclopedia of building & environmental inspection, testing, diagnosis, repair, & problem prevention advice.
Or see this
INDEX to RELATED ARTICLES: ARTICLE INDEX to HVAC THERMOSTATS
Or use the SEARCH BOX found below to Ask a Question or Search InspectApedia
Ask a Question or Search InspectApedia
Try the search box just below, or if you prefer, post a question or comment in the Comments box below and we will respond promptly.
Search the InspectApedia website
Note: appearance of your Comment below may be delayed: if your comment contains an image, photograph, web link, or text that looks to the software as if it might be a web link, your posting will appear after it has been approved by a moderator. Apologies for the delay.
Only one image can be added per comment but you can post as many comments, and therefore images, as you like.
You will not receive a notification when a response to your question has been posted.
Please bookmark this page to make it easy for you to check back for our response.
IF above you see "Comment Form is loading comments..." then COMMENT BOX - countable.ca / bawkbox.com IS NOT WORKING.
In any case you are welcome to send an email directly to us at InspectApedia.com at editor@inspectApedia.com
We'll reply to you directly. Please help us help you by noting, in your email, the URL of the InspectApedia page where you wanted to comment.
Citations & References
In addition to any citations in the article above, a full list is available on request.
- In addition to citations & references found in this article, see the research citations given at the end of the related articles found at our suggested
CONTINUE READING or RECOMMENDED ARTICLES.
- Carson, Dunlop & Associates Ltd., 120 Carlton Street Suite 407, Toronto ON M5A 4K2. Tel: (416) 964-9415 1-800-268-7070 Email: info@carsondunlop.com. Alan Carson is a past president of ASHI, the American Society of Home Inspectors.
Thanks to Alan Carson and Bob Dunlop, for permission for InspectAPedia to use text excerpts from The HOME REFERENCE BOOK - the Encyclopedia of Homes and to use illustrations from The ILLUSTRATED HOME .
Carson Dunlop Associates provides extensive home inspection education and report writing material. In gratitude we provide links to tsome Carson Dunlop Associates products and services.


