 AO-Smith Water Softener Lid Removal
Brine Tank Access
Brine Tank Float Repair
- POST a QUESTION or COMMENT about AO-Smith water softeners or conditioners
This page shows how to open the main cover on an AOS water softener, it identifies the main components you'll see with the cover open, and then we discuss in detail removal of the smaller brine tank float tube lid (white tube and cover in our photo).
This article series provides manuals, adjustment and repair advice, and contact information for AO-Smith water softeners along with AO Smith water conditioning and water softener treatment adjustment advice.
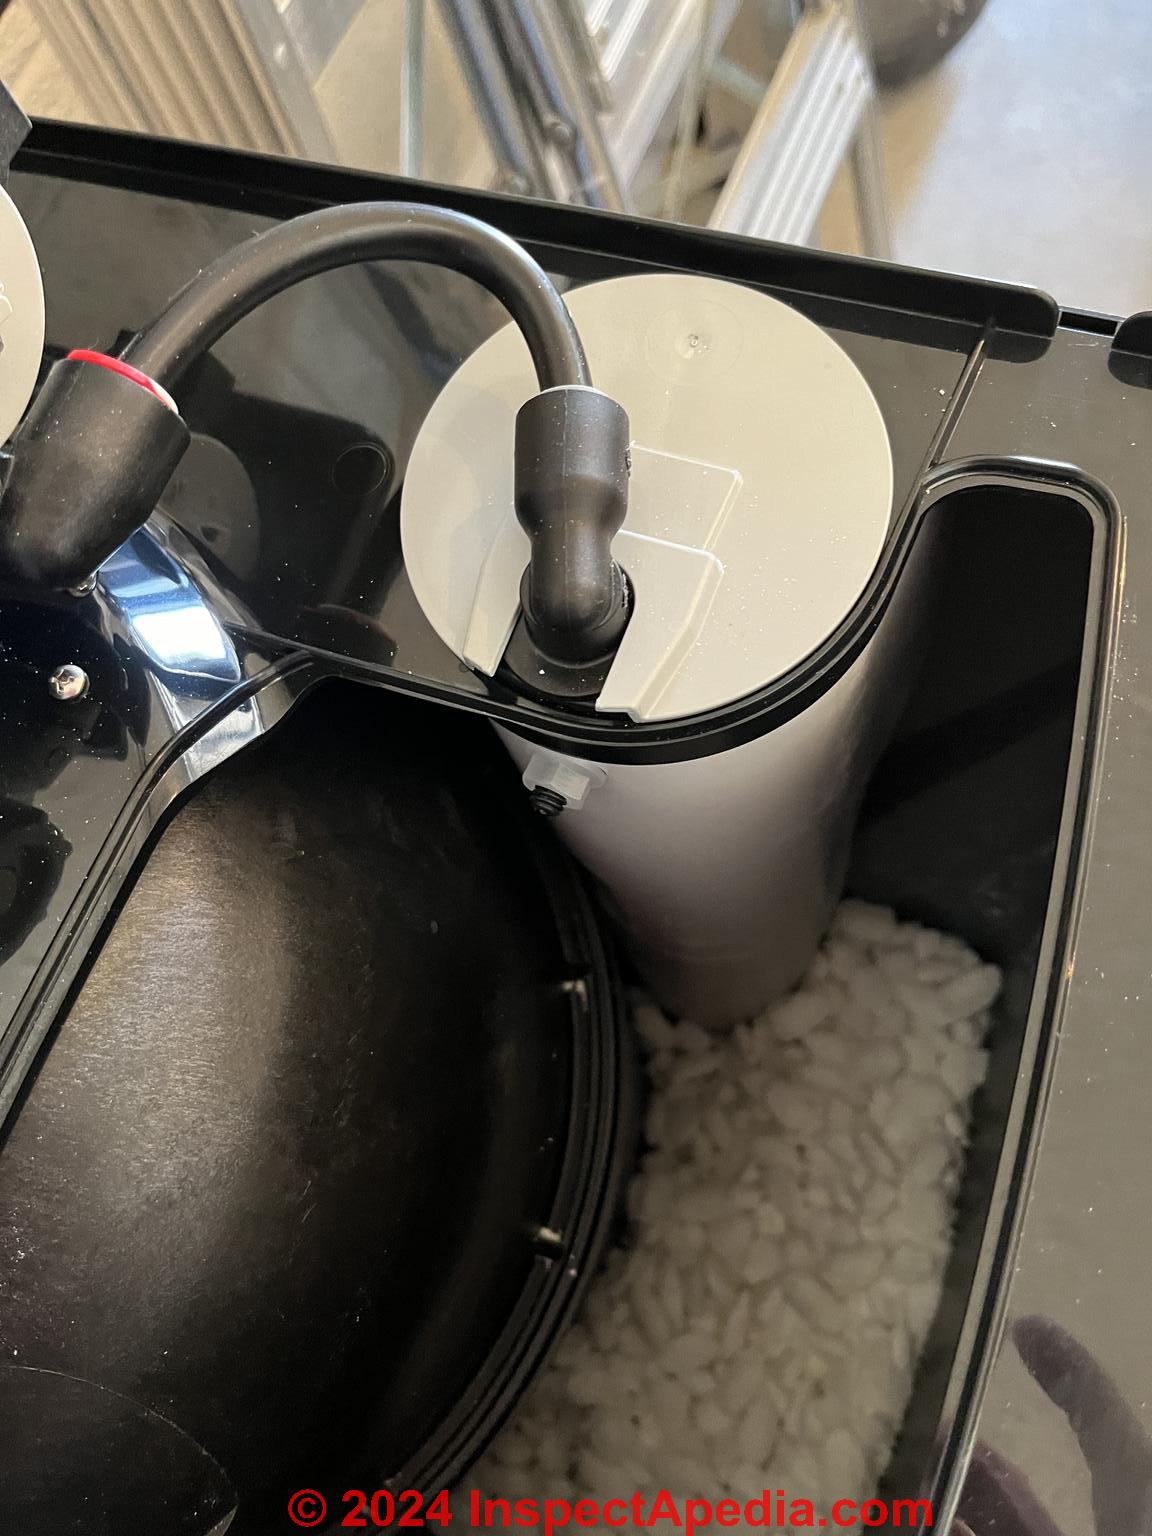
Page top photo: an A.O. Smith water softener model AO-WH-SOFT-350C interior, courtesy of InspectApedia.com reader Jerry.
InspectAPedia tolerates no conflicts of interest. We have no relationship with advertisers, products, or services discussed at this website.
- Daniel Friedman, Publisher/Editor/Author - See WHO ARE WE?
A.O. Smith Water Softener Brine Tank & Float Access
Article Contents
...
How To Remove the Brine Well Cover/lid on AO Smith AO-WH-SOFT-350C
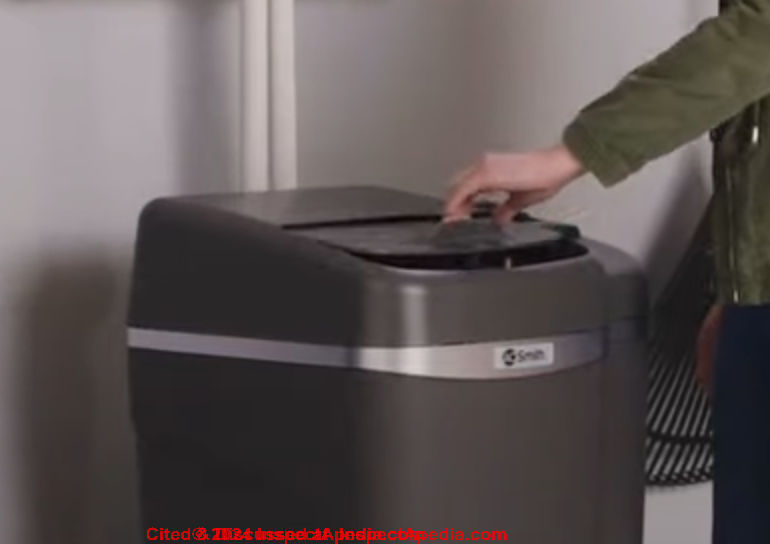
Using the AO Smith AO-WH-SOFT-350C water softener as an example and with help from reader Jerry, we illustrate how to remove the main access cover to get access to the water softener control head, resin tank, salt reservoir and brine tank float well and float assembly.
The main cover, as shown in our photo, simply lifts up slightly as you slide it rearwards.
On the AO-WH-SOFT-350C when you slide the cabinet cover to its open position (rearwards), that gives access to the brine tank into which salt is placed.
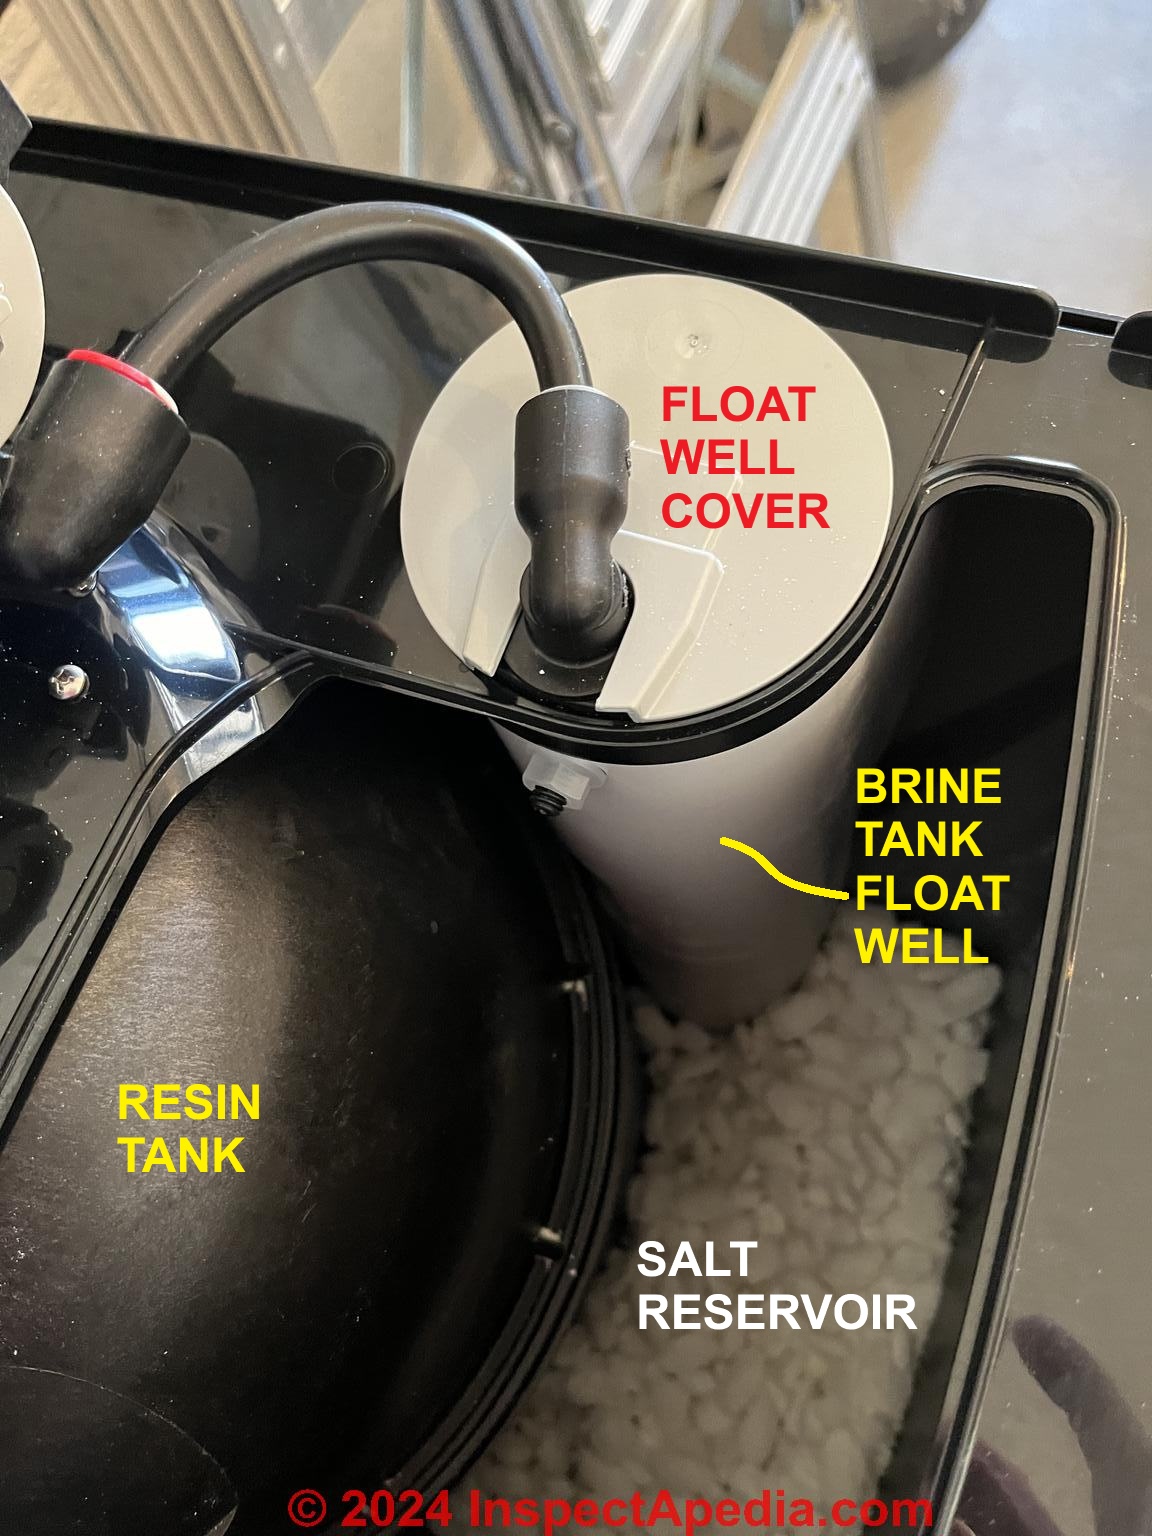
Jerry's photo at the top of this page and our annotated photo below show the interior view of the AOS softener with its lid fully open.
What's Inside the AOS Softener Shown Here?
 On these AOS softener models, you will see
- Salt
in the salt reservoir area, identified in our photo in white text as "SALT RESERVOIR". It's the building owner/occupant's responsibility to add water softener salt when this level falls close to the softener tank bottom - The treatment tank or resin tank:
A fiberglass "tank" at the rear right corner of the brine well - the resin tank, identified in our yellow text as "RESIN TANK".
The softener resin tank is not normally disassembled by the homeowner: it's where the actual water treatment takes place.
Confusingly, in some manuals AOS calls this the "Brine Cabinet" in the instructions for this water softener. - The brine tank float well or float tube.
This is a white vertical tube, the float well, capped with a white float well cover - both of these are identified in our photo.
Inside the float well is a vertical float, rod, and valve assembly that controls the water level in the salt reservoir during the water softener cycle that sends water into the container to dissolve salt.
The salty water is, in turn, used during the water softener regeneration cycle to remove minerals from within the resin tank and thus to "recharge" the resin tank so that it can continue to provide soft water to the building.
Watch out: we don't normally recommend that you don't try dis-assembling the float tube nor its parts. But in fact the cap on that tube can certainly be removed if service or repair of the brine tank float is needed, such as in case the float becomes stuck.
The brine tank float tube is capped by a white plastic cover that you should be able to gently pry straight up to remove it. That gives access to the brine well float assembly.
Details about the float well, cover, and float assembly may vary by water softener brand and model.
If you don't have the manual for your specific AO Smith water softener you can download the PDF from AO-Smith WATER SOFTENERS.
...
AO Smith Softener Brine Tank Float Assembly & Cap Removal
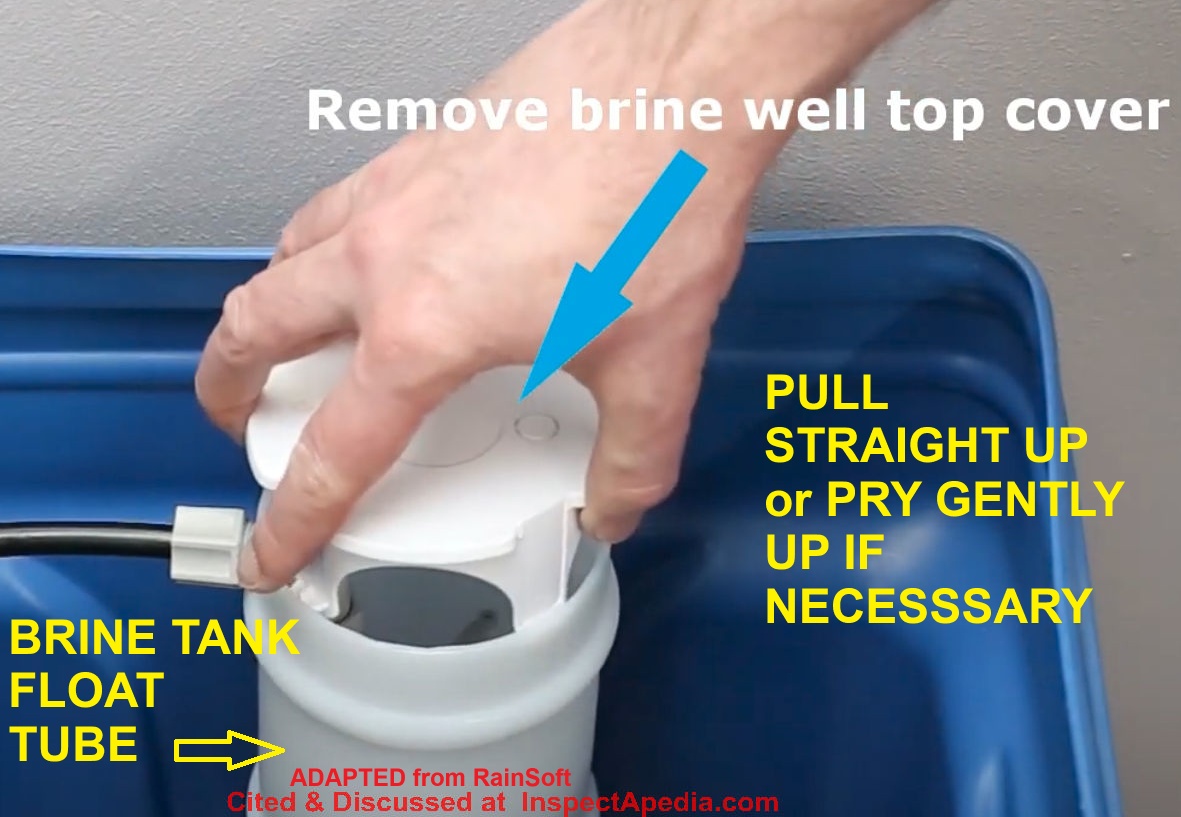
 The small, round brine well cover cap is usually easily removable to expose the float assembly.
Using a Rainsoft brine well float assembly tube photo we illustrate how on almost all softeners of this type we simply pull the cap straight up and out.
If it's necessary to free up a stuck brine tank float you may need to pull the float assembly out, clean and free up the float, float rod, and valve, and then vacuum-clean the brinewell with a wet vac. (Thanks to reader Jerry for that suggestion.)
After cleaning the brine tank float assembly I often use a bit of spray silicone to be sure all of the moving parts move freely. If they still tend to jam, I replace that assembly with OEM parts.
Usually the cover for the brine tank float tube or float well is simply a friction fit cover with sides that slip into the tube itself.
Just use a wide bladed screwdriver to gently pry off the brine well cover cap if you can't pull it straight up bare-handed.
The photo I show here is from a youtube video showing removal of the brine well cover on a RainSoft softener - original source youtube [dot] com/watch?v=hd5-hV9I-v0
You'd think that over the life of a water softener, accessing and cleaning or repairing a brine tank float switch would be required.
The IO Manual for the water softener shown above on this page, is
That manual labels the top of the assembly as "Safety Shutoff" - a bit confusing.
If you need to adjust the float level, see
More repair instructions are at
For more help you can also try this
- Contact: A. O. Smith Corporation, 11270 West Park Place, P. O. Box 24500, Milwaukee, WI 53224 USA, Tel: 855.424.9892
...
Continue reading at WATER SOFTENER BRINE TANK FLOAT VALVE ADJUST, or select a topic from the closely-related articles below, or see the complete ARTICLE INDEX.
Or see these
Recommended Articles
- AO-Smith WATER SOFTENERS
- AO-Smith WATER SOFTENER BRINE TANK & FLOAT ACCESS
- AO-Smith WATER SOFTENER INJECTOR ASSEMBLY
- DIAGNOSE WATER SOFTENER PROBLEMS
- HOW WATER SOFTENERS / CONDITIONERS WORK
- IDENTIFY WATER SOFTENER BRAND / MODEL - how to identify the brand and model of your water conditioner or water softener
- WATER CONDITIONER / SOFTENER MANUALS
- WATER SOFTENERS & CONDITIONERS - home
- WATER SOFTENER ADJUSTMENT & CONTROLS
- WATER SOFTENER BRINE TANK DIAGNOSIS & REPAIR - home
- WATER SOFTENER BRINE TANK FLOAT VALVE ADJUST
Suggested citation for this web page
AO-Smith WATER SOFTENER BRINE TANK & FLOAT ACCESS at InspectApedia.com - online encyclopedia of building & environmental inspection, testing, diagnosis, repair, & problem prevention advice.
Or see this
INDEX to RELATED ARTICLES: ARTICLE INDEX to WATER TREATMENT SYSTEMS
Or use the SEARCH BOX found below to Ask a Question or Search InspectApedia
Ask a Question or Search InspectApedia
Try the search box just below, or if you prefer, post a question or comment in the Comments box below and we will respond promptly.
Search the InspectApedia website
Note: appearance of your Comment below may be delayed: if your comment contains an image, photograph, web link, or text that looks to the software as if it might be a web link, your posting will appear after it has been approved by a moderator. Apologies for the delay.
Only one image can be added per comment but you can post as many comments, and therefore images, as you like.
You will not receive a notification when a response to your question has been posted.
Please bookmark this page to make it easy for you to check back for our response.
IF above you see "Comment Form is loading comments..." then COMMENT BOX - countable.ca / bawkbox.com IS NOT WORKING.
In any case you are welcome to send an email directly to us at InspectApedia.com at editor@inspectApedia.com
We'll reply to you directly. Please help us help you by noting, in your email, the URL of the InspectApedia page where you wanted to comment.
Citations & References
In addition to any citations in the article above, a full list is available on request.
- In addition to citations & references found in this article, see the research citations given at the end of the related articles found at our suggested
CONTINUE READING or RECOMMENDED ARTICLES.
- Carson, Dunlop & Associates Ltd., 120 Carlton Street Suite 407, Toronto ON M5A 4K2. Tel: (416) 964-9415 1-800-268-7070 Email: info@carsondunlop.com. Alan Carson is a past president of ASHI, the American Society of Home Inspectors.
Thanks to Alan Carson and Bob Dunlop, for permission for InspectAPedia to use text excerpts from The HOME REFERENCE BOOK - the Encyclopedia of Homes and to use illustrations from The ILLUSTRATED HOME .
Carson Dunlop Associates provides extensive home inspection education and report writing material. In gratitude we provide links to tsome Carson Dunlop Associates products and services.


