 WassersteinThermostat C-Wire Common Wire Add-On Kit
Step-by-step illustrated procedure
- POST a QUESTION or COMMENT about the C wire in heating and cooling equipment
This article describes installing a missing C wire in heating and cooling equipment using the Wasserstein C-wire kit AC adapter and wire.
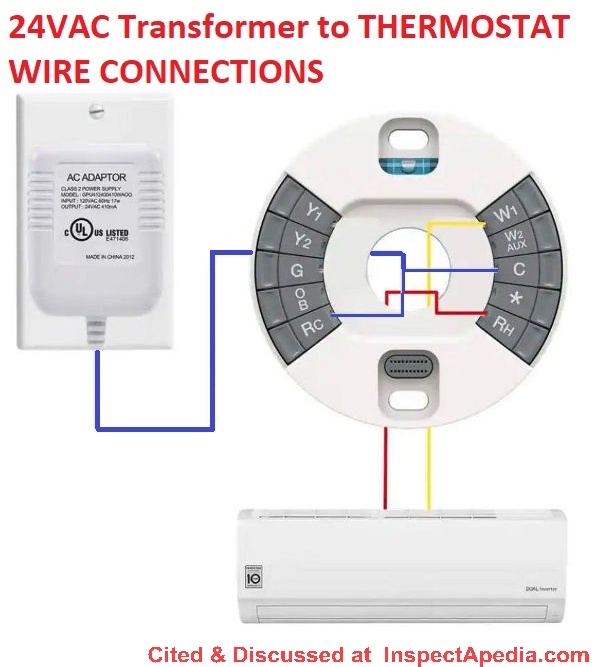
The C-wire or "COMMON" wire in heating and cooling or heat pump applications is a source of 24-volt AC power needed by certain controls and also needed by some, but not all, room thermostats.
The author has worked as a trained HVACR repair technician and is a member of ASHRAE, American Society of Heating, Refrigerating, and Air-Conditioning Engineers.
InspectAPedia tolerates no conflicts of interest. We have no relationship with advertisers, products, or services discussed at this website.
- Daniel Friedman, Publisher/Editor/Author - See WHO ARE WE?
Wasserstein 24V Transformer & C-Wire Adapter Installation Success
As you'll read in this article series (links at page bottom), there are several ways to get a C-wire to bring power to a smart thermostat such as the Nest learning thermostat.
Here we use the Wasserstein C-wire add-on kit to illustrate how you can add quickly, easily, and successfully add a C-wire or Common wire when needed.
While the process of adding a C-wire is pretty simple and easy, in trying out several methods and several C-wire kits we found that the hook-up wasn't always as easy as promised.
Remarkably, even among several of these kits, instructions for the wiring connections were inconsistent, not using the same connections, and some kits did not work at all, either because the wall adapter, a low voltage transformer, was defective or because it was too easy to buy the "wrong" transformer kit.
But we had quick and easy success installing Wasserstein's 24VAC transformer and C-wire adapter to power a Nest wall thermostat that had been giving occasional trouble by running low on its own internal battery.
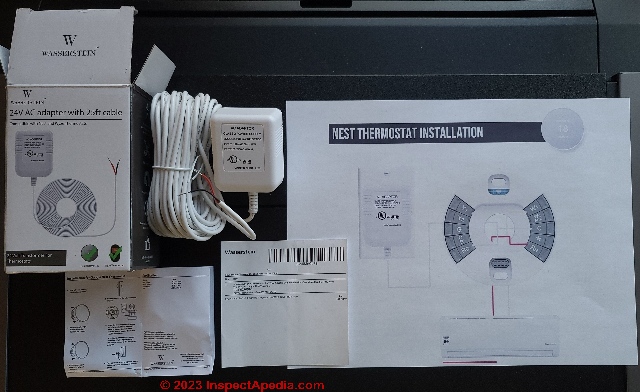
Shown below are the contents of the Wasserstein C-wire add-on kit:
In the box are a 24VAC transformer and wire and an instruction sheet that gives step by step hook-up details.
Pro's:
- The kit worked easily and immediately when we followed its instructions.
- The AC adaptor, Class 2 poer supply, model GPU4124004 10WAOO specifies
Input: 120VAC 60Hz 17W - this is a 17-watt transformer
Output: 24VAC 410mA - which we found adequate to power the Nest room thermostat
Con's:
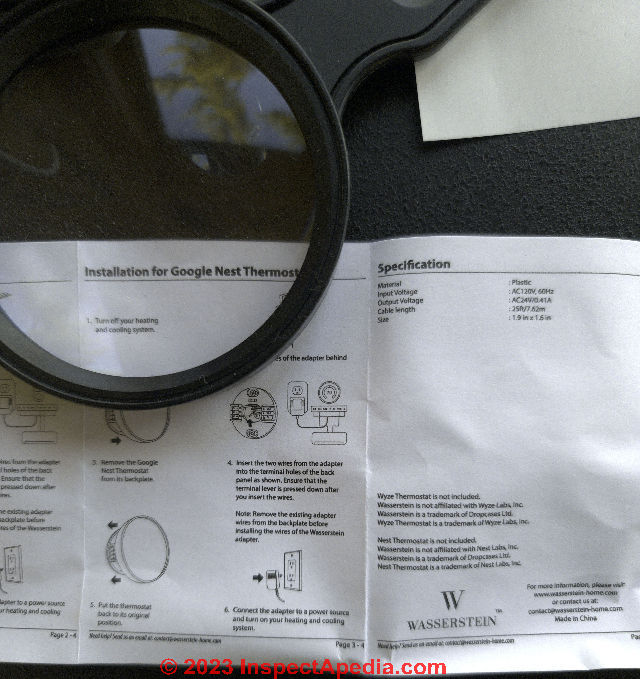
- The instructions are printed in microscopic font that are illegible without a magnifying glass. Alternatively you can go to the company's website wasserstein-home.com to find more-easily read installation steps.
- The instructions suggest routing the C-wire from the transformer inside of a wall cavity and up to your wall thermostat - a completely un-realistic procedure for most homeowners.
Unless the electrical receptacle is immediately below the room thermostat in the same stud-bay, routing a wire inside the wall cavity will require more-extensive cutting and drilling to route the wires.
We simply ran the C-wires up to the thermostat as shown in photos below.
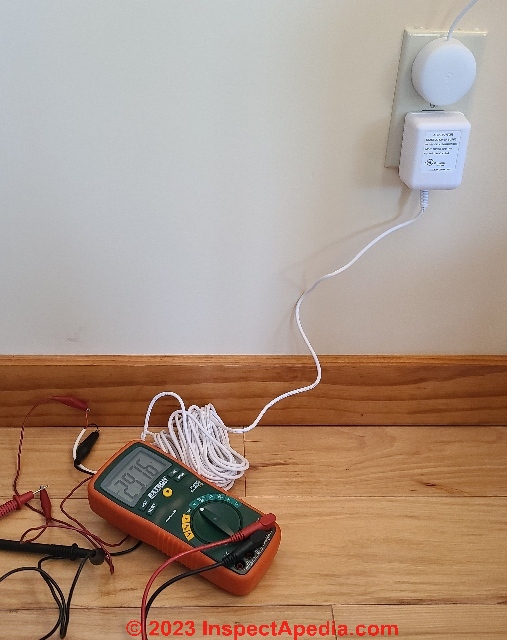
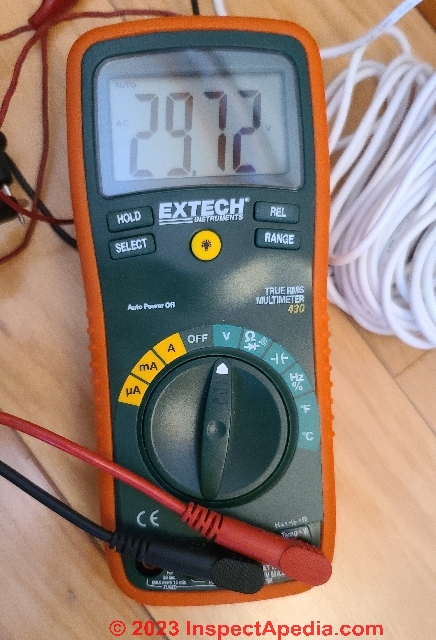
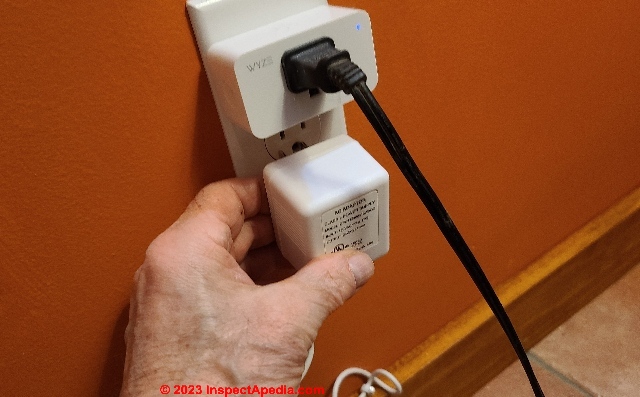
First we plugged the Wasserstein AC Adaptor in to a wall receptacle and used our digital DMM to confirm that its output voltage was in-range. We found about 29VAC - compare this with the inadequate output voltage
at our description of a different C wire kit that did not work:
Nest C-WIRE KIT FAILURE, DEFECTIVE AC ADAPTER TEST
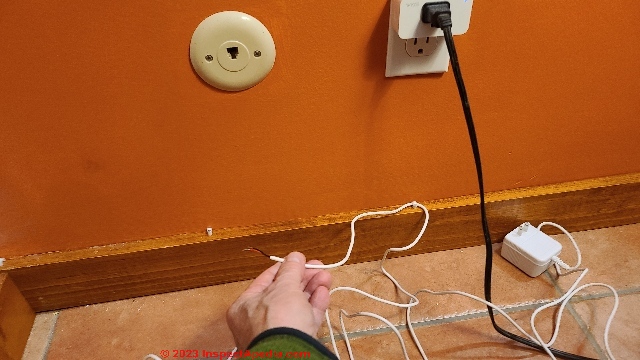
Watch out: as you'll notice below, before running the C-wire bundle up to the thermostat we un-plugged the AC Adapter from the wall to be sure it's power was OFF.
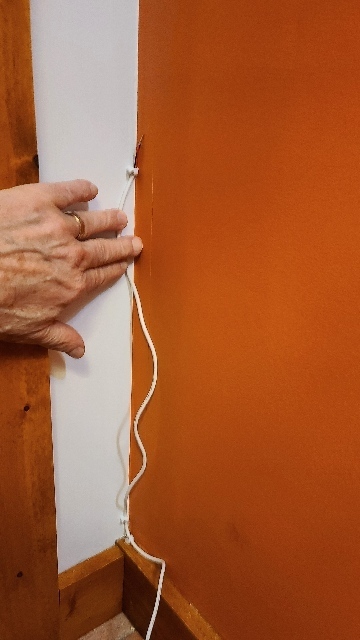
Below: Next we ran the wires from the AC Adapter/transformer along the top of our baseboard trim, then
up the wall
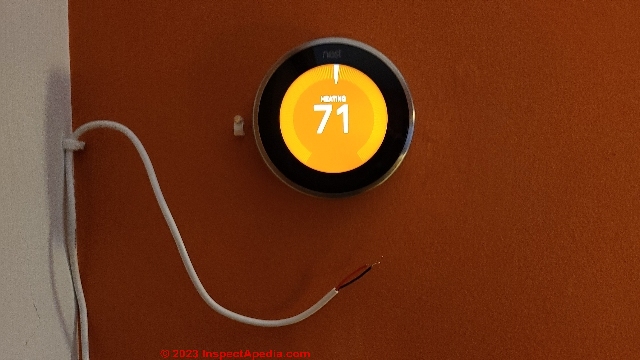
and then to the thermostat. Notice that our Nest Thermostat was on and live and calling for heat.
Watch out: before removing the thermostat and connecting the new C-wires as per Wasserstein's instructions, we went to the heating boiler and turned off all electrical power to the boiler.
If you're not sure how to do that,
see ELECTRICAL POWER SWITCH FOR HEAT
Tip: before running the new C-wire bundle into the thermostat we loosened the screws holding the thermostat to the wall, and we cut a small gouge in the drywall at the edge of the thermostat so that when we later tightened it in place the thermostat would rest flush against the wall.
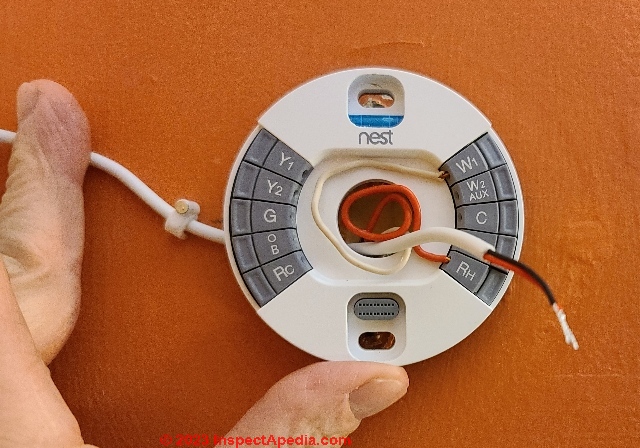
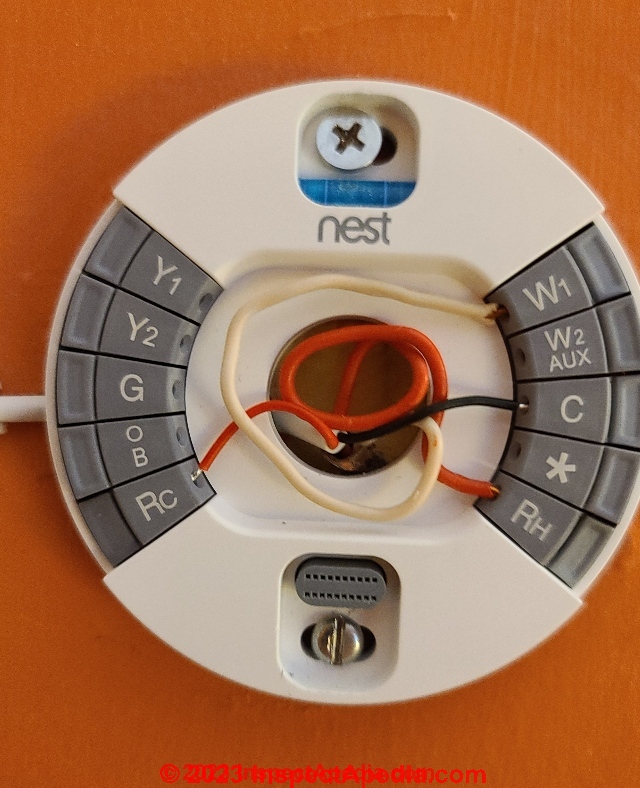
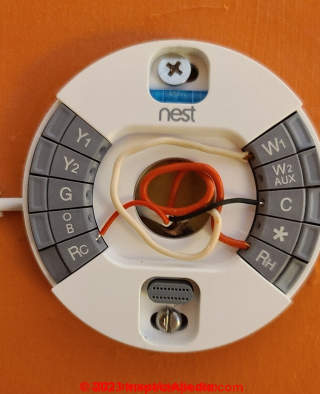
Notice that the original thermostat wires remained at their original connections:
- Original Red thermostat wire remained connected to Rh on the Nest Thermostat
- Original White thermostat wire remained connected to W1 on the Nest Thermostat
Now we connected the C-wire bundle wires (red and white) according to the Wasserstein instructions.
- The C-wire kit wire bundle's black wire connected to the C terminal on the Nest Thermostat.
- The C-wire kit wire bundle's red wire connected to the Rc terminal on the Nest Thermostat
With all of our thermostat wires now connected, we level and tighten the thermostat back onto the wall, and then we're ready to plug the AC adapter back into the wall receptacle (below).
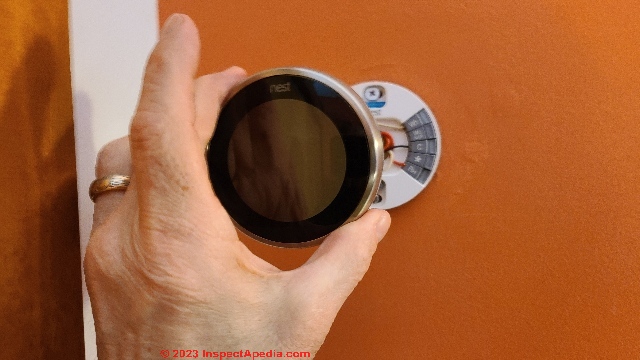
Now we simply re-connect the Nest Thermostat to its base,
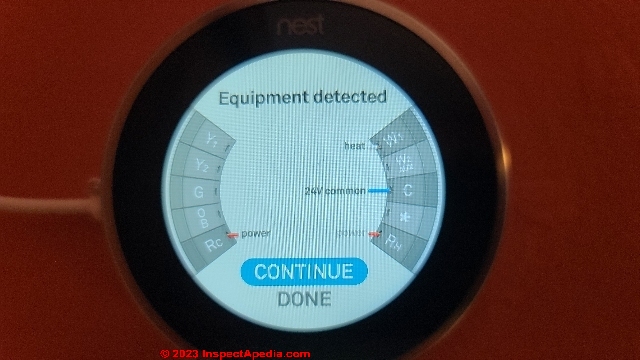
and we'll see that the smart wall thermostat detects just what wires have been connected.
Click to enlarge the photo above and you'll see that the Smarty-Pants Nest Thermostat has detected exactly the two wires we just connected, the black C wire and the red Rc wire that we showed in our earlier photograph.
If when re-connecting the Nest thermostat to its base you do NOT see that it has detected the wires that you connected, then there is a connection problem (or you forgot to plug-in the AC adapter).
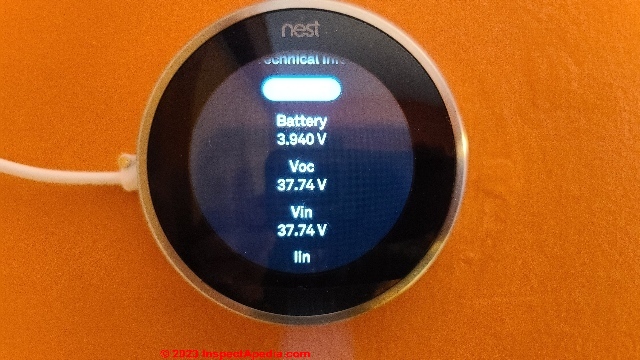
Since all of the thermostat wire connections look good, we let the Nest continue ... it displays its technical information and then
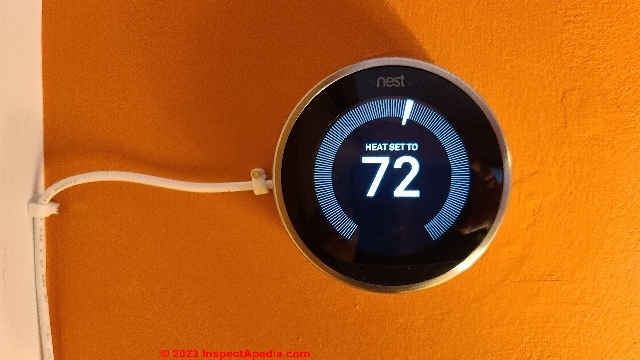
we see that the Nest thermostat display looks perfectly normal, sensing room temperature at 72 degF.
If we turn the temperature up (rotating the thermostat outer bezel to the right or clockwise) you'll see the temperature number go up accordingly and when the heater turns on, the thermostat display will be orange in color.
...
InspectAPedia.com is an independent publisher of building, environmental, and forensic inspection, diagnosis, and repair information provided to the public at no cost.
In order to absolutely assure our readers that we write and report without bias, we do not sell any products or services, nor do we have any business or financial relationships with any manufacturer or service provider discussed at our website.
...
Continue reading at Nest C-WIRE KIT FAILURE, DEFECTIVE AC ADAPTER TEST or select a topic from the closely-related articles below, or see the complete ARTICLE INDEX.
Or see these
Recommended Articles
- ADD a COMMON WIRE at THERMOSTATS - How to add a C-Wire to power a thermostat
- Solution #1: CONNECT an EXISTING C-WIRE ALREADY AT the THERMOSTAT
- Solution #2: RUN a NEW WIRE from EXISTING 24VAC TRANSFORMER to THERMOSTAT
- Solution #3: USE AN EXISTING G-WIRE AS C-WIRE
- Solution #4: INSTALL A C-WIRE TRANSFORMER & WIRE KIT
- Nest C-WIRE WASSERSTEIN C-WIRE KIT INSTALLATION DETAILS
- Nest C-WIRE KIT FAILURE, DEFECTIVE AC ADAPTER TEST
- SOURCES of C-WIRE ADD-ON KITS
- OTHER TRANSFORMER KITS NOT for THERMOSTAT C-WIRE
- THERMOSTAT WIRING NEST
- LOW VOLTAGE TRANSFORMER TEST
- THERMOSTAT INSTALLATION STEPS - how to replace or install a new thermostat
- THERMOSTAT WIRING COLOR CODES - methods for identifying which thermostat wire is which if yours have lost their labels or have unclear color codes.
- THERMOSTAT WIRE CONNECTIONS - detailed room thermostat installation & wiring guide for each heating or cooling system type and each thermostat brand / model
- THERMOSTAT WIRE TERMINAL ID CODES / FUNCTIONS - what are the R, W, and other thermostat wire terminals used for?
Suggested citation for this web page
Nest C-WIRE WASSERSTEIN C-WIRE KIT INSTALLATION DETAILS at InspectApedia.com - online encyclopedia of building & environmental inspection, testing, diagnosis, repair, & problem prevention advice.
Or see this
INDEX to RELATED ARTICLES: ARTICLE INDEX to HVAC THERMOSTATS
Or use the SEARCH BOX found below to Ask a Question or Search InspectApedia
Ask a Question or Search InspectApedia
Try the search box just below, or if you prefer, post a question or comment in the Comments box below and we will respond promptly.
Search the InspectApedia website
Note: appearance of your Comment below may be delayed: if your comment contains an image, photograph, web link, or text that looks to the software as if it might be a web link, your posting will appear after it has been approved by a moderator. Apologies for the delay.
Only one image can be added per comment but you can post as many comments, and therefore images, as you like.
You will not receive a notification when a response to your question has been posted.
Please bookmark this page to make it easy for you to check back for our response.
IF above you see "Comment Form is loading comments..." then COMMENT BOX - countable.ca / bawkbox.com IS NOT WORKING.
In any case you are welcome to send an email directly to us at InspectApedia.com at editor@inspectApedia.com
We'll reply to you directly. Please help us help you by noting, in your email, the URL of the InspectApedia page where you wanted to comment.
Citations & References
In addition to any citations in the article above, a full list is available on request.
- In addition to citations & references found in this article, see the research citations given at the end of the related articles found at our suggested
CONTINUE READING or RECOMMENDED ARTICLES.
- Carson, Dunlop & Associates Ltd., 120 Carlton Street Suite 407, Toronto ON M5A 4K2. Tel: (416) 964-9415 1-800-268-7070 Email: info@carsondunlop.com. Alan Carson is a past president of ASHI, the American Society of Home Inspectors.
Thanks to Alan Carson and Bob Dunlop, for permission for InspectAPedia to use text excerpts from The HOME REFERENCE BOOK - the Encyclopedia of Homes and to use illustrations from The ILLUSTRATED HOME .
Carson Dunlop Associates provides extensive home inspection education and report writing material. In gratitude we provide links to tsome Carson Dunlop Associates products and services.


