 Air Handler Blower Unit Cleaning
How to Clean the AHU Blower Assembly & Blower Fan
- POST a QUESTION or COMMENT about how to diagnose & repair problems with the air handler or blower unit / fan assembly in a warm air furnace or air conditioning system
Steps in cleaning air handler or blower unit for A/C or heat pump or furnace systems:
This article illustrates and describes key steps in removing and cleaning the blower fan assembly in an air handler used for air conditioning or heating.
This article series describes Air Conditioning Blower Fan, Cooling Coil, Fan Coil Unit Leaks, Mold, and Filter Problems & Repairs.
InspectAPedia tolerates no conflicts of interest. We have no relationship with advertisers, products, or services discussed at this website.
- Daniel Friedman, Publisher/Editor/Author - See WHO ARE WE?
Air Handling Blower Fan Cleaning may fix no air flow or weak air flow
 Here we describe and illustrate a detailed, thorough cleaning of the blower assembly in an air handler that is used for both heating and air conditioning.
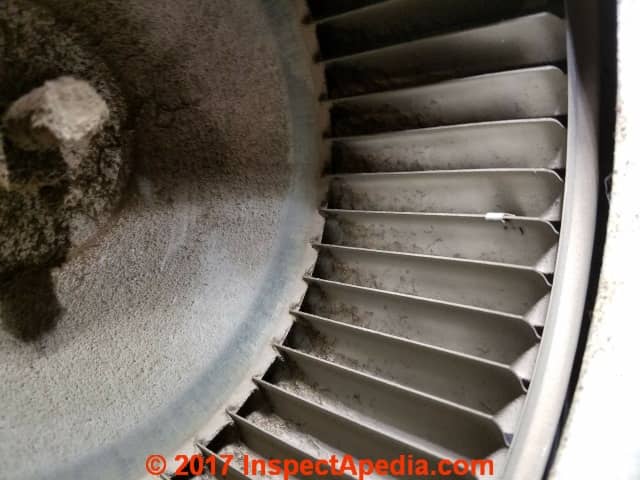
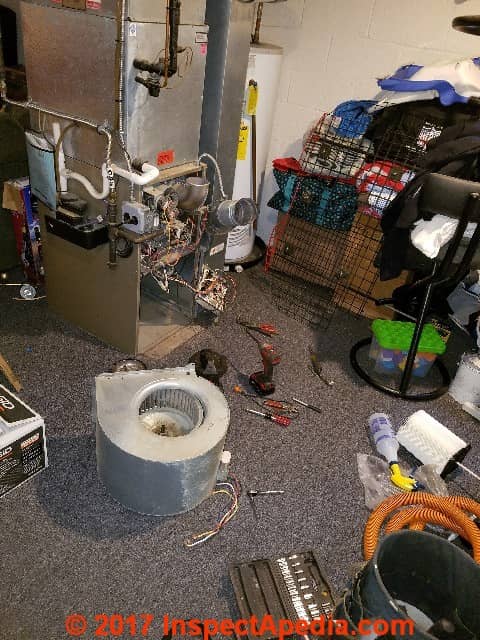
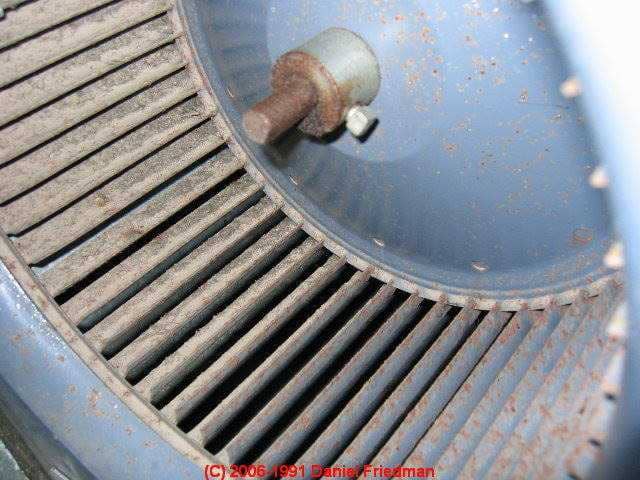
At page top is a dirty squirrel cage fan inside of an air handler unit.
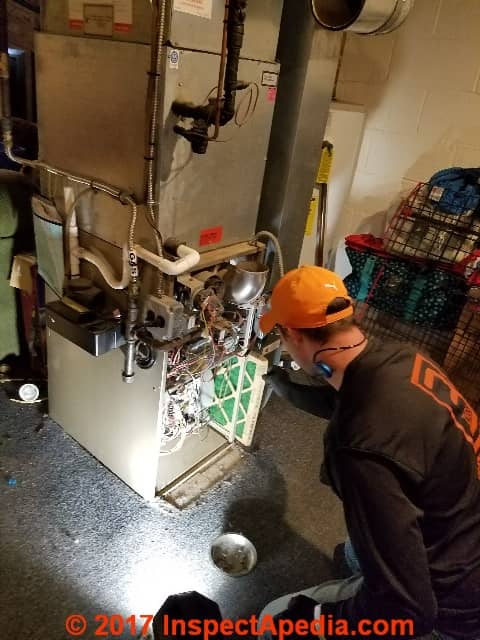
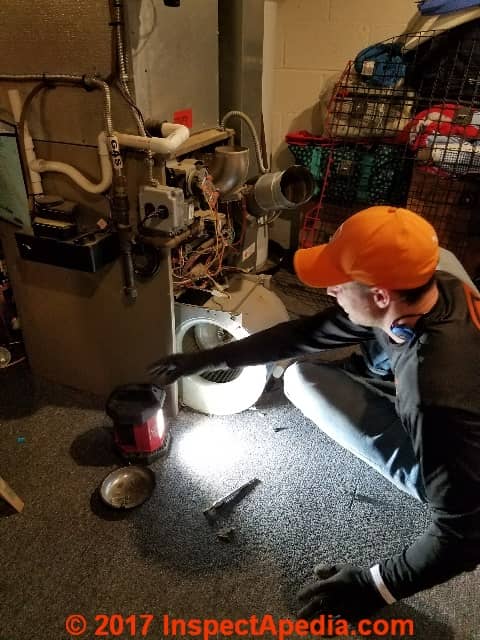
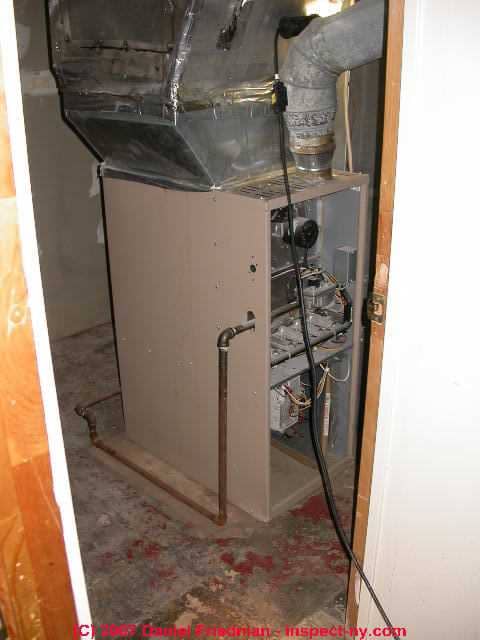
The photo shown just above/left is a typical gas-fired air furnace or air handler unit. If a cooling coil is installed above the air handler then the same system may be in use for both air conditioning and heating.
[Click to enlarge any image]
We noted
that a dirty blower fan reduces the blower assembly air flow rate, increasing heating and cooling costs, and sometimes leading to actual system operating failures such
as FROST BUILD-UP on AIR CONDITIONER COILS
that forms not just frost but solid ice if the air flow rate across even a clean cooling coil is just too slow.
Here in a series of photos we illustrate the basic steps in disassembling and thoroughly cleaning the squirrel cage fan blower assembly as well as the compartment into which the blower fan is placed.
In a typical up-flow air handler return air enters the bottom of the air handler through an air filter.
A squirrel cage blower fan located in the unit bottom rotates to move returning air up through the heat exchanger (that will be hot if the furnace is in heating mode) then further upwards through an evaporator/cooling coil (that will be chilled by refrigerant if the system is in air conditioning or cooling mode).
I have made air flow measurements confirming a 50% or more improvement in the air flow of a heating or air conditioning blower unit when dirt is cleaned from the blower fan assembly.
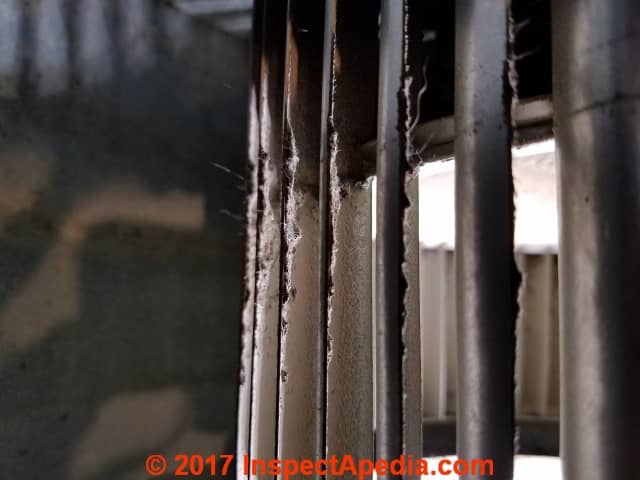
Surprisingly, even a small amount of dirt and debris makes a big reduction in airflow. That's because it doesn't take much dust and dirt to fill the slight curvature of the fan blades in these units.
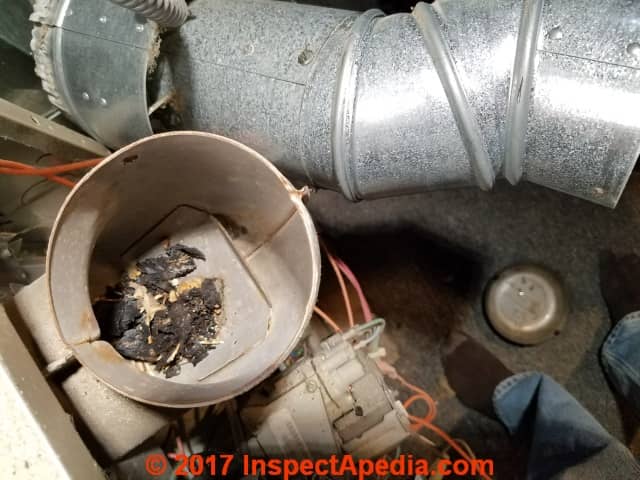
Dead Birds, Rodents in the Flue
Above: even before looking at the blower fan itself the service technician removes the flue vent connector to inspect and if necessary clean that component.
In our photo you can see a nicely dried dead bird who fell down the system chimney or perhaps even entered it deliberately - and could not escape.
Inspect the Air Filter
James Agzigian, 3 Zigs Heating and Cooling, a Cherry Hill New Jersey HVAC service company was kind enough to both permit photographs of the air handler blower assembly cleaning procedure and to point out some key steps in cleaning and reassembling the unit for safe, effective operation.
For U.S. readers in New Jersey, James' contact information is at the end of this article.
Above: the air filter is pulled for inspection and typically, replacement. If there is no air filter in the system we know it has not been operated properly and we expect it to be even more dust and debris clogged than usual.
Watch out: For effective operation of this system it is essential that it never be operated without air filters in place.
See AIR FILTERS for HVAC SYSTEMS.
Notice above that the service tech uses a powerful work light to begin his inspection of the blower unit. There's little chance of doing a great cleaning job if you're working in the dark.
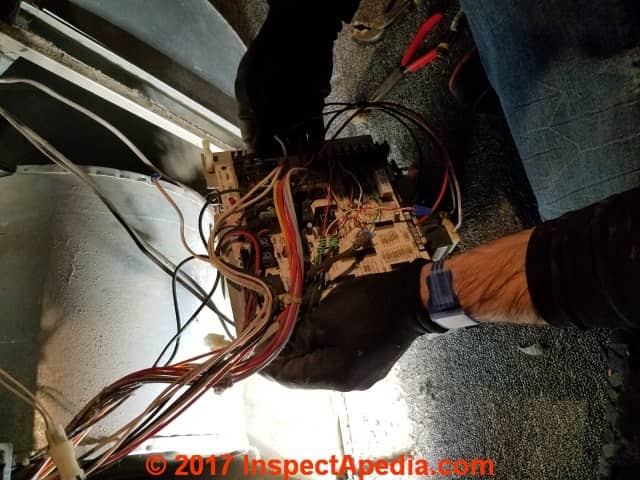
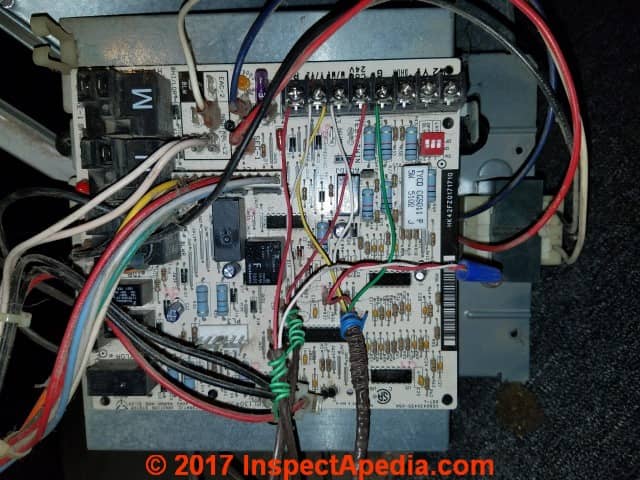
Below: before beginning mechanical removal of the blower assembly it's of course necessary to turn power and fuel off to the heating/air conditioning air handler unit and then to remove circuit boards and wires that are in the way.
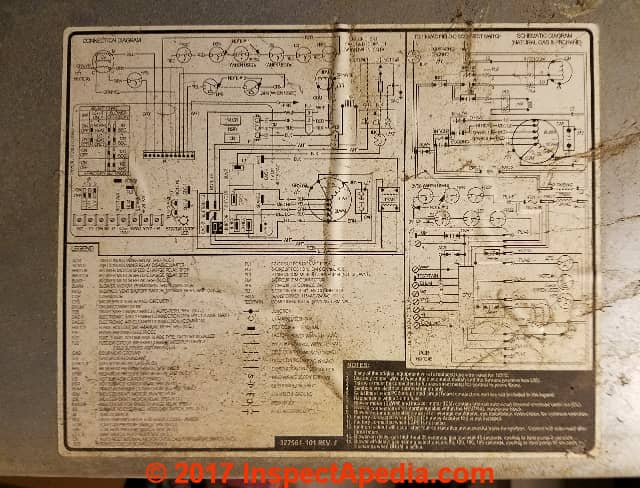
I'd have been compulsively labeling every wire so that I could plug each back in to its original connection point, but an experienced service technician will appear to be moving much faster: he already sees which wires power what and he knows where they connect on the circuit control board.
Someone less experienced may spend time later pouring over the wiring diagram (above) if she forgot to note where the wire connectors belong.
Below: having disconnected the wires and removed the circuit board the technician can un-bolt and slide out the blower assembly from its compartment in the bottom of this air handler unit or AHU.
Both above and in the photo below you can see the whole blower assembly sliding out of the air handler base. Typically there are 2-4 bolts that secure the assembly to the bottom of the AHU.
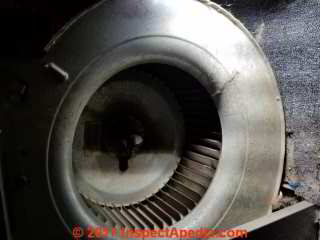
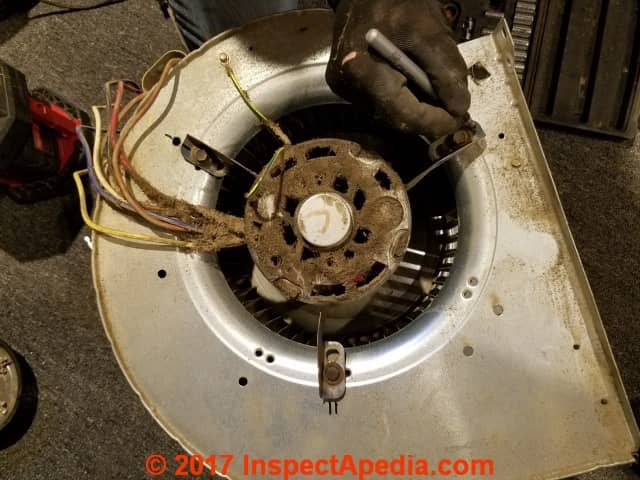
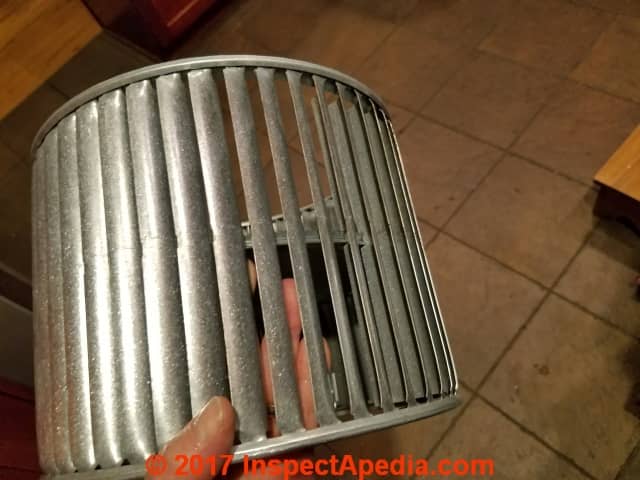
Now let's take a closer look at the squirrel cage fan itself. In our first photo below the fan doesn't look that dirty - not too bad.
But take a look at the second photograph below. There you'll see in cross section how dirt and debris blocks and changes the shape of the curved fan blades.
Below James is pointing out that at some point this blower fan was wet: perhaps from condensate spilling down through the air handler from a blocked condensate drain above.
Water spinning off of the blower fan leaves a center trail of corrosion on the air handler blower enclosure.
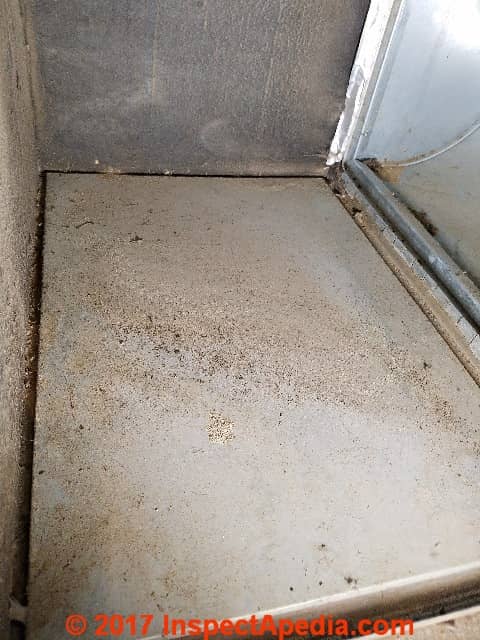
Before further disassembly of the blower fan from its direct-drive motor (some units use a pulley-driven fan motor) we look into the bottom of the air handler return air plenum (below).
The dust and debris needs to be cleaned from this space as well.
This is an area where I sometimes have found dead mice or other little critters, and once a dead skunk: all are a potential bacterial hazard in the system.
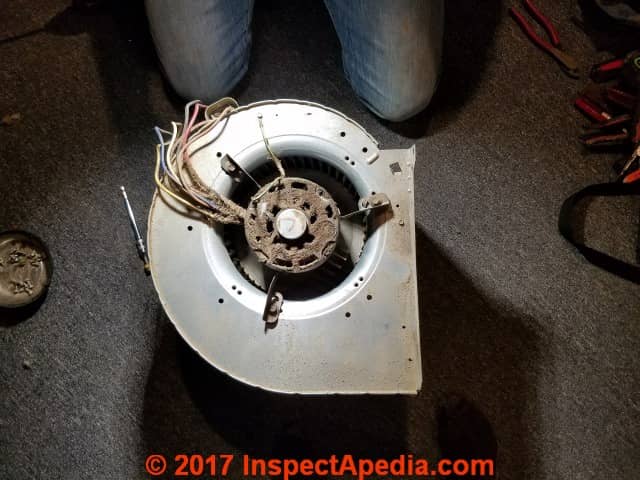
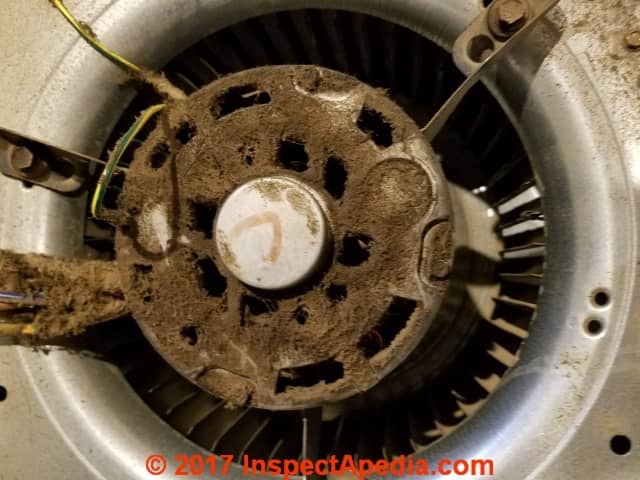
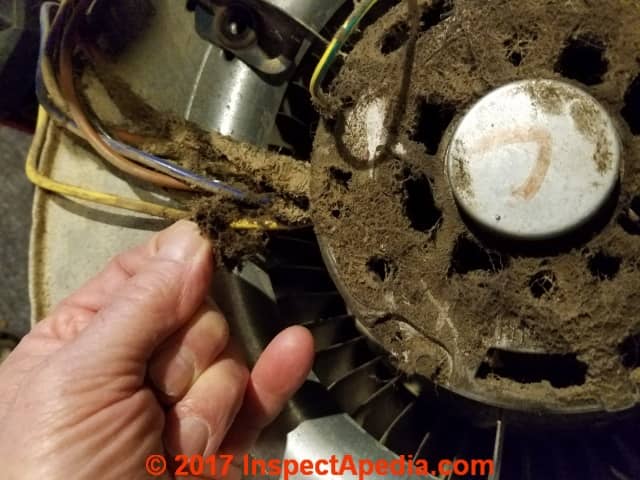
Below James has flipped the blower assembly on its side so that we can see the accumulation of dust and hair on the blower motor.
Excessive debris on the motor's air inlet openings can cause motor overheating and may reduce its life.
Below: the motor for the blower assembly fan is mounted with three bolts to the squirrel cage fan housing (red arrows).
James takes care to number both the motor brackets and their position on the housing. Why?
Well look at all of those holes for other fan mountings. We need to be able to re-assemble the blower fan motor in the factory-position after we've disassembled and cleaned these parts.
I sometimes take a photo of the position of parts and wires too, because on occasion the cleaning process may wash off my re-assembly numbers or marks.
Below you can see in a closer image the thick greasy hair and dust on the blower motor.
Below is Aero Krome, a spray penetrating lubricating product that this service tech uses to loosen jammed bolts or drive shafts - a step necessary clean metal and electrical parts.
OPINION: What about spray foaming the fan instead of taking it apart for cleaning?
Some service technicians try cleaning the blower fan without any disassembly, using a spray foam cleaner - the same product that's used to clean a dirty evaporator coil.
(See DIRTY HVAC COIL CLEANING PROCEDURES). In the case of the evaporator coil, because we don't want to cut a refrigerant line we can't remove the coil for cleaning. But that's not the case with the blower assembly in the air handler.
Not only does blower assembly removal permit more thorough cleaning of all of its parts, that approach avoids dripping messy goop into the bottom of the air handler into areas where it is impossible to clean without removing the whole fan assembly.
So the service tech is simply moving crud from one place in the air handler to another - the AHU bottom - where it will soon be back in the fan assembly.
To clean these dirty parts the service tech took them outside to a work area where they could be sprayed clean and dried.
First the motor and the control board are cleaned, then the round squirrel cage fan itself as well as the fan housing are cleaned thoroughly, then brought back inside for re-assembly.
Below are two photos of the cleaned squirrel cage fan. In our second photo you can see a tiny metal clip in the photo upper left corner.
Watch out: don't remove much less lose a clip like this. This little weight was installed at the factory to balance the rotating fan.
An un-balanced fan will quickly wear out its bearings and thus fail.
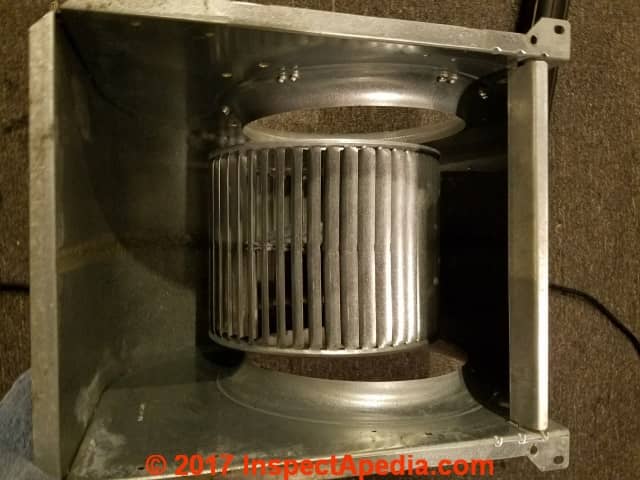
Our first photo below shows the round blower fan set into the fan housing.
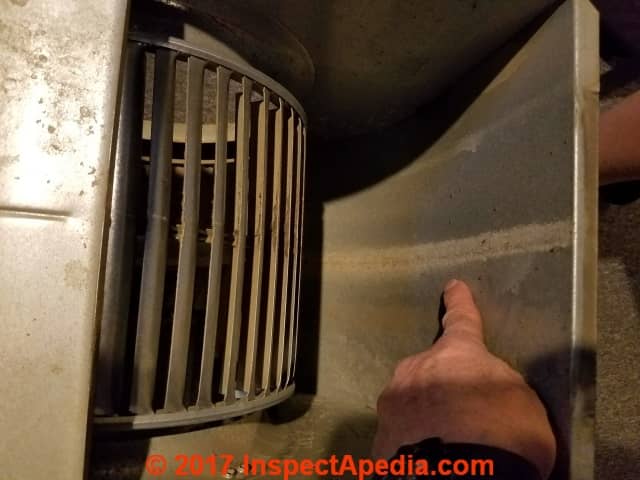
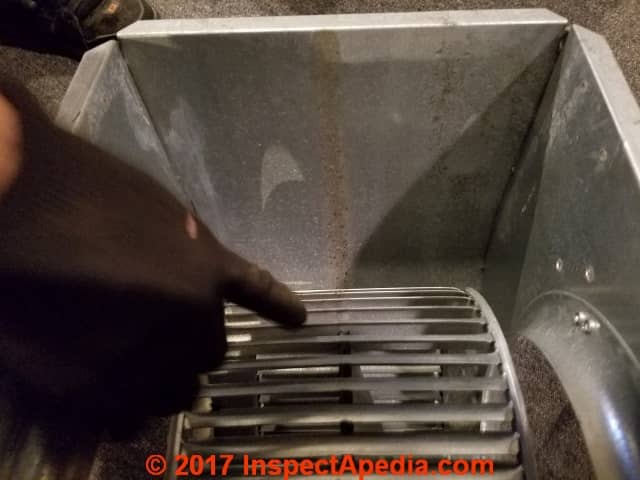
In the second photo James is pointing to the leading edge of the squirrel cage blower fan blades, noting that it's too easy to re-assemble a blower fan with the blades facing backwards!
Replacing the squirrel cage blower fan into its cage it's critical to remember to face the blades in the right direction. James is pointing to the curved blade showing us that it's scoop faces in the direction of rotation.
Putting the blower cage in backwards looks just fine to an amateur but the air output of the blower assembly will be close to nil. It's a lot of trouble to pull the whole assembly apart again to correct this mistake.
Watch out: if you have trouble slipping the blower fan back onto the motor drive shaft, don't force it or you may bend something and you'll be sorry. Rust and corrosion on the shaft can make re-assembly difficult. Try using emory paper to clean the shaft surface until you can slip the fan back in place.
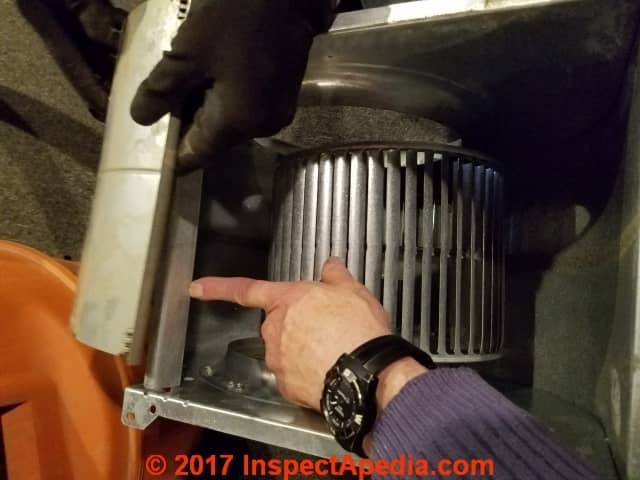
Below James' gloved hand is showing how the air deflector will mount onto the rear of the blower frame and I'm pointing with my thumb to the curved blades are facing towards-it and my index finger points to the direction the curved blades are facing - the direction of rotation.
James notes that on occasion he finds a service tech or DIY air handler cleaner person who just leaves the air deflector off when reassembling the unit, perhaps because he couldn't remember how to position it. Again the result is significantly-reduced blower assembly output.
In our next photo James is replacing the direct drive motor that operates the fan, taking care to mount the motor in the same position as it was before disassembly.
Otherwise you might find that wires don't reach their connection points or the fan may not be properly centered in its housing.
Below: with the squirrel cage fan in place, the motor properly re-mounted onto the blower frame, and the air deflector properly replaced and secured (right side of the blower frame in our photo), James gives the fan a spin to be sure that it rotates freely and evenly - a low-tech test worth making before the blower assembly is replaced in the air handler and the wiring connections restored.
The blower assembly is now returned to the bottom of the air handler and bolted into place, then the control board and wire connections are replaced and, of course, the service tech returns the system to operation and waits to see that it runs properly before packing up tools and leaving the job.
Watch out: If you permit the filters to become very dirty you may need expensive special cleaning or other repairs.
See BLOWER FAN OPERATION & TESTING.
COOLING MAINTENANCE TIP: The HVAC blower assembly should be serviced every two years. Without proper service the system may have no more than a five year lifetime.
- James Agzigian, 3 Zigs Heating and Cooling, heating and air conditioning service contractor in Cherry Hill, New Jersey. Tel: 609-425-8313, Email: zig@threezigs.com, Website: http://threezigs.com/ Special thanks to James for tolerating questions and permitting photographs as he cleaned the air handler blower assembly shown in the photos of this article.
Question: AC Blower Fan Wobbles out of Balance after Cleaning
Air Handler Blower Unit Cleaning
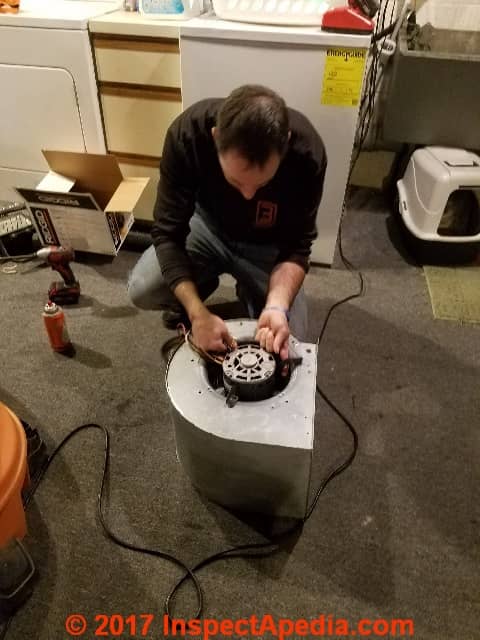
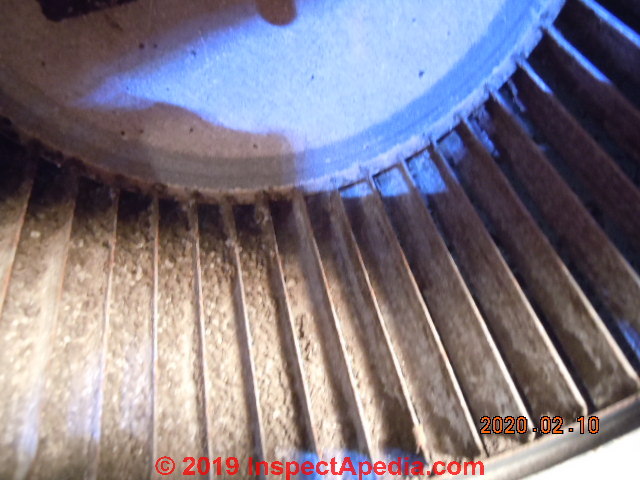
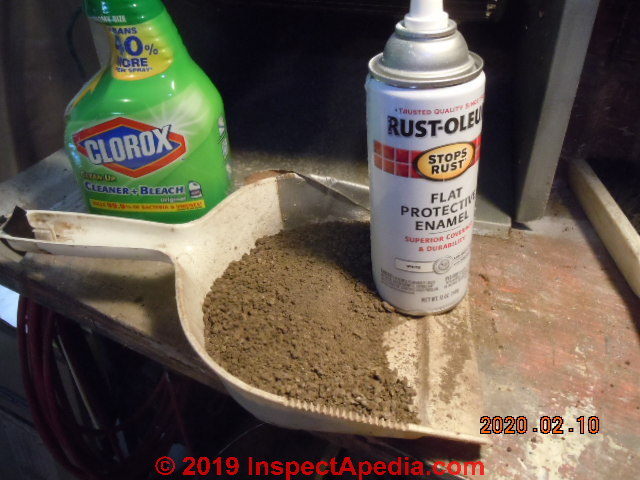
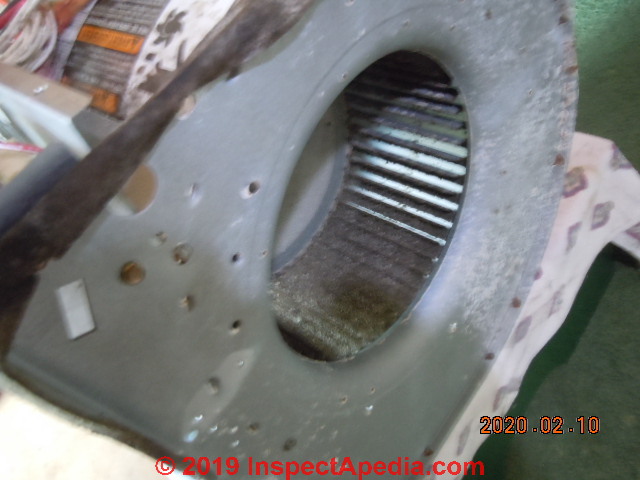
Just saw your website and this topic..Spent the afternoon cleaning my Trane unit and so thought to share a pic or two.
You can see in one pic the enormous pile of dirt from the blower.
No troubles with the re assembly but the fan is wobbly or out of balance just a bit now.
Not noisy now but can hear the air"pulsing" some while standing next to the unit..
Still has the factory motor and fan blades all from a 2005 install.
Feel free to use any pic delivered. - Anonymous by private email 2020/02/12
Reply: check for lost balancing clips or weights on the blower wheel
Thanks Smilin' I will add these photos to our discussion on cleaning blower fan assemblies and will send along that link.
About the HVAC blower fan squirrel cage fan balance problem, we want to address that as else the wobble might ruin the fan assembly, motor, motor bearing &c. especially on direct-drive units.
Have you looked for original blower fan balancing weights or clips that might have gotten moved or simply lost entirely? Often there are simple spring-type clip-on weights along the circumference of the fan.
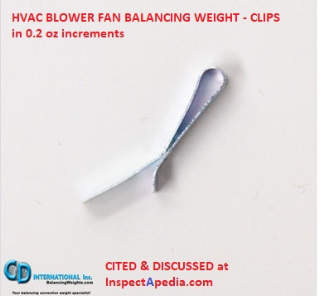
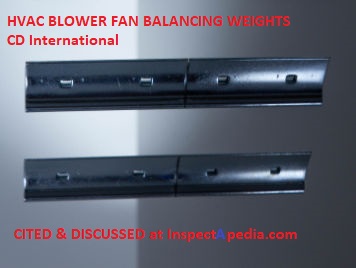
Above: HVAC squirrel cage blower fan balancing clips as provided by CD International, cited below. One or more clips of the proper weight are clipped onto the edge of the squirrel cage blower fan assembly to correct out-of-balance wobble. It is possible to disturb, move, or lose one of these clips during cleaning.
These are sold in fractions of an ounce weight (0.2 oz increments). (Larger blowers and commercial units might have longer curved weights that clip onto the curved blower fan blade rather than onto the edge of the fan rim.) I'll illustrate in attachments.
- have you double checked that there's not a bad bearing that's causing wobble?
- is it possible there's uneven removal of dirt or debris?
- are there bent components?
- is this a belt-driven fan or direct drive? If belt, check the pulleys for alignment and tightness and the belt for damage
These HVAC squirrel cage blower fan balancing weights are provided by HVAC suppliers including the source of the photo excerpts of blower fan weights above:
- C D International, Inc., 5550 Shimerville Roadn Clarence, NY 14031 USA, Tel: 716-741-8851 Website: https://www.balancingweights.com/standard-squirrel-cage-clips/?sort=priceasc
- Mr. Shims, Tel: (800) 72-SHIMS Website: https://mr-shims.appspot.com/balancingweights.jsp Email: info@mrshims.com
- Reliability Direct, Website: https://www.reliabilitydirectstore.com/ Tel: (281) 957-5283
- Your local HVAC supplier
Reader follow-up: balancing clips in place, suspect failing fan bearing
"...have you looked for original blower fan balancing weights that might have gotten moved or simply lost entirely..."
Ans: I noticed the clips right away..has one larger and one smaller..made sure they were still in place after scraping / cleaning.
Did notice that when checking for proper balance, no matter what starting point and no matter how many times the fan is spun, it always stops a little hard and has a slight movement, maybe 3/8 inch additional rotation.
Probably the output bearing. Feels a little tiny bit rocky when moving the blade by hand.
Fan may have been out of balance for some time with dirt deposits and caused a little spot in the bearing; or, fan motor "sealed bearing" just normal for age and use..
Went in and re tightened some sheet metal mount screws...can't really "hear" air pulsing and is running very quiet. Seems like a good mate between the fan casing output and the duct.
But, when u place a hand on the cabinet you can feel the fan slightly.
So, will drive it till the wheels fall off, kinda like my old Ford Bronco..
Reply: Mark the orignal location then try adjusting the balancing spring-clip weight location on your wobbling blower fan
Well the old Ford Bronco had a very long live and a large following of enthusiasts.
I agree that from your description it sounds like a failing bearing.
Nevertheless you might want to try this:
- Mark the original location of the existing spring-clips on your blower fan, then try moving one of them to one side by about 2-inches.
- Run the fan and observe if the balance is better or worse.
- A bit of experimenting might let you fine-tune the balancing clip location to smooth out the fan operation.
...
Reader Comments, Questions & Answers About The Article Above
Below you will find questions and answers previously posted on this page at its page bottom reader comment box.
Reader Q&A - also see RECOMMENDED ARTICLES & FAQs
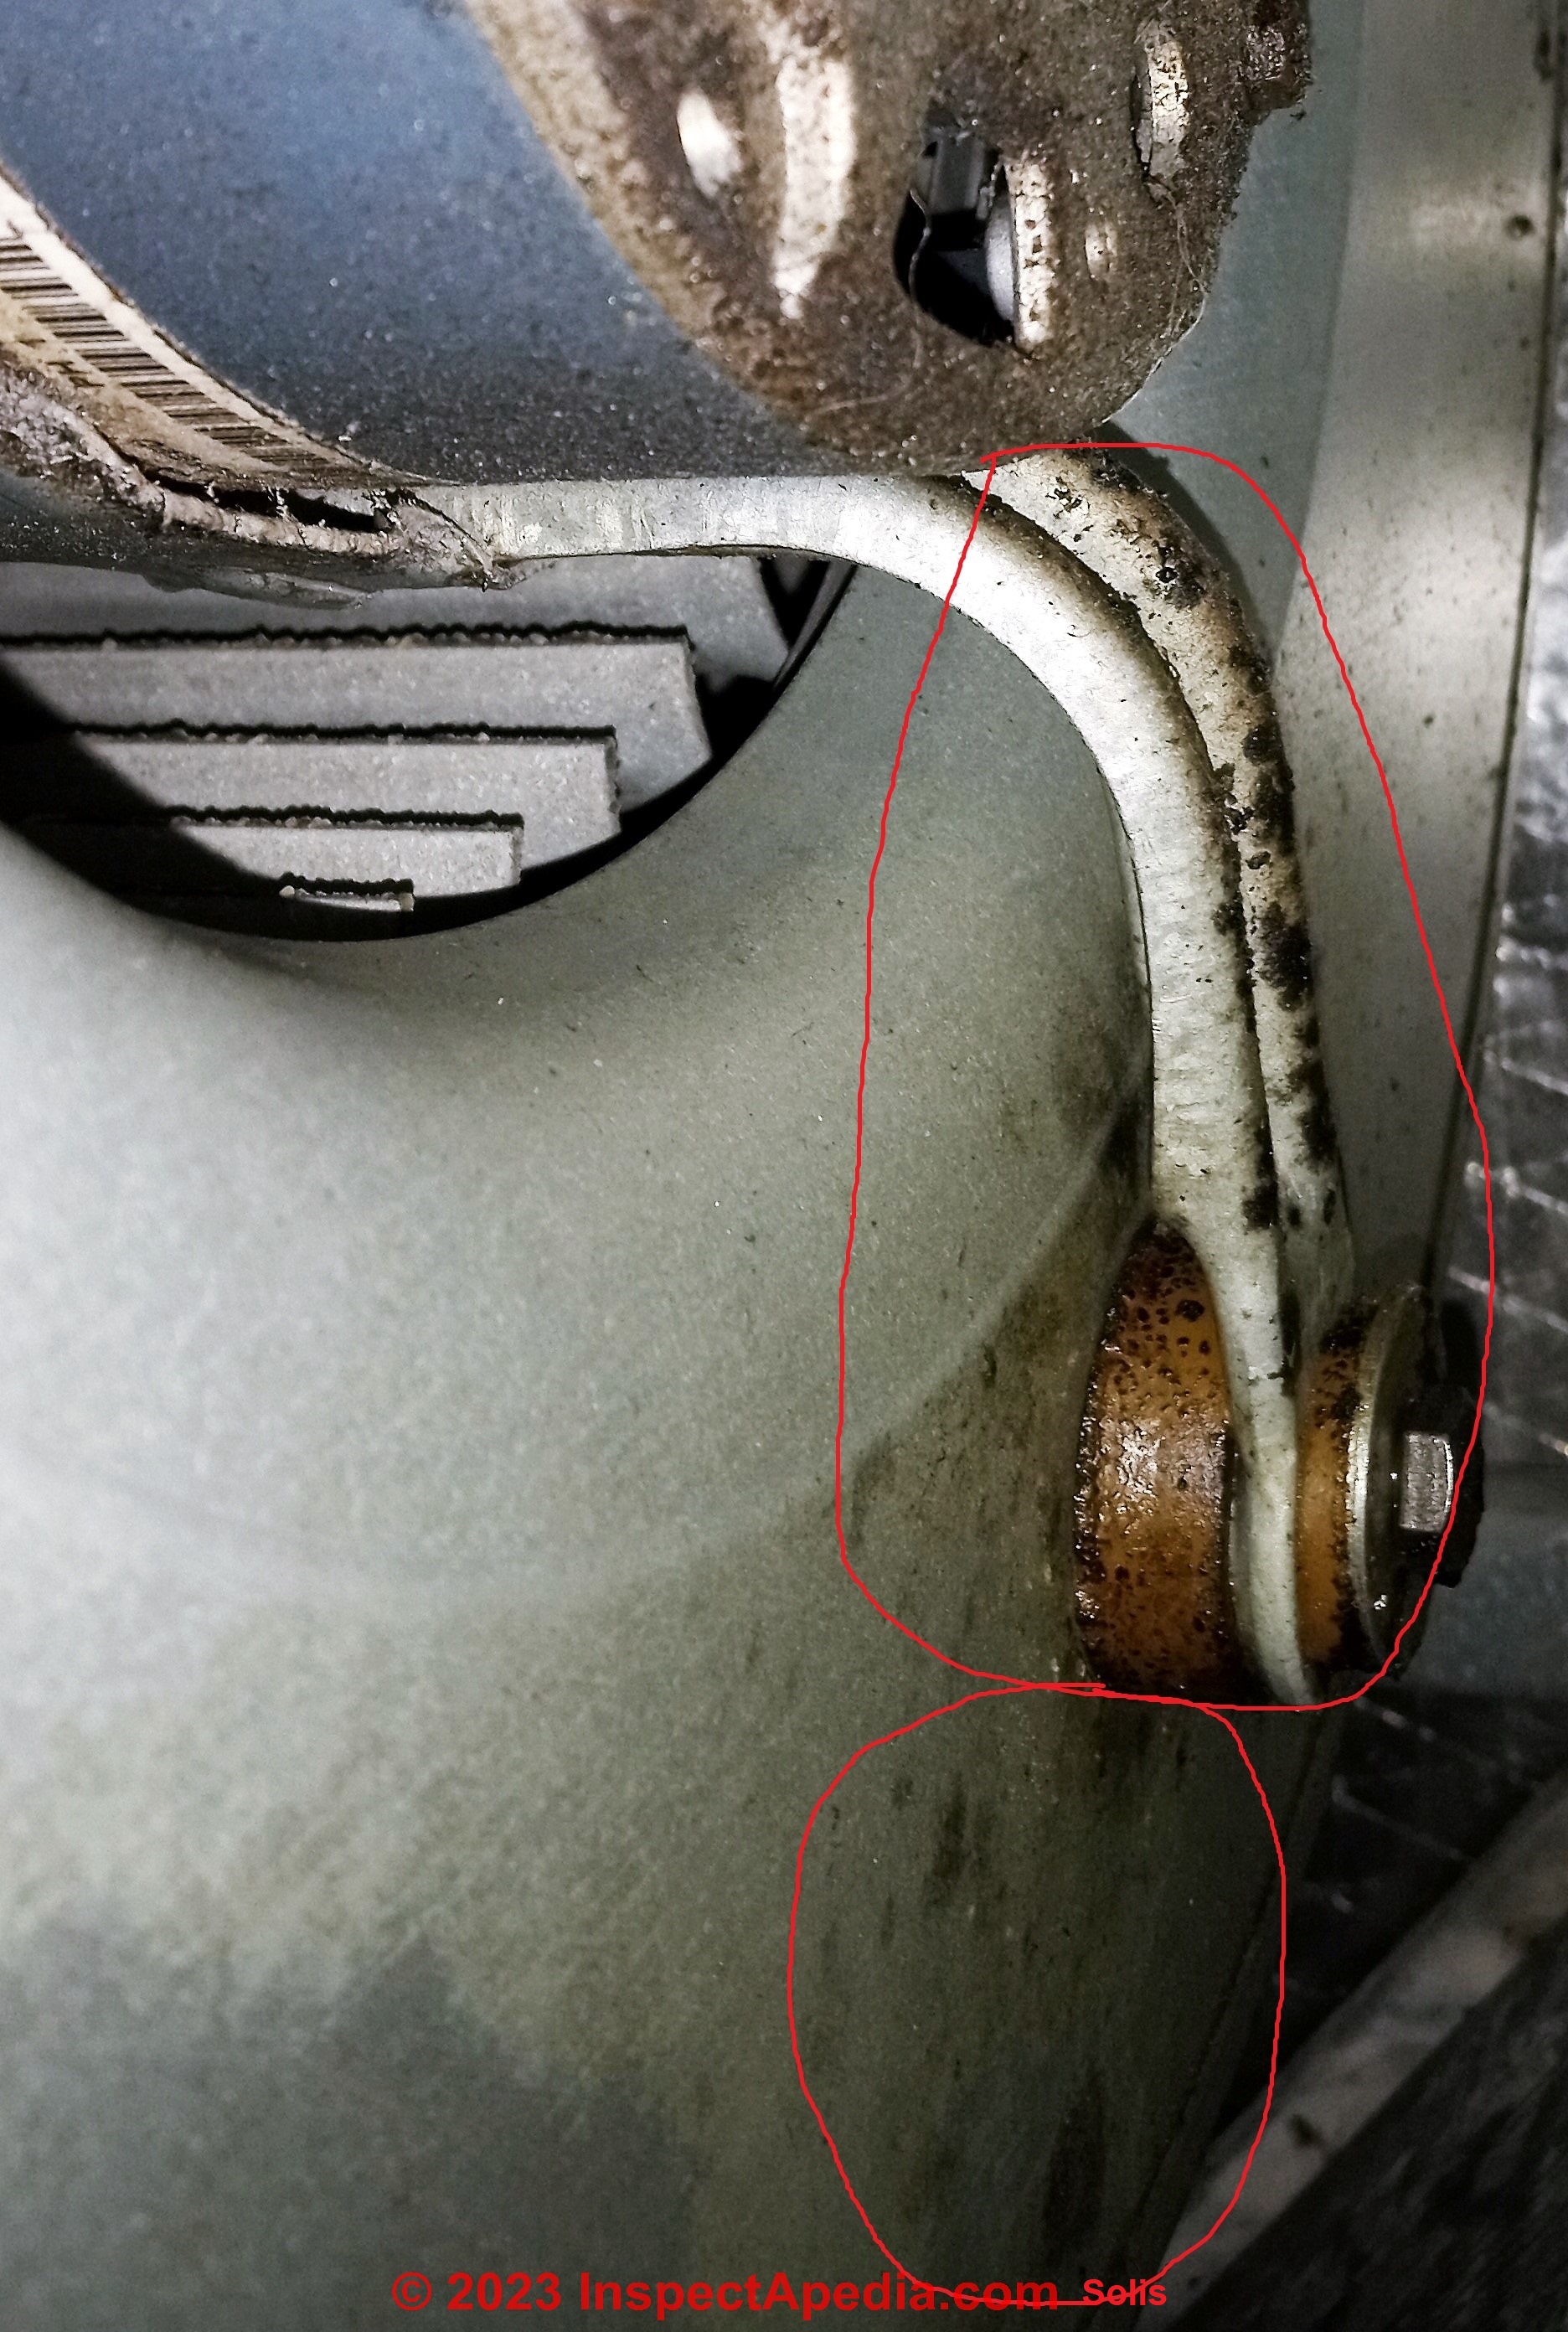
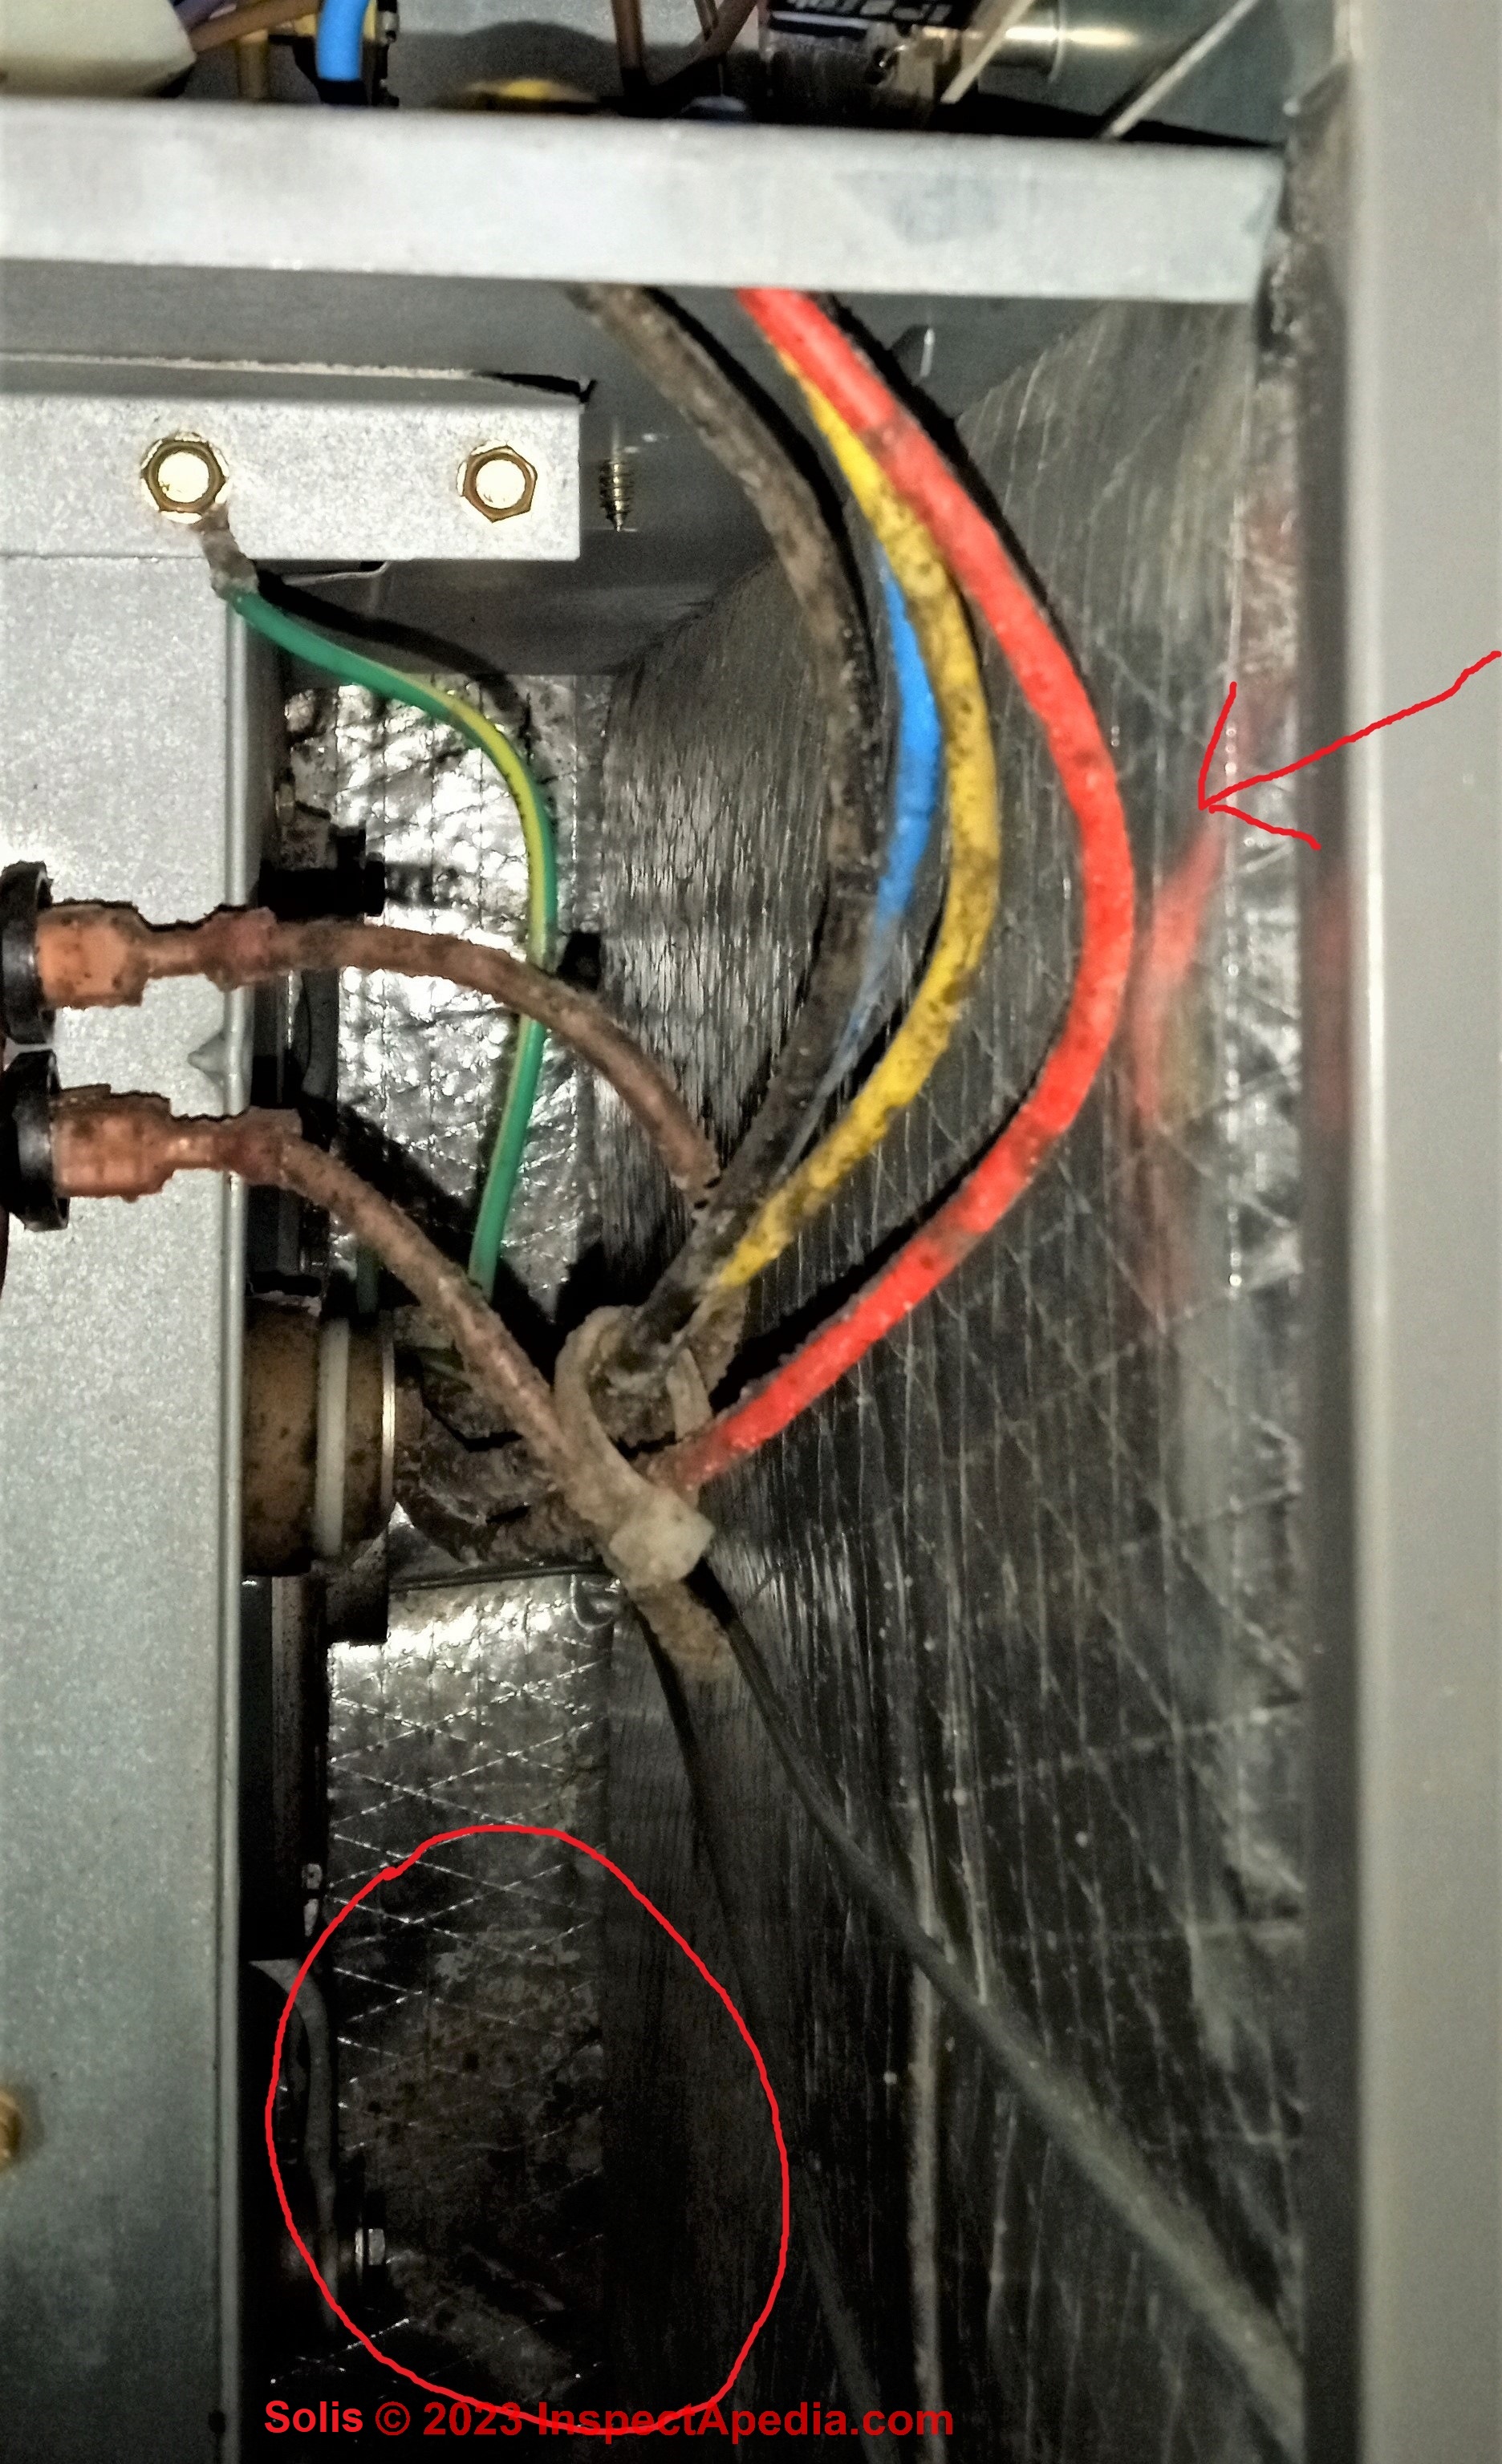
Question: Is my health at risk due to the mold in the air conditioner air handler in these photos?
Hello and thank you. I just found your site and I'd like to know how to donate if possible. However, to my question, if I may:
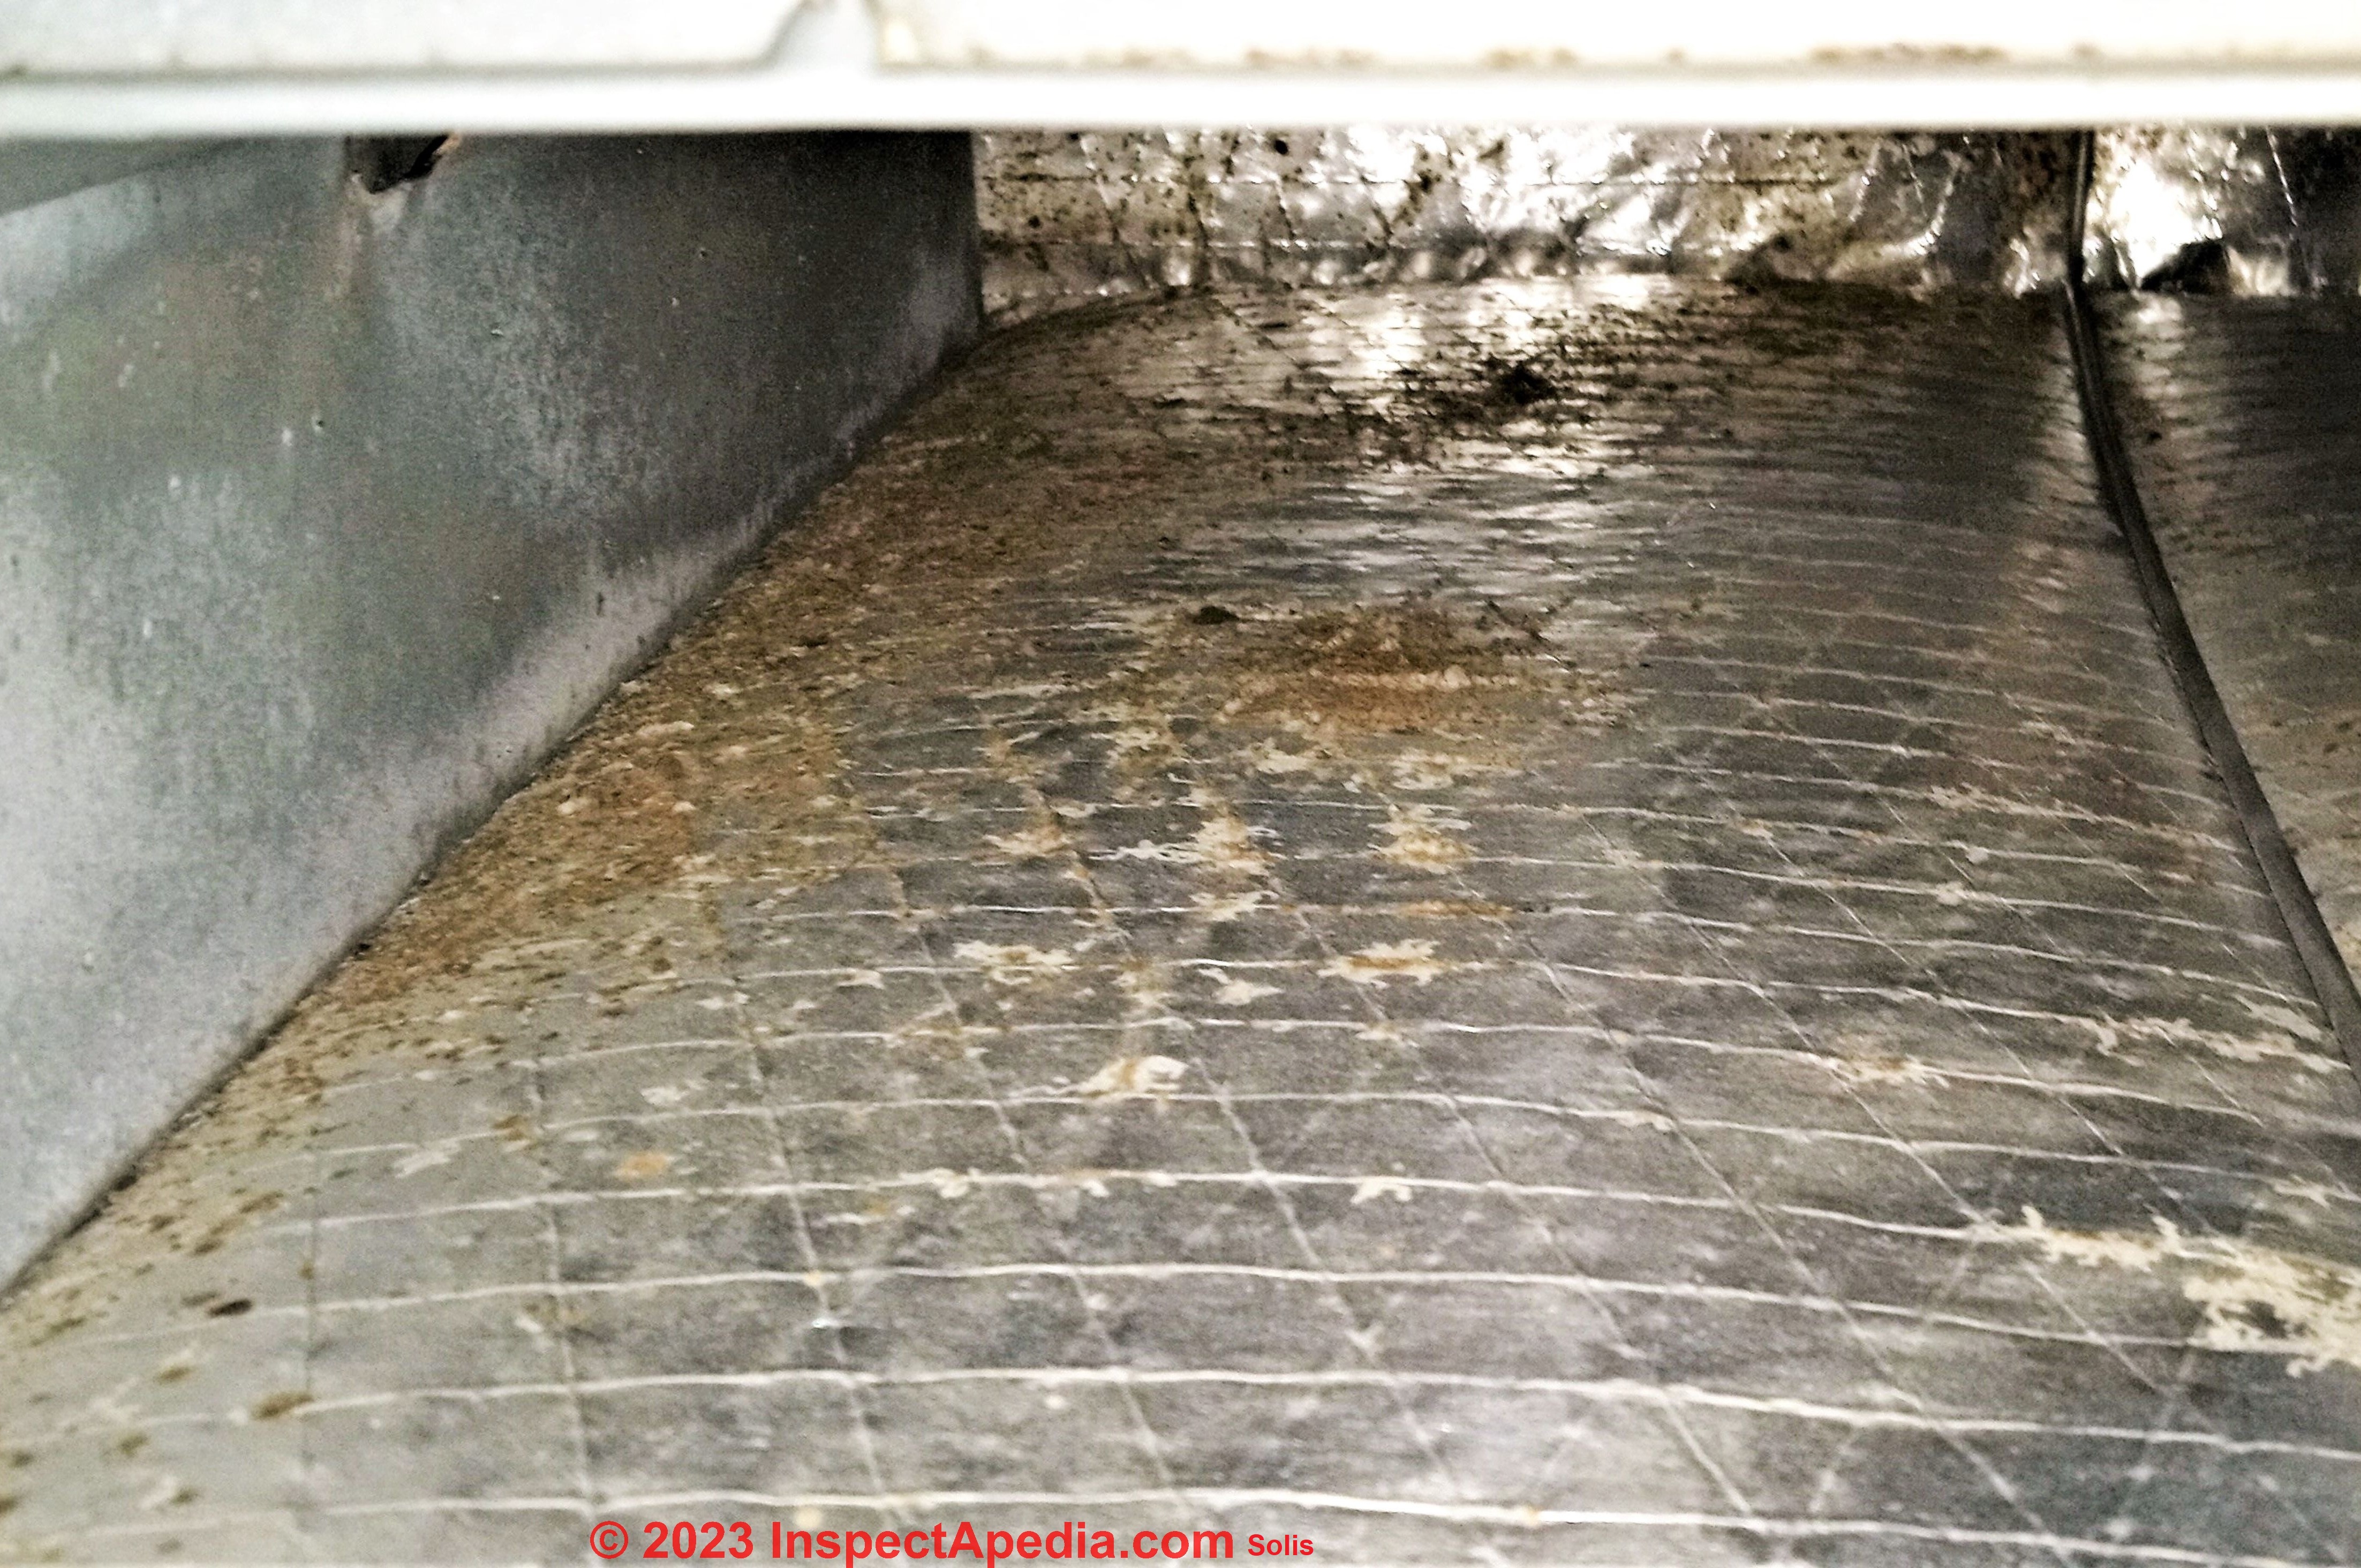
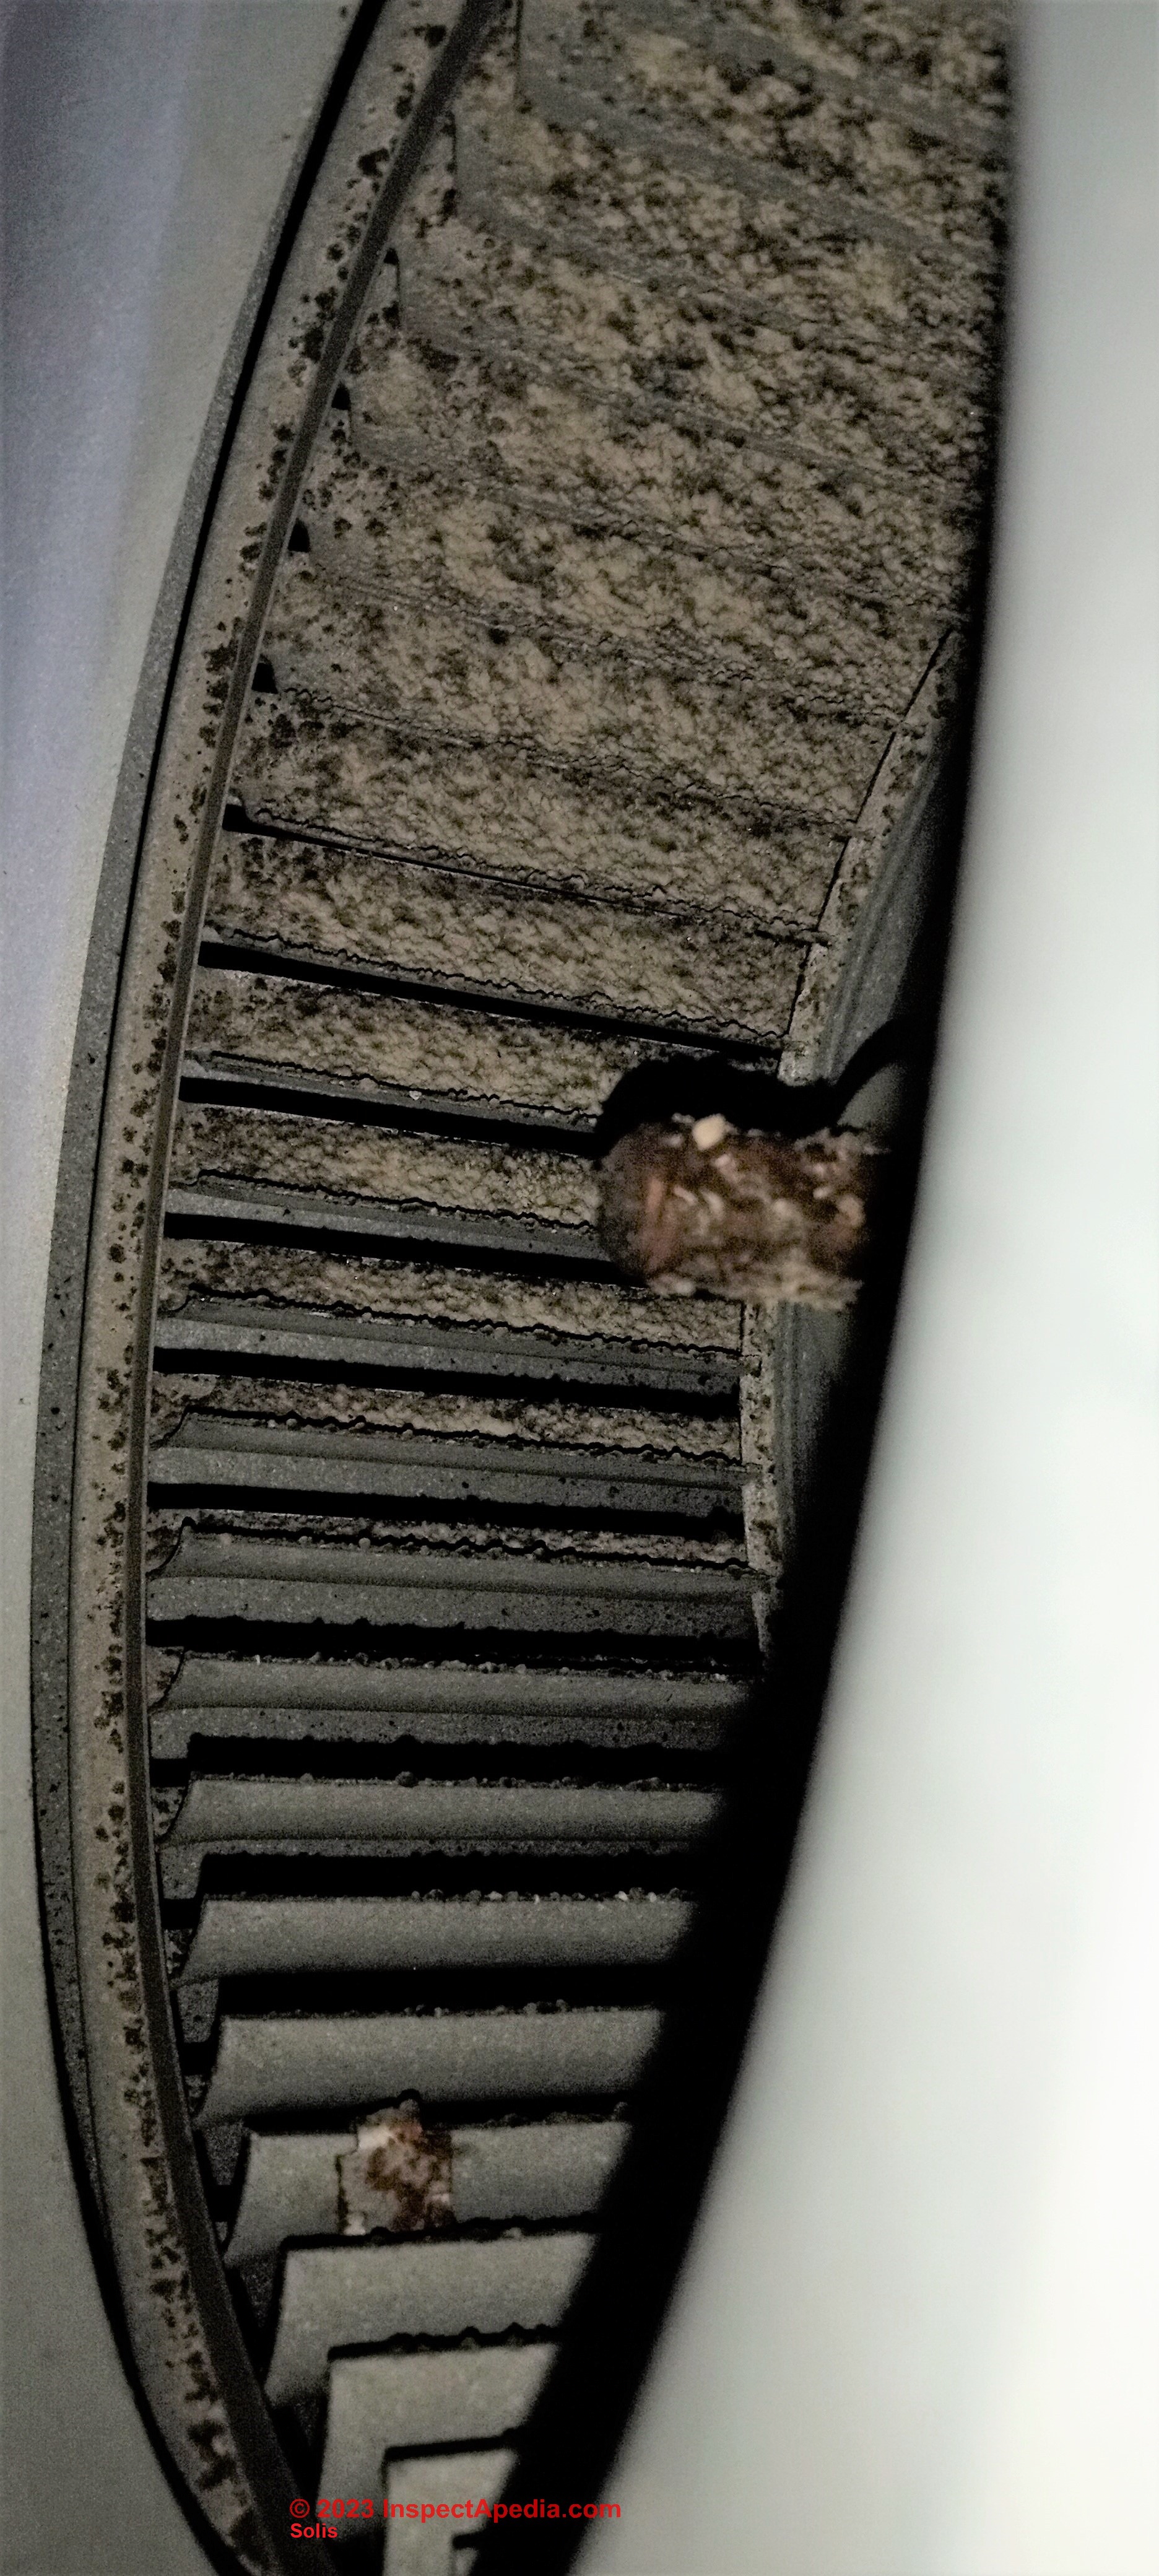
Can you confirm if it's possible to identify mold by an ordinary photograph? (See attached photos 1 thru 4.) I am renting a home where our AC unit was recently repaired, but before the repair, the contract technician identified mold in the air handler.
(That would be the evaporator coil, foil insulation on walls, blower fan, etc.)
The property management then had another company only clean the evaporator coil, claiming from photos that the remaining visible contamination is not mold and "everything that needed to be cleaned was done."
Please note, I am a senior, disabled Vet with serious health issues, and I'm concerned about any continued health risks caused by contamination, whether mold or otherwise.
Please also note that my wife and I are looking to buy our own home quickly due to this concern with our rental. - Anonymous by private email 2023/04/26
Moderator reply: bits of mold on AC blower blades, insulation, wires vs contaminated blower compartment & ductwork
Thank you for the questions and photos - working on a reply for you may help us help other readers facing similar questions.
Yes, it's often possible to recognize mold or probable-mold from photographs, but keep in mind that from just the photo we have no idea of just what mold genera/species are present and thus can't be confident of the level of hazard based on the mold's identity.
In general, however, large areas of mold are more-likely to be hazardous, and there's rarely just one mold genera/species present if mold contamination is observed. When there is less than 30 square feet of contiguous moldy material, hiring a mold remediation professional is not necessary.
I can see a very dirty air handler blower fan - thick with house dust and possibly a bit of surface mold growth - the property manager may not care, and you may be moving, but you can take satisfaction that they'll be spending probably two or three times as much as necessary for heating or cooling any of their property that uses a very dirty blower like that - mold concern aside.
I see what looks like rather small areas that include a bit of mold - of unknown genera/species in your photos; the total area looks trivial and would not, alone, explain a building-related illness.
You say you're disabled but didn't give specifics. If you are someone with respiratory illness it makes sense to be extra careful about exposure to mold as well as to other airborner irritants, allergens, etc.
But in general, the bits of what might indeed be mold on those wires is simply too small to be, itself, a health concern unless you put your finger into the mold and then into your eye or into an open sore.
General OPINON: Unless *other* conditions in your rental are thought to be making you sick, the conditions in your photos and the air handler would not be a good reason to rush into buying a home - where making a mistake or being too hasty can be more costly. Hire an experienced home inspector, one who works for you, not the realtor, and get a thorough inspection of the property so that you have a sense of priorities of repair.
BLOWER FAN ASSEMBLY CLEANING - above on this page, describes cleaning a dirty / moldy air handler unit thoroughly.
Our photos during cleaning a rather moldy split system air handler unit
SPLIT SYSTEM AC MOLD CONTAMINATION REMOVAL lets you can see what more-substantial mold looks like on the air handler blades.
Watch out: if there have been leaks and mold growth in the ductwork of your present home or if there are larger areas of mold in the air handler's air path (beyond what we could see in the photos) that could be a more-serious and immediate health concern.
Trouble cleaning the squirrel cage blower fan assembly
I have a squirrel cage fan cleaning problem. The fan is in a Mitsubishi, Mr. Slim MSZ-A15NA indoor unit. The squirrel cage fan can not be removed for cleaning due to problems with the installation location.
Twice a year, the fan blades get caked with dirt, reducing airflow.
To clean it, I 1st have to place a large plastic sheet below the unit to catch all the drippings.
I then use Frost King Foaming Cleaner, which I spray directly onto the fan blades, from the bottom of the discharge vent as I manually rotate the fan.
After letting it soak, I then flush the cleaner and dirt out with a pump spray bottle filled with vinegar. I usually have to repeat this messy endeavor 2 or 3 times to remove the majority of the dirt build-up.
While the above procedure gets the job (partially) done enough to restore airflow, I'm trying to find an alternative spray cleaner that would do a better job. Mitsubishi engineers had no suggestions other than to point out that the build-up comes from pollution within my house.
But other than humidity, there is little else that I know of to cause the build-ups as I also have supplemental filtration - Filtreat Foam covering the air intake ducts on the unit and a pair of German made, VENTA Air Wash units placed on the floor.
My question, other than asking if you know of an alternative spray cleaner that would do a better job, is if you can offer any other better solutions. Thank you for your time.
Karl Baldwin, kbaldwindw@hughes.net 540-743-2062
Reply:
Karl
I think you are using the right cleaner and I agree that it is a lot of work and a mess.
And I agree that even a small amount of debris on the blades of a squirrel cage fan can significantly cut airflow - I've measured CFM rates before and after cleaning.
In my opinion you should not have to clean the fan very often, certainly not annually.
See the detailed procedure
at BLOWER FAN ASSEMBLY CLEANING
I would look carefully at these sources of crud that can clog a blower fan.
- leaks in the return duct system that pick up crud from somewhere enroute
- missing, improperly fitted and leaky, or poor filtration level at the return air inlet filter
- damaged fiberglass insulation inside the ductwork
- debris generators in the air handler such as a fraying belt on a blower assembly or oil or grease leaks nearby
- leaks into the air handler return plenum or blower compartment
If the problem were an unusual source of particulate debris in your building itself, we ought to be able to see that right on the air filter.
There is a chance that a lab analysis of the air filter contents might point to an unusual particle source.
Use our email at the CONTACT link at page bottom if you want to arrange a pro-bono forensic lab examination of a dust sample from your blower fan blades and/or the filter following the procedure I document at
Is it risky to clean a squirrel cage fan in an air handler?
Hi can you tell me if cleaning the squirrel cage in an older unit is a risk because disassembly can cause the unit to work incorrectly? And if so should it be left highly dirty or replaced at that point? On 2020-10-01 by Alan
by (mod) - Dis-assembling a blower unit squirrel cage fan for cleaning
Alan
Dis-assembling a blower unit squirrel cage fan for cleaning is a widely-used service procedure and cleaning it can make a very significant improvement in air-flow.
The unit is designed to be able to be removed, cleaned, lubricated, and reinstalled.
If disassembly shows that there was a warn-out bearing or a damaged blower fan then in that case the blower assembly needs replacement.
How to access a pre 1980's HVAC Squirrell and Blower Motor
Been searching the web for info on how to access a pre 1980's HVAC Suirrell and Blower Motor that is enclosed and settig back from the Aor Handler, making it difficult to get to. Do I remove portioj of interior wall or what?
Sure appreciate your web, so that I may find a solution. Present Unit is 20 urs old buit still working, but hearing faint noise recently. Can you suggest something to a senior, Thjanks On 2020-05-20 by Bill Knapek
by (mod) -
Bill
I don't know what brand and model air handler you're working-on so I can but wave arms and speculate.
Often the blower is impossible to work-on while it's inside the air handler;
Some of those models mount the blower on slider-rails so that you can loosen a couple of bolts and slide it out for access.
On other models you unbolt the unit from the cabinet floor and just drag it out.
Senior to senior speaking, that is, don't get ripped on a sharp sheet metal corner.
Refrigerant line or coil freeze-up vs air flow vs dirty fan
I recently found your site and the information I've looked at has been informative and thorough.
I'm not sure if this comment is attached to the article I'm referencing, but in case it is not I am referring to Air Handler Blower Unit Cleaning with all the photos of the process done by 3 Zigs.
My situation is an original unit in a house built in December 1998. The unit is a 5-ton, 10 SEER Trane with a gas furnace. The blower assembly was replaced in Aug. 2008. The indoor/outdoor components have had annual maintenance most years.
I am expecting to replace the system in the next 1-2 years but am trying to hold off as long as possible. The refrigerant lines started to freeze up in mid-July due to a low R22 level in the system, which I knew from the year before. It was serviced and 5.5 pounds of R22 added.
Since then it has not been freezing up and keeping the 3-story house comfortable enough if not perfect on the 3rd floor. I'm wondering if the kind of blower unit cleaning you describe would be worth the cost to extend the life of the system.
I live in West Chester, PA, west of Philadelphia. If you think this cleaning would be beneficial, what would be a fair price to pay for it? Thanks for any guidance. On 2019-08-14 by Nathan Huang
by (mod) -
Take a look at the airflow or air output;
Take a look visually at the blower fan itself for the amount of dirt on the squirrell cage fan blades.
As I've noted, you can as much as double the air output if the blower is dirty;
Thank you to our readers for their generous comments
On 2018-10-22 by Sherwood Kressley
Thank you for all the wonderful information!
...
...
Continue reading at BLOWER FAN OPERATION & TESTING or select a topic from the closely-related articles below, or see the complete ARTICLE INDEX.
Or see these
Recommended Articles
- AIR FLOW TOO WEAK
- AIR HANDLER / BLOWER UNITS - home
- AIR HANDLER BLOWER DOORS - how to find and open the blower compartment door or cove
- BLOWER FAN ASSEMBLY CLEANING
- BLOWER FAN OPERATION & TESTING
- BLOWER FAN SPEED SETTINGS
- BLOWER LEAKS, RUST & MOLD
- DIRTY A/C BLOWERS
- DIRTY COOLING COIL / EVAPORATOR COIL
- DIRTY HVAC COIL CLEANING PROCEDURES
- FROST BUILD-UP on AIR CONDITIONER COILS
- MANUALS & PARTS GUIDES - HVAC - home
- RETURN AIR, INCREASE
Suggested citation for this web page
BLOWER FAN ASSEMBLY CLEANING at InspectApedia.com - online encyclopedia of building & environmental inspection, testing, diagnosis, repair, & problem prevention advice.
Or see this
INDEX to RELATED ARTICLES: ARTICLE INDEX to AIR CONDITIONING & HEAT PUMPS
Or use the SEARCH BOX found below to Ask a Question or Search InspectApedia
Ask a Question or Search InspectApedia
Questions & answers or comments about how to diagnose & repair problems with the air handler or blower unit / fan assembly in a warm air furnace or air conditioning system .
Try the search box just below, or if you prefer, post a question or comment in the Comments box below and we will respond promptly.
Search the InspectApedia website
Note: appearance of your Comment below may be delayed: if your comment contains an image, photograph, web link, or text that looks to the software as if it might be a web link, your posting will appear after it has been approved by a moderator. Apologies for the delay.
Only one image can be added per comment but you can post as many comments, and therefore images, as you like.
You will not receive a notification when a response to your question has been posted.
Please bookmark this page to make it easy for you to check back for our response.
IF above you see "Comment Form is loading comments..." then COMMENT BOX - countable.ca / bawkbox.com IS NOT WORKING.
In any case you are welcome to send an email directly to us at InspectApedia.com at editor@inspectApedia.com
We'll reply to you directly. Please help us help you by noting, in your email, the URL of the InspectApedia page where you wanted to comment.
Citations & References
In addition to any citations in the article above, a full list is available on request.
- Thanks to Mark Cramer, Tampa Florida, for assistance in technical review of the "Critical Defects" section and for the photograph of the deteriorating gray Owens Corning flex duct in a hot attic. Mr. Cramer is a Florida home inspector and home inspection educator.
- Thanks to Jon Bolton, an ASHI, FABI, and otherwise certified Florida home inspector who provided photos of failing Goodman gray flex duct in a hot attic.
- Wikipedia Web: https://www.wikipedia.org/ provided background information about the definition of HEPA and airborne particle interception.
- [5] US EPA - Mold Remediation in Schools and Commercial Building [ copy on file as /sickhouse/EPA_Mold_Remediation_in_Schools.pdf ] - US EPA
- Modern Refrigeration and Air Conditioning, A. D. Althouse, C.H. Turnquist, A. Bracciano, Goodheart-Willcox Co., 1982
- Principles of Refrigeration, R. Warren Marsh, C. Thomas Olivo, Delmar Publishers, 1979
- Refrigeration and Air Conditioning Technology, 5th Ed., William C. Whitman, William M. Johnson, John Tomczyk, Cengage Learning, 2005, ISBN 1401837654, 9781401837655 1324 pages
- Air Conditioning SEER - New DOE Air Conditioner and Heat Pump Efficiency Standard
How to diagnose and fix an air conditioning system that is not working
Since the failure of an air conditioner to turn on, loss of air conditioner cooling capacity, reduced air conditioning output temperatures, loss of cool air supply, or even loss of air flow entirely can be due to a variety of problems with one or more components of an air conditioner or air conditioning system, after reviewing the lost air conditioner cooling diagnosis procedures described in this article, be sure to also review the diagnostic procedures at each of the individual air conditioning diagnosis and repair major topics listed just below. To return to our air conditioning and refrigeration home page go to AIR CONDITIONING & HEAT PUMP SYSTEMS.
If your air conditioning or heat pump system has lost its cooling capacity or won't start select one or more of the diagnostic articles listed below.
- A/C - HEAT PUMP CONTROLS & SWITCHES: air conditioner controls and switches - begin here if your A/C won't start. Here's an important tip: most refrigeration problems, in air conditioners, refrigerators, or freezers, are electrical, not mechanical. In air conditioning school, we used to drive out and collect abandoned refrigerators that people were tossing out during our community's spring cleanup week. Taking these appliances back into the shop we found that almost always the problem that had caused the owner to dispose of their air conditioner or freezer was in an electrical connection or electrical control. So it's worth checking out switches and controls on an air conditioner before replacing more costly components.
- OPERATING DEFECTS: major air conditioning problem symptoms and how to get the air conditioning system working again,e.g. compressor or fan noises, failure to start, and inadequate cool air volume
- LOST COOLING CAPACITY: what to do when not enough cool air comes out of the system
- What to check first if there is no cool air or not enough cool air
- Compressor failure diagnosis: basic checks of the air conditioner compressor
- Ducts & Air Handler diagnosis: basic checks of the indoor air handler (blower), air ducts, and filter systems
- COMPRESSOR CONDENSER: problems with air conditioner compressor/condenser units
- AIR HANDLER / BLOWER UNITS: problems with the air handler, air filters, and the cooling coil itself
- DUCT SYSTEM DEFECTS: problems with the air duct system, air filters, supply registers, return air registers
- A/C REFRIGERANT LEAK DETECTION: how to use a TIF5000 to detect air conditioning refrigerant gas leak
- A/C DIAGNOSTIC FAQs: air conditioning system diagnostic FAQs: Q&A about air conditioner repair - a detailed air conditioning system diagnostic checklist
- Our recommended books about building & mechanical systems design, inspection, problem diagnosis, and repair, and about indoor environment and IAQ testing, diagnosis, and cleanup are at the InspectAPedia Bookstore. Also see our Book Reviews - InspectAPedia.
- Complete List of Air Conditioning & Heat Pump Design, Inspection, Repair Books at the InspectAPedia Bookstore.
- In addition to citations & references found in this article, see the research citations given at the end of the related articles found at our suggested
CONTINUE READING or RECOMMENDED ARTICLES.
- Carson, Dunlop & Associates Ltd., 120 Carlton Street Suite 407, Toronto ON M5A 4K2. Tel: (416) 964-9415 1-800-268-7070 Email: info@carsondunlop.com. Alan Carson is a past president of ASHI, the American Society of Home Inspectors.
Thanks to Alan Carson and Bob Dunlop, for permission for InspectAPedia to use text excerpts from The HOME REFERENCE BOOK - the Encyclopedia of Homes and to use illustrations from The ILLUSTRATED HOME .
Carson Dunlop Associates provides extensive home inspection education and report writing material. In gratitude we provide links to tsome Carson Dunlop Associates products and services.


