 Digital Photography Tips for Getting your Photos from Camera into the Computer
- POST a QUESTION or COMMENT about how to upload digital photos from camera to computer to database, email, documents etc
Uploading digital photos from camera to computer or to a computerized photo database:
This article explains the various ways to easily move photographs from a digital camera into a computer and into a photograph database. Discussion focuses on selection of cameras adapt well to microscope eyepieces or trinocular heads, and on camera settings and procedures to obtain best quality photographs. We also discuss image resolution and size settings and make recommendations. Cameras used as examples in this paper include the Nikon Coolpix series 990, 995, and 4500.
InspectAPedia tolerates no conflicts of interest. We have no relationship with advertisers, products, or services discussed at this website.
- Daniel Friedman, Publisher/Editor/Author - See WHO ARE WE?
Tips for Getting your Digital Photos from Camera into the Computer Image Database
 PAAA 2005 Symposium, University of Tulsa, Tulsa Oklahoma - June 2-5, 2005 - updated 02/23/2009 - updated 2015/10/25
Note: the latest version of this document can be found at
InspectAPedia.com/Microscopy/Digital_Photography_by_Microscope.php - © Daniel Friedman All Rights Reserved
Discussion focuses on selection of cameras adapt well to microscope eyepieces or trinocular heads, and on camera settings and procedures to obtain best quality photographs. We also discuss image resolution and size settings and make recommendations. Cameras used as examples in this paper include the Nikon Coolpix series 990, 995, and 4500.
Article Contents
The techniques discussed in this paper work well with digital cameras and any type of microscope, low power stereo zoom to high power forensic polarized light microscopes.]
Fast, simple photo transfer method - flash card readers for photo transfer
Remove the camera's flash card, plug it into
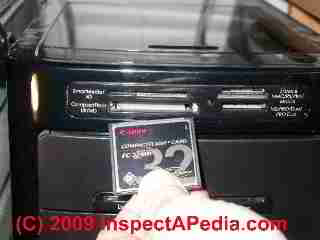
- a flash card slot on your computer,
- into a flash card reader which connects to your desktop computer's USB port
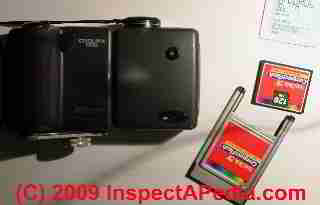
- into a flash card holder which connects to your laptop computer's PCMCIA card slot (Photo at left)
- into a flash card slot on your printer connected in turn to your computer
open the image processing software (ThumbsPlus from Cerious Software [recommended--DF]for example)
open a Windows Explorer (PC-computers) or Finder (Apple Mac computers) window, and drag/drop the image files seen on the flash card hard drive into the desired image management software library window
We carry a flash card reader on long trips, along with our laptop, as this is a compact and very fast means of image upload. This is the most-general means of image upload as the flash card simply appears as an additional hard drive on the computer. Use of this method should not require the installation of any special software on your PC or Mac.
Photo Transfer by Computer's Built-in Flash Card Slot: SD card photo upload or micro-SD card photo uploads
Many desktop and some laptop computers provide a built-in flash-card reader. With your computer turned on simply insert your digital camera's flash card into the appropriate flash card slot on your PC. The computer will recognize the flash card as a mountable external disk or mini hard drive.
On Microsoft Windows machines a window may pop up asking what you want to do with the new "disk" that has just been mounted.
- DO NOT instruct windows to format the new drive - doing so will lose your photographs
- DO instruct windows to open a file folder to display the files, after which you can manually drag them to the data base folder on your computer where you store images to be sorted and adjusted. We use a PHOTOS-IN folder where all new photographs are stored until we have reviewed them, sorted them, and decided which data base folders are their destination.
Some photo manipulation and display programs, such as iPhoto on Macintosh computers, will automatically import any new photos into a default destination directory. This simple approach is great for home photography, but we have not found iPhoto adequate for maintaining a large database of technical photographs such as microscopic photographs of particles for our forensic library.
We prefer to have total control over the destination of our photos, their folders, and the copies that are made of them. iPhoto helps make absolutely certain you never lose any of your photos by making copies of each file at various points in image storage and editing. On our laboratory database the result of that approach quickly converted a 30 gigabyte folder to a 300 GB folder - slow and unwieldy.
If your laptop computer does not have a built-in flash card reader slot two simple options to add this capability are
- Purchase a USB-connected flash card reader - these are small inexpensive little boxes that accept one or more types of flash card or memory card and connect it to a computer's USB port.
- Purchase a PCMCIA-card-slot flash card reader - this "card" accepts a camera flash card and in turn is inserted into the PCMCIA slot on older laptops and on some desktop computers.
Of these two choices, the USB-connected memory card reader is the most portable and general as it will connect to just about any modern laptop or desktop PC or Macintosh computer. Sadly, most newer laptop computers omit the PCMCIA card slot.
Photo Transfer by Manufacturers USB cables
Use the USB connector, connecting the camera to the computer's USB port.Turn on the camera, use manufacturer's driver (on the computer) or plug-and-play to see the camera appear as a hard drive; move (drag and drop) images to the desired library location - this works fine though I find that we might need the camera manufacturer's software installed on the computer in order to recognize the camera as a USB device.
With this special software installed, usually a unique program will run automatically when the camera is detected, offering to show, copy, or otherwise handle your photos. This method of data transfer is often slower than the flash-card approach because software in the camera is acting as a data transfer device.
Photo Transfer by Video bus connection
Use the camera video-out connector and cable to connect to a video input on your computer.
This approach also works fine though I find that we might need the camera manufacturer's software installed on the computer in order to recognize the camera as a USB device and as with the USB approach above, this special software installed, usually a unique program will run automatically when the camera is detected, offering to show, copy, or otherwise handle your photos. This method will be slower than the flash-card approach, as mentioned above.
Photo Transfer by Infra Red or Blue Tooth
Some cameras also permit photo transfer from the camera directly to a computer by infra-red (IR) or Blue Tooth technology. In our (limited) experience these methods are convenient but slow compared with a flash card.
Photo Transfer from Camera to Computer by Cell Network, Internet, or Similar Wireless Methods
Modern cellphones and many higher-end digital cameras can connect to your computer or to an online photographic datasbase directly using wireless methods such as bluetooth, a local area network, or the cell phone network. In my opinion this approach is suitable for photojournalism in the field, for low-volume photography, and some other applications but I do not recommend it for transferring large volumes of photographs or for very large photo files where time and transfer cost may be significant as may be online storage fees.
...
Continue reading at PHOTO LIBRARY DATABASE TIPS or select a topic from the closely-related articles below, or see the complete ARTICLE INDEX.
Or see these
Recommended Articles
- FORENSIC LAB TECHNICAL PROCEDURES - home
- MICROSCOPE DIGITAL PHOTOGRAPHY
- TECHNICAL & LAB PROCEDURES
- WORLD TRADE` CENTER 9-11 DUST PHOTOS
Suggested citation for this web page
MICROSCOPE PHOTOS to COMPUTER at InspectApedia.com - online encyclopedia of building & environmental inspection, testing, diagnosis, repair, & problem prevention advice.
Or see this
INDEX to RELATED ARTICLES: ARTICLE INDEX to BUILDING FORENSICS
Or use the SEARCH BOX found below to Ask a Question or Search InspectApedia
Ask a Question or Search InspectApedia
Try the search box just below, or if you prefer, post a question or comment in the Comments box below and we will respond promptly.
Search the InspectApedia website
Note: appearance of your Comment below may be delayed: if your comment contains an image, photograph, web link, or text that looks to the software as if it might be a web link, your posting will appear after it has been approved by a moderator. Apologies for the delay.
Only one image can be added per comment but you can post as many comments, and therefore images, as you like.
You will not receive a notification when a response to your question has been posted.
Please bookmark this page to make it easy for you to check back for our response.
IF above you see "Comment Form is loading comments..." then COMMENT BOX - countable.ca / bawkbox.com IS NOT WORKING.
In any case you are welcome to send an email directly to us at InspectApedia.com at editor@inspectApedia.com
We'll reply to you directly. Please help us help you by noting, in your email, the URL of the InspectApedia page where you wanted to comment.
Citations & References
In addition to any citations in the article above, a full list is available on request.
- Our recommended books about building & mechanical systems design, inspection, problem diagnosis, and repair, and about indoor environment and IAQ testing, diagnosis, and cleanup are at the InspectAPedia Bookstore. Also see our Book Reviews - InspectAPedia.
- In addition to citations & references found in this article, see the research citations given at the end of the related articles found at our suggested
CONTINUE READING or RECOMMENDED ARTICLES.
- Carson, Dunlop & Associates Ltd., 120 Carlton Street Suite 407, Toronto ON M5A 4K2. Tel: (416) 964-9415 1-800-268-7070 Email: info@carsondunlop.com. Alan Carson is a past president of ASHI, the American Society of Home Inspectors.
Thanks to Alan Carson and Bob Dunlop, for permission for InspectAPedia to use text excerpts from The HOME REFERENCE BOOK - the Encyclopedia of Homes and to use illustrations from The ILLUSTRATED HOME .
Carson Dunlop Associates provides extensive home inspection education and report writing material. In gratitude we provide links to tsome Carson Dunlop Associates products and services.

