 How to Dry Out Your Building after a Flood, Hurricane, or other Disaster
Flood Damage Repair Guide FEMA/ARC expanded Step 4
- POST a QUESTION or COMMENT about how to respond to building flooding, advice from FEMA, the American Red Cross, and other experts
How to dry out & clean up a wet basement or flooded building:
If your building has been flooded or wet from extinguishing a fire or from hurricane or storm, this article provides easy step by step procedures to salvage materials & contents from a wet or flooded home, drain water from the building walls & ceilings, then dry out the building.
We discuss what can be saved and what should be thrown away after flooding and we explain how & where to make openings to speed building dryout or to permt inspector for & prevention of mold contamination.
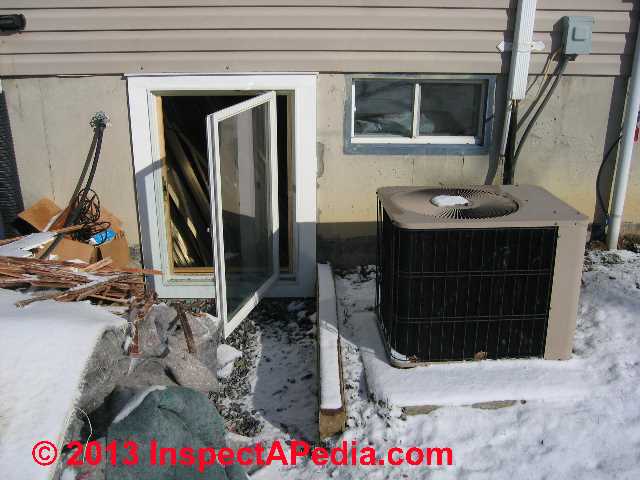
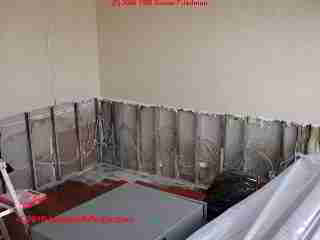
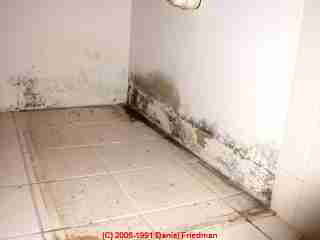
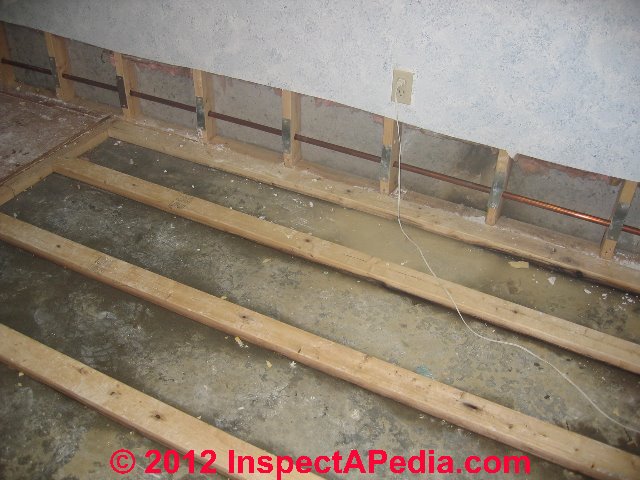
Our page top photo shows flooring removed and lower drywall removed to permit dryout of a wet or flooded basement in Poughkeepsie, NY.
InspectAPedia tolerates no conflicts of interest. We have no relationship with advertisers, products, or services discussed at this website.
- Daniel Friedman, Publisher/Editor/Author - See WHO ARE WE?
Building Dry Out Procedures after leaks or flooding
[Click to enlarge any image]
Article Contents
- BUILDING DRY-OUT PROCEDURES
- RAPID BUILDING DRYOUT Recommendations Following Wetting, Flooding, Storm Damage
- HOW TO LOWER HUMIDITY in the Building to Complete the Dryout Process
- HOW TO SORT OUT BUILDING CONTENTSr & Discard Debris Following a Flood, Fire or other Disaste
- HOW TO DRAIN CEILINGS & WALLSafter a Flood or Similar Soaking Disaster
- WHAT TO DO WITH BUILDING INSULATION that has Been Wet
- HOW TO TREAT WOOD FRAMING / SUBFLOORS Wet by flooding
- HOW TO DRY & RESTORE CEILINGS & WALLS after a Flood or Burst Pipe of Sewer Backup
- HOW MUCH DRYWALL Should be Removed Following Flooding, Water Damage, or Wetting
- HOW TO DRY OUT THE FLOOR following a fire, flood, hurricane or similar disaster
- HOW TO SALVAGE CABINETS & COUNTERTOPS after a Flood or other Disaster
Flood Response Step 4: How to Dry Out a Flooded Building or Wet Basement after a Hurricane, Earthquake, Flood or Other Disaster - Drying out a Home after Flooding - Details
Floodwaters affect a home three ways:
- The water damages materials. Wallboard will disintegrate if it remains wet too long; wood can swell, warp, or rot; electrical parts can short out, malfunction, and cause fires or shock.
- Mud, silt, and unknown contaminants in the water not only get everything dirty; they also create a health hazard.
Floodwater tested in Houston organized by the New York Times following flooding caused by Hurricane Harvey in 2017 found contamination with sewage bacteria (E-Coli at 4 to 135 times a safe level for human exposure) and a variety of toxic substances including arsenic, lead, other heavy metals (found in indoor floodwater sediment tested in a residential home).
Skin infections were reported, presumably among people wading in floodwaters in Houston. - Kaplan, Sheila, Jack Healy, "Houston Floodwaters Are Tainted with Bactgeria and Toxins, Tests Show", The New York Times, 12 September 2017 p. A13. - Dampness promotes the growth of mold - any of about two hundred common fungi that can grow on everything. (You may hear some people refer to this as "mildew" but that's a technically incorrect term as mildew actually only grows on living plants.
Details are at
MILDEW in BUILDINGS ?
The following steps work on all three of these problems. It is very important that they be followed in order.
Adapted and expanded from Repairing your Flooded Home, American Red Cross & FEMA & from additional expert sources.[1] NOTICE: neither the ARC nor FEMA have yet approved the additions & expansions we have made to the original document.
Rapid Building Dryout Recommendations Following Wetting, Flooding, Storm Damage
Rapid dryout of a building reduces the chances of an expensive mold cleanup cost added to the costs of existing water and flood damage. As we discuss
at FLOOD-CAUSED MOLD, PREVENTION, ideally we dry out the building within 24 to 48 hours of its having become wet, or as soon afterwards as is safe and practical.
What is effective in rapidly drying out a building is a combination of the following steps:
- Watch out: Make sure that the building is safe to enter.
See BUILDING ENTRY for DAMAGE ASSESSMENT - Remove standing water using pumps, mops, shop vacs, preferably as soon as flood waters have subsided and the building has been found safe to enter. When the building is safe to enter, photo-document all inside (and outdoor) conditions and damage - information that may assist you in making any loss or insurance claims as well as in rebuilding planning.
- Remove wet materials including carpeting & contents from the building, discarding, or piling up for removal outside items such as wet wall-to-wall carpets, flooded furniture, wet drywall.
- Watch out: be sure to make a complete inventory, both by photographs and in writing in order to be able to provide accurate loss information to your insurance company.
- Use a combination of dehumidifiers, fans, heat (or electric heaters if your building has power and your heating system is not ready to operate), and/or if weather permits, open windows to dry out the building rapidly.
- If the heating system is operable or portable heaters can be safely operated, use heat to speed the dryout process but do not run warm air heat and do not run air conditioners if there is a risk that these systems may become mold contaminated
- Also see
- Tip on using cold temperatures to retard mold growth and gain flooded building cleanup time: mold experts (including the author) opine that if you cannot thoroughly dry out a building in 24-48 hours, the risk of serious mold contamination becomes significant.
But in fact you may have more time and the risk of rapid mold contamination growth is certainly reduced in cold conditions. So if your building has been wet or flooded in cold or winter weather, leaving the heat off until you have removed standing water and are ready to begin demolition, dryout, and cleanup, may be a better idea.
Be sure to see WINTERIZE A BUILDING to protect from freeze damage.
How to Lower the Humidity in the Building to Complete the Dryout Process
Everything will dry more quickly and clean more easily if you can reduce the humidity in the home. There are multiple ways to lower the humidity and deter mold growth, described just below.
But you’ll have to delay using some methods if you have no electricity. (Read Step 5 before you attempt to restore the utilities.)
How Dry is "Dry Enough" When Salvaging Building Contents or Preparing for Re-Painting?
[Addition by DF]
To avoid problems with paint failure or mold growth, moisture content in salvaged materials or building surfaces should be below 18%.
Watch out: a ceiling, floor or wall or item that feels "dry to the touch" may still have a high internal moisture content if the dryout process has not continued long enough, as may thick or soft goods.
You can use a moisture meter if one is available, set to its "wood" setting, to check moisture content. Details about moisture meters are
Also see MOISTURE CALCULATIONS
and MOISTURE CONTROL in BUILDINGS. When using a moisture meter or even when just feeling surfaces for evidence of dampness, for a building or basement that has been flooded, remember to check the areas that are likely to be last to dry: lowest points, corners, intersections.
If you do not have a moisture meter to check the dryness of surfaces or materials allow extra drying time (days or more)
How to Dry Out Building Ceilings, Walls, Floors, General Water & Moisture
Building Dryout Method 1 - Open up the house / building
If the humidity outside is lower than indoors, and if the weather permits, open all the doors and windows to exchange the moist q indoor air for drier outdoor air. Your body will tell if the humidity is lower outdoors.
If the sun is out, it should be drier outside. If you have a thermometer with a humidity gauge, you can monitor the indoor and outdoor humidity. On the other hand, when temperatures drop at night, an open home is warmer and will draw moisture indoors.
At night and other times when the humidity is higher outdoors, close up the house.
Open closet and cabinet doors
Remove drawers to allow air circulation. Drawers may stick because of swelling. Don’t try to force them. Speed drying by opening up the back of the cabinet to let the air circulate. You will probably be able to remove the drawers as the cabinet dries out.
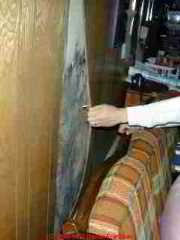
Watch out: our photo (above left) makes plain that flooding soaked cabinets and wall partitions in this home. In the example shown, just opening cabinet doors to help dry-out the building is futile. Demolition is needed to
- remove all wet drywall and further drywall to a 24" clear margin above the highest wet or visibly moldy surface
- remove the countertops and cabinets, take them out of the building for inspection, and if salvageable, cleaning and sanitizing, else disposal
Use fans to speed building dry-out but watch out about running air conditioning or heating equipment in a flood-damaged building
Fans help move the air and dry out your home and adding heat or air conditioning can speed building dry-out. But don't rush to turn on any air handling system in the building before considering the following warnings:
Watch out: Do not use central air conditioning or the furnace blower if the air handler ducts were under water. They will blow out dirty air, that might contain contaminants from the sediment left in the duct work.
Watch out: Do not use air conditioners, central air conditioning, nor warm air heating systems to speed building dry-out if the building is mold contaminated, unless you also plan to later completely clean and replace those components. Doing so will assure that the air handler, blower assembly, and duct work become mold contaminated.
If ductwork is uninsulated metal the ducts can be cleaned. Clean or hose out the ducts first. Insulated ductwork that has been flooded should be replaced or if insulation can be replaced separately it may be possible to salvage some duct components.
Details are at DUCT SYSTEM FLOOD or WATER DAMAGE
Building Dryout Method 2 - Run dehumidifiers To Speed Dry-Out of a Flooded or Wet Building
Dehumidifiers and window air conditioners will reduce the moisture, especially in closed up areas.
Building Dryout Method 3 - Use desiccants ???
Desiccants (materials that absorb moisture) are very useful in drying closets or other enclosed areas where air cannot move through.
Desiccants like those listed below are usually available at hardware, grocery, or drug stores.
- Chemical dehumidifier packs used for drying boats and damp closets.
- Cat litter made of clay.
- Calcium chloride pellets used for melting ice in the winter. Hang pellets in a pillow case, nylon stocking, or other porous bag. Put a bucket underneath to catch dripping water.
Close the closet or area being dried. Be careful. Calcium chloride can burn your skin. It will also make the air salty, so do not use this product near computers or other delicate equipment. . Call a contractor.
Watch out: in our OPINION (InspectApedia) desiccants recommended in the original ARC/FEMA flood repair guide are a completely ineffective "band-aid" approach to drying out a home following flooding.
The level of water and moisture far exceed the capacity of cans or piles of desiccants and worse, the rate of dry-out will be so slow that the risk of further water damage and mold contamination will be increased.
Building Dryout Method 3 - Hire a Flood Damage Restoration Contractor
There are contractors who specialize in drying out flooded buildings. They have large fans and dehumidifiers that can dry out a house in a few days. Look in the yellow pages under Fire and Water Damage Restoration or under Dehumidifying.
Be careful about contractors who inflate prices after a disaster and about out-of-town contractors who inflate prices after a disaster and about out-of-town contractors who request payment in advance. Be patient. Drying your home could take several weeks. Until your home is reasonably dry, damage caused by mildew and decay will continue. The musty odor will remain forever if the home is not thoroughly dried out well.
How to Sort Out Building Contents and Discard Debris Following a Flood, Fire or other Disaster
You have three types of contents that should go to three different places:
- items you do want to save
- things you don't want to save - items to be discarded (but not garbage)
- garbage
Things you do want to save
Move these to a safe, dry place, such as the second story or outside. The longer they sit in water, the more damaged they become. In some cases, you may only be able to move them to a dry or clean room in the same building while you clean the other rooms.
Watch out: leaving soft goods (that are costly or difficult to clean) in a mold-contaminated area means that those items are likely to need extra (and more expensive) cleaning before they can be returned to use.
Don’t leave wood furniture in the sun where it will warp as it dries.
To save an area rug, lay a sheet or some other material on top so the colors will not bleed. Clean it promptly.
For a detailed procedure on sorting and salvaging (store, clean, re-store) building contents following a flood, mold contamination, sewage backup or storm damage, see SALVAGE BUILDING CONTENTS.
Excerpts from that deatiled article are included just below.
How to Handle Things you don’t want to save
Put things you don’t want to save outside to dry until the adjuster comes to confirm your losses.
Take pictures or videotapes and list each item for the record.
If you are not sure whether to throw something out, decide whether it is worth salvaging by checking the information in Step 6.
Garbage Items & Garbage Disposal
Get rid of food and anything else that could spoil or go bad immediately. Don’t let garbage build up.
Garbage piles will cause yet another health hazard by attracting animals and insects.
If your insurance adjuster has not come, tell your agent or adjuster that you need to get rid of potential health hazards. That person will tell you
Items Soaked by Floodwater
Usually these items should be thrown out after wetting or a flood
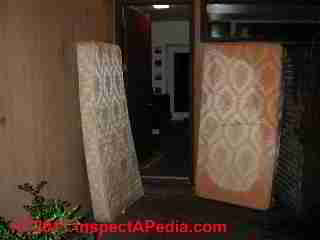
Mattresses, pillows, foam rubber, large carpets, carpet padding, upholstered couches and chairs, books, paper products.
These items should always be thrown out after wetting or a flood
Food, cosmetics, medical supplies, stuffed animals, baby toys
Watch out: Don’t take chances with frozen food if electricity went off unless food is still thoroughly frozen and contains ice crystals. As a rule, food will remain frozen for up to three days in a closed freezer without power. Don’t refreeze thawed food. However, you can cook and then freeze raw meat that was partially thawed and then refreeze it.
Questions about the Safety of Your Food? Call the USDA Food Safety Hotline: 1-800-535-4555 Professional home economists will answer your questions from 10 a.m. to 4 p.m. eastern time, Monday through Friday. Professional home economists will answer your questions from 10 a.m. to 4 p.m. eastern time, Monday through Friday.
Then throw the stuff out, preferably in sealed plastic garbage bags.
How to Dispose of discarded items properly after a flood, hurricane, fire or other disaster
Do not burn or bury them. There will usually be more frequent garbage pickups after a flood. Your local TV and radio stations will have announcements concerning trash pickup schedules and drop-off sites.
Framing and structural components can be kept
Unlike wallboard, wet studs and sills that are touched by floodwaters do not need to be thrown out.
Interior Hollow-Door Doors, Trim & Similar Items are usually Thrown Out
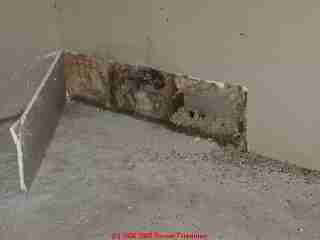
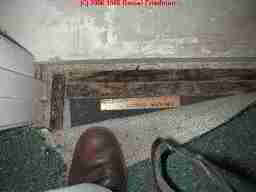
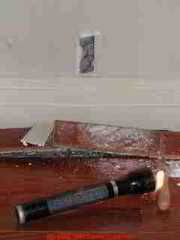
Our photo of floor baseboard trim exploration (above) shows what happens when trim is left in place at the bottom of a wet floor. Better would have been to remove the trim and the bottom 12-inches of drywall to dry and inspect the wall cavity.
Watch out: in our experience [DF] when a building has been wet enough to allow water to enter even just the very bottom of a wall cavity, there is a high risk of harmful and costly mold contamination of both the interior wall cavity surfaces as well as wall insulation.
More advice on handling wall and floor cavities where the floors have been wet is
at Step 6. FLOOD DAMAGED BUILDING CLEAN-UP for carpeting and rugs that have been wet by area or building flooding

At above right we show the right way to handle trim in a flooded building - remove it and pile it with site trash to be removed - as a first step in addressing wet walls and wall cavities (discussed below).
Hollow wood and plastic or vinyl doors usually have cardboard spacers in the middle that lose their shape when wet.
Generally, hollow-core doors come apart after they are flooded sand need to be replaced.
How to Drain Ceilings & Walls after a Flood or Similar Soaking Disaster
Once building contents have been cleared outside for salvage & storage or for disposal, the next step in cleaning and repairing a soaked or flooded building is to get the water out of the ceilings and walls. How you drain and dry your ceilings and walls depends on what they are made of.
Ceiling inspection & draining after a fire, flood, hurricane, or other disaster
Check for sagging ceilings. Drain them carefully as shown in Step 2. If the floodwaters went above your ceiling, you should replace it if it is made of wallboard. A plaster ceiling will dry eventually, but if it has too many cracks or sags, you will have to tear it down and replace it. Remove any wet insulation in the ceiling to allow the joists to dry.
Wall inspection & draining after a fire, flood, hurricane, or other disaster
Remove water trapped within your walls. To check for water, take off the baseboard. Stick an awl or knife into the wall about 2 inches above the floor (just above the 2 X 4 wood sill plate). If water drips out, cut or drill a hole large enough to allow water to drain freely. (Use a hand or cordless drill or saw to avoid shock.) If you are going to replace the wallboard anyway, you don’t have to be neat: use a hammer to knock out a hole.
If your walls are plaster, a knife won’t penetrate them. Drill a hole above the sill plate to drain the water. (Use a hand or cordless drill to avoid shock.) Do not use a hammer or chisel on plaster because the plaster could shatter.
Draining walls with metal sill plates
In a newer home, you may have metal sill plates. A metal sill acts as a trough at the bottom of the wall cavity. Drill a hole at floor level to drain the water, using a hand or cordless drill.
Repeat the process to drain all the wall cavities. Depending on the spacing between studs in your walls, make a hole every 16” or every 24”. Watch out for the wiring which is usually at the same height as your electrical outlets. If there is wet insulation, you will have to remove the wallboard in order to take out all the insulation.
Below at HOW to DRY & RESTORE CEILINGS & WALLS we discuss in detail the wall cavity mold contamination and floor damage that occurred in this NYC apartment as water traveled throughout the building floor in channels formed by metal wall partition sill plates.
What to do with Building Insulation that has Been Wet by Flooding, Fire Extinguishment, Hurricanes, or other Disasters
There are 3 main types of insulation and each reacts differently to floodwaters.
Foam Building Insulation Products & Flood or Water Contamination, Damage, Wetting
Styrofoam insulation [and similar foam board or sprayed-in-place foam building insulation] survives best; it may only need to be hosed off.
Watch out: open cell foam board or spray foam insulation that has been contaminated by flood waters (e.g. containing sewage pathogen s) cannot be effectively cleaned by hosing off or washing; such materials should be removed, the building cavity cleaned and sanitized, and when dry, re-insulated as part of the building restoration procedure.
Fiberglass Building Insulation & Flood or Water Contamination, Damage, Wetting
Watch out: original FEMA/ARC advice about wet fiberglass insulation stated:
Fiberglass batt or roll insulation should be discarded if they are muddy. f soaked by clean rainwater, remove them so the rest of the wall can dry. They can be put back in the wall, but it will take a very long time to dry.
That view about fiberglass insulation is not correct and is risky advice. Fiberglass insulation that has been wet, even if it looks "clean" is highly prone to developing hidden mold contamination. The potential cost of having to demolish and rebuild insulated walls and ceilings in which contaminated fiberglass batts were used far exceeds the cost of throwing away and replacing suspect fiberglass insulation. Our [DF] opinion is that you should never re-use soaked fiberglass building insulation.
Details are at FIBERGLASS INSULATION MOLD.
Fiberglass Building Insulation & Flood or Water Contamination, Damage, Wetting
Watch out: original FEMA/ARC advice about wet fiberglass insulation stated:
Cellulose (loose or blown-in treated paper) insulation will hold water for a long time. It can also lose its antifungal and fire retardant abilities. Therefore, flooded cellulose insulation should be replaced.
We agree that flooded cellulose insulation should be replaced, both because of the very long dry-out time that delays building repairs and because of the risk of lost fire-retardant properties. But any type of building insulation that has been wet by floodwaters, likely to contain sewage or pathogens, should be disposed-of and the building cavities cleaned and sanitized before rebuilding.
For a complete guide to the identification and properties of all types of building insulation
, see INSULATION IDENTIFICATION GUIDE
How to Treat Wood Framing or Subflooring Flooding that has Been Wet by Flooding, Fire Extinguishment, Hurricanes, or other Disasters
Watch out: ARC/FEMA's original advice for flooded buildings stated:
If allowed to dry naturally, wood will generally regain its original shape.
It is correct that wood framing will remain substantially the same size and shape when dried after a single event flood or wetting event unless severe warping occurs. But this is not true of subflooring in many installations where we find that the subflooring swelled, arched, and separated from the floor framing.
As we discuss below at How to dry the floor following a fire, flood, hurricane or similar disaster, it is absolutely not true for finish flooring of wood or most wood laminate or engineered wood floor products.
ARC/FEMA's original advice for flooded buildings continues:
Different layers of laminated wood, such as plywood, may dry at different rates, causing the layers to separate.
Some contaminants will stay in the wood pores after it dries, but not as much as stays in flooded wallboard.
Wood studs and sills will be covered by new wallboard and painted, so they are well removed from human contact. Therefore, wet wood studs and sills do not need to be replaced if they are allowed to dry properly.
We agree completely that wood framing in flooded buildings does not need to be replaced and thus should not be replaced unless it is rotted or otherwise damaged so that it cannot perform its structural function. But in a flooded building, before covering floor framing with new subflooring on top or with a new ceiling (for the floor below), if the floor structure was wet by floodwaters it should be cleaned and sanitized.
For more detailed help about fungicidal or sanitizing sealant coatings that can help reduce moisture uptake and mold growth in restored buildings after wetting or a flood see MOLD SANITIZER, SPRAY, BIOCIDE USE GUIDE
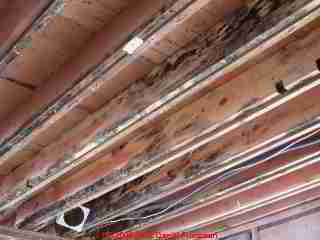
Watch out: also for contractors who may propose costly cleaning and sanitizing of "black mold contaminated" framing lumber that may have been in that state, and may contain only harmless mold that has been present since original construction.
While flooded framing of walls, ceilings or floors may need to be cleaned and sanitized if contaminated by floodwaters, in some cases the extra cleaning (media blasting, sanding, scraping) proposed for what is really cosmetic mold, are probably not necessary.
See Black cosmetic mold for details.
How to Dry & Restore Ceilings & Walls after a fire, flood, hurricane, or other disaster
What to Do About Wet Drywall "Sheetrock" or Wallboard
Most ceilings and walls are covered with wallboard, especially in newer homes. Synonyms are drywall, gypsum board, or "sheetrock". All of these products are made of gypsum sandwiched between layers of paper.
Wallboard will act like a sponge, drawing water up above the flood level. It becomes very fragile if it stays wet for long and will fall apart when bumped. Drywall that has been wet is also an engraved invitation to mold contamination.
When the wallboard finally dries, there will still be mud and contaminants dried inside.
Wallboard that has been soaked by floodwater presents a permanent health hazard. Therefore, this article series recommends that you remove and throw out flooded wallboard.
Watch out: original ARC/FEMA advice stating:
On the other hand, if the wallboard was soaked by clean rainwater, it can be dried in place with plenty of fresh air moving through the area.
is risky advice because of the high risk of mold growth in un-treated building ceiling, wall, or even some floor cavities.
Flood soaked wallboard is usually removed and thrown away.
Plaster and paneling can often be saved, but you still need to get air circulating in the wall cavities to dry the studs and sills.
Different approaches are used for different materials and for different types of flood-waters as we describe next..
Water Damaged Drywall Decision Tree
 This decision algorithm for wet drywall is adapted from both our own field and test-lab experience and various sources including the University of Minnseota's Department of Environmental Health & Safety (DEHS web: dehs.umn.edu/ )
- Identify the SOURCE of WATER Damage causing Wet "Sheetrock" (gypsum board, drywall)
such as those moisture sources listed next.
- IF the water source was CLEAN POTABLE WATER such as burst water supply pipe in the building
2.a. THEN IF you are responding within 24 hours of the wetting event
THEN remove all of the wet or damp drywall to include a safety margin of about 12" of dry material and dispose of it as construction debris. Health-safety dust containment controls can be minimal.
2.b. ELSE if it has been more than 24 hours since the wetting event
THEN Inspect & test for mold contamination AND
IF there is NO evidence of mold contamination
THEN remove all of the wet or damp drywall as we described just above at 2.a.
ELSE there IS EVIDENCE of MOLD contamination
THEN remove all of the wet and damp drywall as described above, but using dust containment and personal protective equipment
- IF the water source was STEAM
AND IF the surfaces have never been actually "wet" you can try drying and dehumidification and ventilation, salvage the contents and monitor for signs of mold growth
ELSE the surfaces have been wet, treat as in 2.a. above
- IF the water source was UNSANITARY such as rain, melting snow, or ground-water flooding
THEN IF you are responding within 24-hours of the wetting event THEN treat the drywall as in 2.a. above
ELSE the drywall has been wet more than 24-hours, THEN inspect & test for mold contamination as in 2.b. above.
- IF the water source was SEWAGE such as from a plumbing drain, sewage backup, toilet overflow, or possibly area flooding that (as it often does) contains sewage as well,
THEN remove all of the wet and damp drywall as described above, but using dust containment and personal protective equipment
Followed by disinfecting of the cleaned surfaces and testing to confirm that cleaning and disinfection were effective - that sewage pathogens don't remain on building surfaces.
Details of Drywall or Wallboard recommendations for demolition/replacement after a fire, flood, hurricane, or other disaster
If floodwaters soaked the drywall or wallboard four feet above the floor or more, you should take down all the wallboard and replace it.
If the water level was less than four feet deep, remove the lower four feet of wallboard. You can fill the gap with 4’ x 8’ sheets installed sideways.
Watch out: original ARC/FEMA advice for handling styrofoam-insulated drywall covered walls stated:
If you have Styrofoam insulation—or no insulation—and the wallboard was soaked with clean rainwater, you can dry the walls without removing the wallboard using the technique explained below for plaster walls
But you will need to remove wet insulation if it is not Styrofoam.
We advise against this advice which failed to recognize that any building wall or ceiling covered by drywall (wallboard) that has become wet is almost certainly going to develop severe mold contamination inside the cavity on the cavity side of drywall and very often as well on the surfaces of wood framing and exterior wall sheathing.
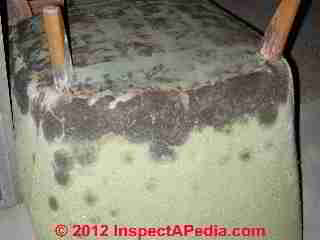
Our photo (above left) illustrates a severe and highly toxic mold contamination found inside an "apparently clean" wall on the upper floor of a Manhattan apartment whose floors had been wet from a plumbing leak in a different area more than 40 feet away.
Water traveled inside the wall cavity (in the upturned metal stud used as a sill plate for internal wall partitions), leading to a large Memnoniella echinata mold contamination.
You can just see the black mold growth on the opposing side of drywall exposed at our test cut made just above floor trim in this wall. Lifting the laminate flooring discovered additional contamination needing cleaning below the floor as well.
How Much Drywall Should be Removed Following Flooding, Water Damage, or Wetting or Mold Contamination?
Our larger wall test cut shown at left was made following observation of a very small amount of surface mold on the exterior or room side of the drywall. Unable to explain why mold was growing in this location we opened the wall to find a leaky plumbing drain pipe.
For detailed help and more examples of when, where, how & why to make test cuts in walls or ceilings
see PHOTO GUIDE to FIND HIDDEN MOLD
Any drywall-covered walls or ceilings that have been wet should be handled by removing all wet or visibly water-stained or visibly moldy drywall and the insulation, if any, in that building cavity. Continue removing drywall until you have provided at least a 24-inch margin of clean, dry, un-stained materials.
Slight increases in the amount of drywall to be removed in a wet or flooded building can actually save labor cost & speed reconstruction
For additional cost-savings in time and labor, remove additional drywall or wallboard to reach either:
- the center of a vertical stud or horizontal ceiling joist to which the edge or replacement drywall can be nailed or screwed
and/or
- an open space that is in multiples of 12-inches, so that you minimize the waste of drywall cutting, installation, and taping during building restoration
Plaster walls & ceilings recommendations for demolition/replacement after a fire, flood, hurricane, or other disaster
How to Handle Plaster Ceilings or Walls Affected by Flooding or Wetting Disasters
Plaster will survive a flood better than wallboard.
Watch out: original ARC/FEMA advice stating
Plaster wall or ceiling coverings should not have to be replaced but it will take a very long time to dry. Sometimes the plaster will separate from the wood laths as it dries. Then the wall will have to be removed and replaced.
Watch out: Simply plastering over moldy surfaces is risky advice because we find that although plaster does not support mold growth as readily as drywall or "wallboard, there is still risk of mold growth in insulation and in or on surfaces of in un-treated building ceiling, wall, or even some floor cavities. We also find that mold growth is readily supported in paint coating drywall surfaces.
Below at HOW to DRY & RESTORE CEILINGS & WALLS we give more-complete advicewe give better advice on how to inspect and where appropriate, remove sections of plaster-covered walls or ceilings, insulation removal, and how to clean & inspect building cavities for contaminants.
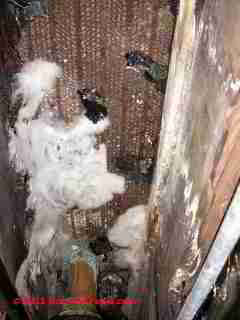
Watch out: original ARC/FEMA advice for handling plaster walls or ceilings stated:
If the plaster or wallboard is clean and in good shape, you can drill or cut ventilating holes in each wall cavity. Place holes low enough so they will be covered by the baseboard after the wall dries out.
Open up the wall on both sides of interior walls. For exterior walls, drill or cut holes on the inside of the house.
However, if there is wet insulation, you will have to remove the plaster or wallboard in order to take out all the insulation.
Really? This is risky advice with a nearly zero chance of success. Our field and forensic lab experience [DF] confirm that plaster is more resistant to mold growth than drywall, paneling, or similar materials.
However we have on occasion found significant mold contamination on wood surfaces in the previously wet wall or ceiling cavity regardless of the wall or ceiling covering material. Our photo (left) illustrates some interesting mold and fungal growth in the wall cavity of a plaster-covered interior where there had been plumbing leaks.
Now the risk of mold growth in any building cavity is significantly increased when the cavity has suffered leakage over a protracted interval compared with a brief (if dried quickly) single event. But in any case, the risk of problem mold growth and thus very costly future new demolition, cleaning, and restoration, is significant enough that a better approach includes these steps:
- For uninsulated building cavities,
cut and remove no less than 12-inches of plaster at the floor and ceiling level of walls or at the ceiling-wall margins if the plaster ceiling was wet. Use fans, heat (if possible) and dehumidifies to speed building dryout including of the opened wall and ceiling cavities. - For insulated building cavities,
cut and remove enough plaster wall or ceiling material in continuous strips along the full length of the wall or ceiling at both floor and wall (wall cavities) or the full ceiling perimeter (ceilings) to permit removal of all wet or potentially wet and contaminated insulation.
- In either case, when the wall and ceiling cavities are thoroughly dry
and provided inspection confirms no problem mold growth, you can proceed with reconstruction. The cavity center will be last to dry so consider several small 2" x 4" test openings in locations to permit inspection and moisture testing.
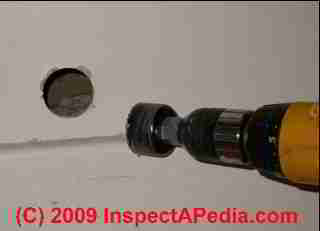
Our photo (left) illustrates an easy method for making small, easily-patched inspection openings in building walls or ceilings. In addition to inspecting the wood surfaces in the wall cavity, inspect the cavity side or "back side" of the test plug cut from the wall.
Look for evidence of floodwaters (contaminated by sewage) and mold. - For building exterior walls, top floor ceilings,
or other building cavities where insulation is desired, and where you have successfully left plaster ceiling or wall coverings in place, you can re-insulate using blown-in cellulose or foam insulation products.
Concrete block cavities & draining floodwaters
The cavities in a concrete block wall will drain on their own. The water will not damage the concrete like it will wood or wallboard.
Wall covering (wallpaper) dryout following flooding?
Vinyl wall covering seals the wall and prevents drying.
Watch out: The original ARC/FEMA advice offered this:
Wallpaper paste is a favorite home for mold and mildew. For these reasons, you should remove all wall covering that got wet and throw it out. (If vinyl wall covering is loose on the bottom, you may be be able to save it by pulling it off the wall up to the flood level.
FEMA/ARC's original advice to clean and reapply wallpaper after everything dries is an error if the wall was actually exposed to flooding (as opposed to high indoor moisture). Walls that have been flooded will require at least partial demolition.
Therefore, simply pulling off lower sections of wall coverings up to the flood level is dangerous advice.
Follow the drywall or plaster wall post-flood dryout, cleaning, and recovery advice described above.
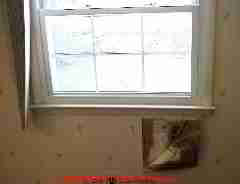
However there are cases where limited wallpaper removal (and drywall removal) are appropriate, such as below a leaky window sill shown in our photo at above left.
Paneling treatment following a fire, flood, hurricane or similar disaster
Watch out: the original ARC/FEMA advice for handling wall paneling after a flood stated:
Carefully pry the bottom of each panel away from the wall. Use something to hold the bottom away from the sill so the cavities can drain and dry out.You may be able to nail wall paneling back into shape after they and the studs dry out.
Do not even consider simply following this bad advice.
Our field and laboratory tests confirm that the cavity side of wood type and vinyl wall coverings are very conducive to mold growth in buildings that have been wet or even just exposed to very high humidity.
Our photo above illustrates a common situation. This basement was exposed to a single event wet-floor "flood" due to a burst drain pipe almost twenty years ago.
Water was removed from the floor within 24 hours, and there was almost no visual evidence of a mold problem in the finished basement.
But some building occupants experienced severe asthma attacks on entering the basement area or simply when standing at the top of the basement stairs. Our air, dust, and surface tests led to investigating the wall and wall cavity, for which this first inspection point produced the results you can see in our photo.
- If a building wall cavity has been flooded to any depth whatsoever or exposed to wet conditions the wall paneling should be removed completely, any drywall behind the paneling should be removed in accordance with our drywall handling recommendations above, and the exposed wall cavity cleaned, dried, and sanitized.
- Paneling might be salvageable: We agree that if you get to paneling in time (before it has delaminated, warped, disintegrated due to water damage) it may be feasible to remove, dry, and clean the material for salvage and re-use - on occasion. Be sure to inspect the paneling front and back sides (wall cavity side) for mold growth and contamination.
- Inspect the wall cavity and wall insulation for mold contamination. If the paneling was not badly water damaged it may be possible to clean and sanitize it and nail it back in place. If there is or was wet insulation, you will have to remove the paneling and to take out all the insulation.
- Modern fire codes require that wood type wall paneling be installed over a layer of drywall. If original construction omitted the drywall, as may be found in some older homes, you should install drywall (and depending on climate, insulation) in walls before restoring the final wall covering.
How to Dry the Floor following a fire, flood, hurricane or similar disaster
Air needs to circulate around flooded floors so they can dry out. This means removing the floor covering. Because floodwaters contain mud and dirt, most soaked floor coverings should be thrown away. Keep a piece of all discarded floor covering so the adjuster can tell its value.
Air needs to circulate below the floor to dry it out. If the crawl space of your home is flooded, pump it out. Remove any plastic sheets, vapor barriers or insulation from underneath the floor. (Be sure to replace them when the floor and foundation are completely dry.)
If a home with a basement was flooded over the first floor, remove finished basement ceilings, or cut or drill holes between all the joists to allow circulation. Don’t cut or drill near electric lines or pipes. You have now reached the stage where no more damage should occur to your home. Exterior holes have been patched, the utilities have been turned off, and the drying process has started.
It may take days or weeks, depending on the humidity, for all the wood to dry out. You can do Steps 5, 6, and 7 while the home is drying. However, do not start Step 8, Rebuild and Floodproof, until the home is completely dry.
Advice for Cleaning & Salvaging Carpets & Other Floor Coverings that have been Wet by a Burst Water Pipe, Floodwaters, or other Disaster
- Small throw rugs can be saved and cleaned in a washing machine.
- Indoor-outdoor carpeting can be removed from the building, hosed off and hung up to dry.
- Carpeting & large rugs and those with foam backing should be discarded.
After getting wet, wall-to-wall carpeting usually will not return to its former size and has to be thrown away. Therefore, make the job easier by cutting it in strips and discarding it in pieces that are small enough to be carried.
Valuable area rugs: usually only valuable area carpets are worth the cost of professional cleaning.
If you expect to preserve a valuable rug it should be transported to or by the professional cleaning company promptly. Rugs (not permanently-installed carpeting) that were wet by unsanitary flood waters or a burst sewer pipe should be thoroughly sanitized as part of the cleaning and dryout procedure.
Watch out: Be sure to tell your carpet cleaner what the carpet has been exposed to - both to protect the workers from possible harm and to assure that proper handling and cleaning are performed.
Don't leave a valuable but wet carpet rolled-up and stored for days - you are may find that the carpet will be destroyed by running dyes and colors, and you risk a badly mold-contaminated carpet that will be difficult to clean and restore.
Watch out: for the tack- down strips along the wall; they often have nails sticking up to hold the carpet down. Cutting or scratching yourself on a rusted or flood-water-contaminated carpet tack strip is asking for an infection.
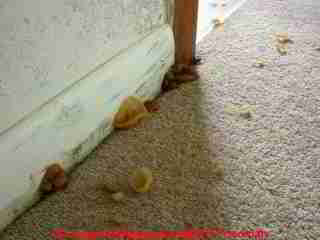
- Wall-to-wall carpeting handling after soaking or flooding:
Watch out: Original ARC/FEMA advice offered this:
A wall-to-wall carpet that was soaked by clean rainwater can be left in place and dried.
Really? In our experience wet wall to wall carpeting along with the padding beneath it most often forms a mold contamination reservoir.
Most insurance companies currently agree that widely (over large areas) soaked wall to wall carpeting should be removed, along with its padding, and later replaced.
Our photo (above) illustrates what happened when a wet carpet was "dried in place" in a home.
Only once in nearly 40 years of field inspection and forensic lab testing have I [DF] found a carpet wet by burst pipe or roof drainage that had been left in place after soaking and that was not mold contaminated.
We agree that if only a small area of wall to wall carpeting has been wet by clean water - such as from a burst water supply pipe) it is often possible to dry and retain the carpeting.
Detailed information about wet or moldy or smelly carpets or carpeting & carpet padding: - Floor tiles, vinyl or sheet flooring: remove tile, vinyl, and linoleum flooring should be removed if it is warped, loose, or has a foam rubber pad (which should be thrown away).
Wet Wood Floor Dryout & Preservation - what to expect
Wood generally has some moisture content, but a flood can bring increase the moisture content of wood up to 30 percent or above. This causes swelling.
Watch out: The original FEMA/ARC comments about wood returning to its original size and shape after flooding are a bit optimistic when it pertains to wood floors.
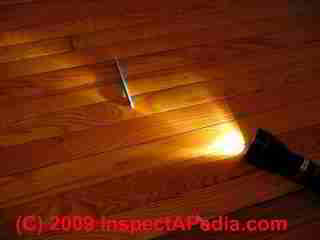
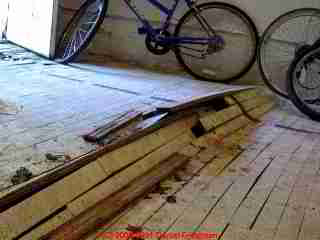
A wood floor that has been soaked can be salvaged if it can be cleaned and dried quickly - in hours. If you can dry the floor quickly enough some cupping will remain but the floor may be usable (photo, below left).
But if days pass the wet wood floor is likely to swell, buckle, and will not be repairable without demolition and at least partial replacement (photo, below).
Details are at FLOOR WOOD, DAMAGE DIAGNOSIS.
Salvage Kitchen & Bathroom Countertops & Cabinets
To salvage cabinets and counter tops that have not been badly water-damaged but that were mounted in a room that was soaked by flooding, fire extinguishment, storm damage or similar events, I [DF] find that you will need to remove wall mounted cabinets (on walls that were wet) and floor mounted cabinets (on floors that were soaked or flooded) to permit the cabinets to be properly dried and cleaned.
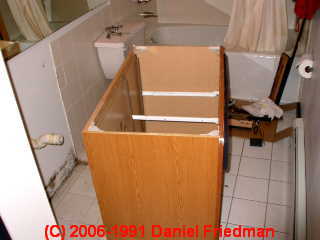
If there has been protracted leakage or spillage under built-in cabinets such as bath vanities, there may be a mold cleanup job under or behind these components.
Study the building carefully to decide on the building points at most risk of having been wet from leaks due to construction details or other site observations.
That's where one would make a test cut.
Wet Furniture / Casework Water Damage Decision Tree
This decision algorithm for wet cabinets, caseework, and furniture is adapted from both our own field and test-lab experience and various sources including the University of Minnseota's Department of Environmental Health & Safety (DEHS web: dehs.umn.edu/ )
- Identify the SOURCE of WATER
such as those moisture sources listed next.
- IF the water source was CLEAN POTABLE WATER such as burst water supply pipe in the building
2.a. THEN IF the wet items are hardwood or intact, laminated cabinetry
THEN clean and dry the surfaces and also inspect and monitor, making test cuts if necessary, hidden spaces such as under or behind floor or wall-mounted cabinets to check for wet conditions or mold growth.
2.b. ELSE IF the wet items are upholstered furniture, particleboard, pressboard, or delaminated cabinetry
THEN IF within 24-hours of the wetting event, remove and discard these items as they are not salvageable, only minimal dust control and PPE (personal protective equipment) e needed
ELSE IF more than 24-hours of the wetting event, THEN remove and discard these items as above, using controlled abatement procedures and PPE
- IF the water source was STEAM
3.a. THEN IF the surfaces have never been actually "wet" you can try drying and dehumidification and ventilation, salvage the contents and monitor for signs of mold growth
3.b. ELSE the surfaces have been wet, treat as in 2 above
- IF the water source was UNSANITARY such as rain, melting snow, or ground-water flooding
THEN IF you are responding within 24-hours of the wetting event THEN treat the cabinetry and furniture as in 2.a. above
ELSE the drywall has been wet more than 24-hours, THEN inspect & test for mold contamination as in 2.b. above.
- IF the water source was SEWAGE such as from a plumbing drain, sewage backup, toilet overflow, or possibly area flooding that (as it often does) contains sewage as well,
THEN remove all of the wet and damp cabinetry, casework, furniture as described above, but using dust containment and personal protective equipment
Followed by disinfecting of the exposed, cleaned buillding surfaces and testing to confirm that cleaning and disinfection were effective - that sewage pathogens don't remain on building surfaces.
Reader Question: Hurricane Sandy Flood Damage Cleanup: do white deposits on our walls after flooding mean that further cleanup and dryout are needed before we can put back insulation, drywall & trim in our home
We live in New Jersey where we had 2 feet of [salt water] brine in our living space. I removed 4 feet of Sheetrock and insulation from exterior walls. I left the interior walls for 4 weeks to see if mold had grown. Well it seems like white mold has paid us a visit. I enclosed photos.
Do you think it is dangerous to leave or should I bite the bullet and cut all the interior walls as well? Thanks for your advice. W.K. - 11/28/2012
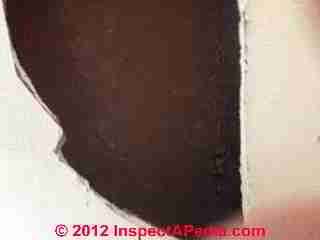
Reply: some warnings about mold or efflorescence & adequacy of cleanup and dryout after flood damage
Of course I'm sorry to read of the flood, but not surprised given the extent of flooding caused by Hurricane Sandy in 2012.
Kudos to you if you were able to remove wet materials and drywall quickly enough to prevent more extensive water or mold or sewage damage to the building.
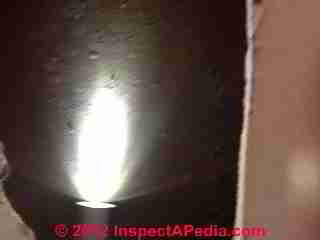 In the case of hurricane Sandy we got a small break in that cold weather after the storm may have helped retard mold growth in buildings that could not be dried out in the recommended 24-48 hours.
And "dried out" means really dry, not leaving tings mostly dry but with some wet spots.
Your photos were a bit blurry, so I'm not sure what we were looking at. It may be you are seeing effloresence, not mold.
See EFFLORESCENCE, Salts & White / Brown Deposits for help in recognizing effloresence.
I don't have nearly enough information to offer much personally-tuned advice, bur if specific questions arise just ask and I'll try to assist.
Other than that, and addressing more of your question,
one of the worst mistakes I've seen people make is to put the house back together before making sure the building cleanup is complete and adequate and that the building is really dry, including more subtle spots such as behind trim that should have been removed, or in insulation that was wet (and is at high risk of mold contamination)
So the white stuff you saw, even if it is effloresence, not mold, is an important clue that needs investigation, as it is in any case an indication of (previously if not present) high moisture.
I would:
- Check by inspection (light and mirror) and surface testing, the wall cavity side of the lowest (closest to wet) drywall - to be sure that there is no mold growing on it, as well as checking higher areas in each wall cavity;
- Remove any visibly moldy drywall, continuing to give a clean dry margin of 24" or one stud bay or floor joist or ceiling joist bay;
- Check for adequate cleaning and sanitizing - I don't assume that floodwaters contained only seawater, as often during area flooding sewers back up, adding sewage to the mix that floods homes.
A simple bacteria swab test, properly conducted, can test both representative cleaned surfaces as well as upstairs surfaces that might have become contaminated during building restoration if proper measures to prevent it were nto followed.
See CARPET MOLD / ODOR TESTS
Also see SEWAGE CLEANUP PROCEDURES & STANDARDS - Do not enclose any wall cavity that has insulation that was wet and was not pulled out, cavity dried, and new insulation installed after any cleaning, sanitizing, and sealants.
I look for moisture levels below 18%, preferably below 12% in the most-suspect, most-likely-to-be-wet, slowest-to-dry locations such as intersections between existing wood framing and drywall fastened to it, at wall bottoms, at wall sill plates and stud bases; - Iinspect the entire building, not just the area that was soaked, for possible problem mold growth, as high indoor moisture conditions could have made a problem elsewhere, such as in an attic, in closed cabinets, even under carpets on upper floors;
- For more complete guidance on successful and durable cleanup & re-build procedures fter a building flood, please see our article series beginning
at FLOOD DAMAGE ASSESSMENT, SAFETY & CLEANUP or see the step by step details found at the top of this page as well as at the top of other articles in this series.
...
Reader Comments, Questions & Answers About The Article Above
Below you will find questions and answers previously posted on this page at its page bottom reader comment box.
Reader Q&A - also see RECOMMENDED ARTICLES & FAQs
On 2021-03-18 - by (mod) -
@Julie, you could certainly remove the floor leveling compound; whether or not it's needed depends on what new flooring you intend to install.
Keep in mind that your moisture meter is (if it's like most of them) not really measuring "moisture" it is measuring electrical resistance between two points through the test surface. The wetter the surface the better it conducts and the lower its resistance and the higher the reading on the moisture meter.
But a surface that is conductive for any other reason will look "wet" even if it's not. Metal would look 100% wet.
That's why some moisture meters (normally calibrated for softwood) include a masonry scale.
See
MOISTURE METER STUDY https://inspectapedia.com/structure/Moisture_Meters.php
MOISTURE METER ERRORS https://inspectapedia.com/structure/Moisture_Meter_Errors.php
MOISTURE METER CHOICES https://inspectapedia.com/structure/Moisture_Meter_Sources.php
On 2021-03-18 by Julie
Thanks for the reply. So I think my question is whether this subfloor will ever dry when covered with the cement-like floor leveling compound covering it? Or, conversely I can chip away at the compound (chisel) to expose the plywood.
I know the latter will be faster at least. But is it required? Could the plywood just dry through a compound after a long drying period? Thank you!
On 2021-03-18 - by (mod) -
@Julie, I don't have a clear understanding of exactly how you're on this built or what all of the materials are but it certainly is important to let surfaces dry before covering them over with anything else.
Fans and dehumidifiers in heat control speed that process. For the problem floor if there's access from below that would be another place to inspect and test for moisture.
On 2021-03-18 by Julie
@Julie, Note, it has been 9 days since water source was stopped. 7 days since vinyl planks removed.
Hello. Your site has been so helpful. We had water damage from a leak and have done mold cleaning and treatment all around the leak (down to joists and framing). Much farther from the leak, there is a section of floor we can’t figure out.
We have removed the vinyl plank flooring and cleaned for mold though none appeared to be here).
Below that remains a thin layer of floor leveling compound, followed by plywood, then the car decking before the joists. This area with the floor leveling compound doesn’t seem to be drying fast...or at all?
I’m wondering whether dehumidifiers and fans might dry it, or if this is just never going to dry unless I take up the plywood. Moisture meter shows completely wet though it doesn’t appear or feel damp. Is it worth letting it try to dry?
Or does it need to come up? Parts are dry (moisture under 10%). Others off the charts on the meter. Thank you!
On 2017-01-25 by sp
for papers in a flood, simply put them in a freezer and as soon as the moisture is in ice form, remove from freezer and tap the ice off of the paper. the ink may smudge a little, but you should be able to read everything. Learned this from an Army man who had to freeze his entire office files. works great
On 2016-09-28 by J.M.
Thank you for your input, Regards, J.M.
On 2016-09-28 - by (mod) -
JM
Unfortunately, the cost of professional restoration work on photographs is likely to be high enough that one is force either into a triage judgement, choosing which photos merit that investment, or to undertake an amateur effort. For the time being, provided the photos are now dry, you can enclose them in an air-tight plastic box, perhaps with a few packets of dessicant to be safe.
Watch out: don't put a mold-dirtied finger in your eye or you may end up with an eye infection that makes looking at photos a moot point.
On 2016-09-28 by J.M.
Thank you for coming back to me so promptly. I searched InspectApedia.com as suggested and realised that my photographs are in a far worse state than the examples shown. I will try your suggestions and if necessary contact a restoration company (as suggested by InspectApedia.com).
I have been out of the country (U.K.) for some many months and unfortunately the photographs were not 'rescued immediately'. They were put in a large plastic bag still in the photograph albums,wrapped up tight and put into a 'boiler cupboard' which is always warm.
After a period of about 6 months I returned and was devastated at what I found. I have thrown about 600 away and was hoping to try and do something with the rest. With thanks,J.M
On 2016-09-28 - by (mod) -
Anon:
When attempting to salvage photographs damaged by flood waters and mold, I would wipe the photos as clean as you can with clean dry soft paper towels, disposing of towels after each area of the towel has been used so you don't just spread mold around (it's mold, not "mildew" - as mildew only grows on living plants).
Then you might reduce the odor by placing photos face-down in fresh air. Sunlight helps but risks bleaching the photo image so I'd avoid facing the actual photo image into bright sun.
Please see MOLD on PHOTOGRAPHS, CLEAN-UP at inspectapedia.com/mold/Clean_Moldy_Photographs.php for details. We reminded ourselves of that article by searching InspectApedia.com for "moldy photograph"
On 2016-09-28 by Anonymous
I have hundreds of photos damaged in a flood. Most of those I have disposed of but have many I need to save. I cannot throw them away,they are a life of memories. What can I do to get rid of the awful smell ot 'mildew'. I intend cutting out the part which is still recognisable. The back of the photograps are quite sticky. Please help asap.
...
Continue reading at Step 5. RESTORE UTILITIES AFTER FLOODING - separate article - The rest of your work will be much easier if you have heat, electricity, clean water, and sewage disposal.
Or see these
Recommended Articles
- BATHROOM MOLD
- CABINETS & COUNTERTOPS
- FLOOD & DISASTER BUILDING DAMAGE REPAIR PROCEDURES - home
- Step 1. TAKE CARE OF YOURSELF FIRST
- Step 2. GIVE YOUR HOME FIRST AID
- Step 3. GET ORGANIZED
- Step 4. BUILDING DRY-OUT PROCEDURES
- SALVAGE BUILDING CONTENTS
- Step 5. RESTORE UTILITIES AFTER FLOODING
- MOLD CONTROL, FLOOD RESPONSE
- Step 6. FLOOD DAMAGED BUILDING CLEAN-UP
- Step 7. CHECK ON FINANCIAL ASSISTANCE
- Step 8. REBUILD & FLOODPROOF
- Step 9. FLOOD & STORM INSURANCE
- FLOOD-CAUSED MOLD PREVENTION
- FLOOD REPAIR CONTRACTORS
- WHEN TO STOP LOOKING FOR MOLD
- FLOOD & STORM DAMAGE REFERENCES for damage assessment & cleanup
- HURRICANE DAMAGED BUILDINGS
- HURRICANE, WIND, & STORM-RESISTANT WINDOWS
- SEWAGE CLEANUP PROCEDURES & STANDARDS for buildings flooded by a sewage or drain burst or backup
- WIND DAMAGED BUILDINGS
Suggested citation for this web page
Step 4. BUILDING DRY-OUT PROCEDURES at InspectApedia.com - online encyclopedia of building & environmental inspection, testing, diagnosis, repair, & problem prevention advice.
Or see this
INDEX to RELATED ARTICLES: ARTICLE INDEX to BUILDING DAMAGE, DISASTER, REPAIRS
Or use the SEARCH BOX found below to Ask a Question or Search InspectApedia
Or see
INDEX to RELATED ARTICLES: ARTICLE INDEX to BUILDING STRUCTURES
Or use the SEARCH BOX found below to Ask a Question or Search InspectApedia
Ask a Question or Search InspectApedia
Try the search box just below, or if you prefer, post a question or comment in the Comments box below and we will respond promptly.
Search the InspectApedia website
Note: appearance of your Comment below may be delayed: if your comment contains an image, photograph, web link, or text that looks to the software as if it might be a web link, your posting will appear after it has been approved by a moderator. Apologies for the delay.
Only one image can be added per comment but you can post as many comments, and therefore images, as you like.
You will not receive a notification when a response to your question has been posted.
Please bookmark this page to make it easy for you to check back for our response.
IF above you see "Comment Form is loading comments..." then COMMENT BOX - countable.ca / bawkbox.com IS NOT WORKING.
In any case you are welcome to send an email directly to us at InspectApedia.com at editor@inspectApedia.com
We'll reply to you directly. Please help us help you by noting, in your email, the URL of the InspectApedia page where you wanted to comment.
Citations & References
In addition to any citations in the article above, a full list is available on request.
- [1] REPAIRING YOUR FLOODED HOME [PDF], American Red Cross & FEMA: Federal Emergency Management Agency, FEMA PO Box 2012, Jessup MD 20794-2012. Printed copies of this book are available from the American Red Cross, from your local Red Cross chapter, or by writing to the address above. Web search 10/4/2010, original source: http://www.redcross.org/www-files/Documents
/pdf/Preparedness/file_cont333_lang0_150.pdf - [2] The following are available free from:
Federal Emergency
Management Agency
Attn: Publications
P. O. Box 2012
Jessup, MD 20794-2012
- Design Manual for Retrofitting Flood-prone Residential Structures, FEMA-114. This detailed manual explains all the floodproofing options in language a homeowner can understand.
- Elevated Residential Structures, FEMA-54.
- Floodproofing Non-residential Structures, FEMA-102.
- Coastal Construction Manual, FEMA-55.
- Manufactured Home Installation in Flood Hazard Areas, FEMA 85.
- [3] The following are available for
free from:
U.S. Army Corps of Engineers
Attn: CECW-PF
20 Massachusetts Avenue, NW
Washington, D.C. 20314
- Introduction to Flood Proofing, John R. Sheaffer, 1967
- Flood-Proofing Regulations, U.S. Army Corps of Engineers, Pittsburgh District, 1990, 80 pages (Corps publication EP 1165 3 314).
- Flood Proofing Systems & Techniques, L.N. Flanagan, editor, 1984
- Flood Proofing Tests, Tests of Materials and Systems for Flood Proofing Structures, Corps of Engineers, National Flood Proofing Committee, August, 1988.
- Raising and Moving the Slab- On-Grade House, Corps of Engineers National Flood Proofing Committee, 1990.
- [4] The following publications are
available from the American Red
Cross. Contact your Red Cross
chapter for more information:
- Your Family Disaster Plan (ARC 4466)
- Su plan para el hogar en caso de desastres (ARC 4466S)
- Your Family Disaster Supplies Kit (ARC 4463)
- Su Equipo de suministros para la familia en caso de desastres (ARC 4463S)
- Safe Living in Your Manufactured Home (ARC 4465)
- Are You Ready for a Flood or Flash Flood? (ARC 4458)
- ¿Está preparado para una inundación or inundación súbita? (ARC 4458S)
- Are You Ready for a Hurricane? (ARC 4454)
- ¿Está preparado para un huracán? (ARC 4454S)
- [5] Clean up References Many Cooperative Extension Service offices have home economists and food and farm experts. Check your telephone book under the county name. For example, if you live in Pittsburg County, check under “Pittsburg County Cooperative Extension Service”.
- [6] Questions on cleaning or disinfecting of specific materials can be answered by manufacturers of cleaning products. Check the product labels for toll free telephone numbers.
- [7] References on technical aspects of floodproofing can be located through the Floodplain Management Resource Center, a free service provided by the Association of State Floodplain Managers. Call 303/492-6818
- [8] CMHC, Canadian Mortgage and Housing Corporation, "After the Flood — A Homeowner’s Checklist", retrieved 10/21/2012, original source http://www.cmhc-schl.gc.ca/en/co/maho/em/em_001.cfm [copy on file as After_The_Flood_CMHC.pdf]
- [9] Como Reparar su Hogar Inundado, American Red Cross and FEMA - PDF - espanol
- [10] Flood Cleanup - Avoiding Indoor Air Quality Problems,> US EPA Fact Sheet
- [11] Cleaning Up After a Flood, Texas Department of State Health Services.
- "IgG Food Allergy Testing by ELISA/EIA, What do they really tell us?" Sheryl B. Miller, MT (ASCP), PhD, Clinical Laboratory Director, Bastyr University Natural Health Clinic - ELISA testing accuracy: Here is an example of Miller's critique of ELISA - www.betterhealthusa.com/public/282.cfm - Townsend Letter for Doctors and Patients
The critique included in that article raises compelling questions about IgG testing assays, which prompts our interest in actually screening for the presence of high levels of particles that could carry allergens - dog dander or cat dander in the case at hand.
- www.tldp.com/issue/174/IgG%20Food%20Allergy.html - contains similar criticism in another venue but interestingly by the same author, Sheryl Miller. Sheryl Miller, MT (ASCP), PhD, is an Immunologist and Associate Professor of Basic and Medical Sciences at Bastyr University in Bothell, Washington. She is also the Laboratory Director of the Bastyr Natural Health Clinic Laboratory. - Allergens: Testing for the level of exposure to animal allergens is discussed at http://www.animalhealthchannel.com/animalallergy/diagnosis.shtml (lab animal exposure study is interesting because it involves a higher exposure level in some cases
- Allergens: WebMD discusses allergy tests for humans at webmd.com/allergies/allergy-tests
- Atlas of Clinical Fungi, 2nd Ed., GS deHoog, J Guarro, J Gene, & MJ Figueras, Centraalbureau voor Schimmelcultures, Universitat Rovira I Virgili, 2000, ISBN 90-70351-43-9
- "Management of Powdery Mildew, Leveillula taurica, in Greenhouse Peppers," Ministry of Agriculture and Lands, British Columbia - Original source: www.agf.gov.bc.ca/cropprot/peppermildew.htm
- Fifth Kingdom, Bryce Kendrick, ISBN13: 9781585100224, - we recommend the CD-ROM version of this book. This 3rd/edition is a compact but comprehensive encyclopedia of all things mycological. Every aspect of the fungi, from aflatoxin to zppspores, with an accessible blend of verve and wit. The 24 chapters are filled with up-to-date information of classification, yeast, lichens, spore dispersal, allergies, ecology, genetics, plant pathology, predatory fungi, biological control, mutualistic symbioses with animals and plants, fungi as food, food spoilage and mycotoxins.
- Fungi, Identifying Filamentous, A Clinical Laboratory Handbook, Guy St-Germain, Richard Summerbell, Star Publishing, 1996, ISBN 0-89863-177-7 (English)
- US EPA: Mold Remediation in Schools and Commercial Building [ copy on file as /sickhouse/EPA_Mold_Remediation_in_Schools.pdf ] - US EPA
- Mycology, Fundamentals of Diagnostic, Fran Fisher, Norma B. Cook, W.B. Saunders Co. 1998, ISBN 0-7216-5006-6
- Kansas State University, department of plant pathology, extension plant pathology web page on wheat rust fungus: see http://www.oznet.ksu.edu/path-ext/factSheets/Wheat/Wheat%20Leaf%20Rust.asp
- A BRIEF GUIDE to MOLD, MOISTURE, and YOUR HOME, [PDF] U.S. Environmental Protection Agency US EPA - includes basic advice for building owners, occupants, and mold cleanup operations. See http://www.epa.gov/mold/moldguide.htm
- US EPA - Mold Remediation in Schools and Commercial Building [ copy on file as /sickhouse/EPA_Mold_Remediation_in_Schools.pdf ] - US EPA
- US EPA - UNA BREVA GUIA a MOHO / HONGO - en Espanol
- "IgG Food Allergy Testing by ELISA/EIA, What do they really tell us?" Sheryl B. Miller, MT (ASCP), PhD, Clinical Laboratory Director, Bastyr University Natural Health Clinic - ELISA testing accuracy: Here is an example of Miller's critique of ELISA - www.betterhealthusa.com/public/282.cfm - Townsend Letter for Doctors and Patients
The critique included in that article raises compelling questions about IgG testing assays, which prompts our interest in actually screening for the presence of high levels of particles that could carry allergens - dog dander or cat dander in the case at hand.
- www.tldp.com/issue/174/IgG%20Food%20Allergy.html - contains similar criticism in another venue but interestingly by the same author, Sheryl Miller. Sheryl Miller, MT (ASCP), PhD, is an Immunologist and Associate Professor of Basic and Medical Sciences at Bastyr University in Bothell, Washington. She is also the Laboratory Director of the Bastyr Natural Health Clinic Laboratory. - Allergens: Testing for the level of exposure to animal allergens is discussed at http://www.animalhealthchannel.com/animalallergy/diagnosis.shtml (lab animal exposure study is interesting because it involves a higher exposure level in some cases
- Allergens: WebMD discusses allergy tests for humans at webmd.com/allergies/allergy-tests
- Atlas of Clinical Fungi, 2nd Ed., GS deHoog, J Guarro, J Gene, & MJ Figueras, Centraalbureau voor Schimmelcultures, Universitat Rovira I Virgili, 2000, ISBN 90-70351-43-9
- A BRIEF GUIDE to MOLD, MOISTURE, and YOUR HOME, [PDF] U.S. Environmental Protection Agency US EPA - includes basic advice for building owners, occupants, and mold cleanup operations. See http://www.epa.gov/mold/moldguide.htm
- "Disease Prevention Program for Certain Vegetable Crops," David B. Langston, Jr., Extension Plant Pathologist - Vegetables, University of Georgia (PDF document) original source: www.reeis.usda.gov/web/crisprojectpages/209797.html
- Disease Prevention in Home Vegetable Gardens [PDF], Patricia Donald,Department of Plant Microbiology and Pathology,
Lewis Jett
Department of Horticulture, University of Missouri Extension - extension.missouri.edu/publications/DisplayPub.aspx?P=G6202 - "Management of Powdery Mildew, Leveillula taurica, in Greenhouse Peppers," Ministry of Agriculture and Lands, British Columbia - Original source: www.agf.gov.bc.ca/cropprot/peppermildew.htm
- Fifth Kingdom, Bryce Kendrick, ISBN13: 9781585100224, - we recommend the CD-ROM version of this book. This 3rd/edition is a compact but comprehensive encyclopedia of all things mycological. Every aspect of the fungi, from aflatoxin to zppspores, with an accessible blend of verve and wit. The 24 chapters are filled with up-to-date information of classification, yeast, lichens, spore dispersal, allergies, ecology, genetics, plant pathology, predatory fungi, biological control, mutualistic symbioses with animals and plants, fungi as food, food spoilage and mycotoxins.
- Fungi, Identifying Filamentous, A Clinical Laboratory Handbook, Guy St-Germain, Richard Summerbell, Star Publishing, 1996, ISBN 0-89863-177-7 (English)
- US EPA: Mold Remediation in Schools and Commercial Building [ copy on file as /sickhouse/EPA_Mold_Remediation_in_Schools.pdf ] - US EPA
- Mycology, Fundamentals of Diagnostic, Fran Fisher, Norma B. Cook, W.B. Saunders Co. 1998, ISBN 0-7216-5006-6
- In addition to citations & references found in this article, see the research citations given at the end of the related articles found at our suggested
CONTINUE READING or RECOMMENDED ARTICLES.
- Carson, Dunlop & Associates Ltd., 120 Carlton Street Suite 407, Toronto ON M5A 4K2. Tel: (416) 964-9415 1-800-268-7070 Email: info@carsondunlop.com. Alan Carson is a past president of ASHI, the American Society of Home Inspectors.
Thanks to Alan Carson and Bob Dunlop, for permission for InspectAPedia to use text excerpts from The HOME REFERENCE BOOK - the Encyclopedia of Homes and to use illustrations from The ILLUSTRATED HOME .
Carson Dunlop Associates provides extensive home inspection education and report writing material. In gratitude we provide links to tsome Carson Dunlop Associates products and services.


