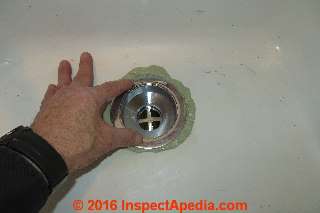
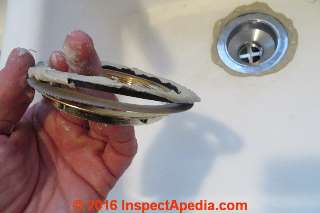
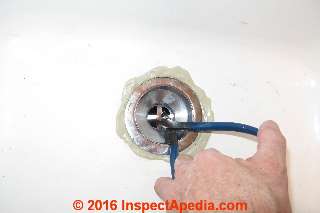
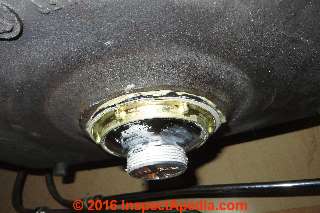
 Repair a Leaky Sink Strainer / Drain
- POST a QUESTION or COMMENT about types of leaks in supply & drain piping
How to fix a leaky sink drain or sink strainer assembly:
Using photographs and text we show how to diagnose the source of water found under a leaky kitchen sink. We repair the link by repairing or replacing leaky sink trap and drain parts or by replacing a leaky sink strainer assembly.
This article series describes the different types of plumbing leaks that can occur in building supply piping or drain piping. Knowing just what kind of leak is occurring in a building helps pinpoint the problem and also helps specify the necessary plumbing repair.
InspectAPedia tolerates no conflicts of interest. We have no relationship with advertisers, products, or services discussed at this website.
- Daniel Friedman, Publisher/Editor/Author - See WHO ARE WE?
How to Repair Kitchen Sink Leaks at the Strainer Assembly
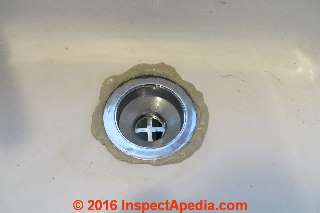
Sink basin or sink strainer leaks occur at the drain assembly of all types of sinks due to improper installation, loose parts, missing gaskets or sealant, or from corrosion.
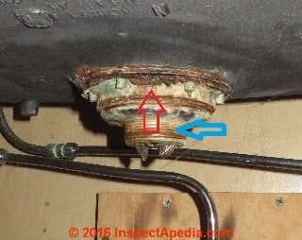
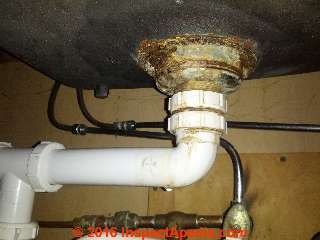
Watch out: But unless you look closely under the sink - a pose that requires crouching and crawling about - you may not see the real source of trouble. If you miss a corroded leaky sink strainer assembly you may find yourself replacing traps or drain piping that were not the problem.
[Click to enlarge any image]
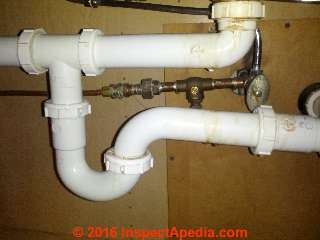
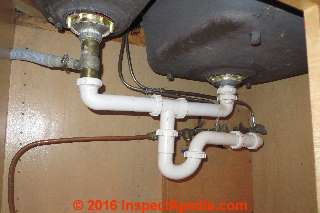
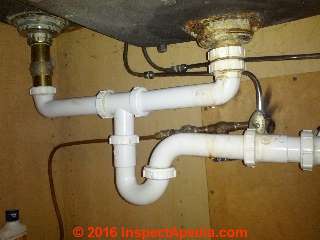
Above: yellow leak stains and water droplets on the white plastic sink drain and trap parts looked as if the drain parts were loose or damaged, maybe cracked. They were not. The problem was the sink strainer. To see it one has to bend over or nearly crawl under the sink and then look up - taking care not to get rusty crud in one's eyes.
1. Remove the Sink Trap, Tailpiece, Drain Parts
Put a bucket or deep plastic bin under the sink drain so that you can catch the water that will spill out of the P-trap when you remove these parts.
Remove all of the white plastic parts (or equivalent at your sink) that you see in the photos above. These parts should un-screw by hand if they're plastic or you may need to use a large goose-neck slip-joint pliers.
Watch out: Take care to keep all of the drain parts as you will either re-use them (if they're in very good shape) or you'll take them to your plumbing supplier to be sure that you purchase all of the necessary parts to install new drain components at the end of the strainer replacement procedure we give below.
2. Remove the Old Sink Strainer Assembly
The sink strainer kit manufacturers, if they give you any instructions at all, will just say "remove the old strainer assembly".
Look let's be honest. You may have a hell of a difficult time getting the old sink strainer off.
Sure if the strainer assembly were pretty new and is un-damaged, you might be able to un-screw the large round strainer nut by tapping it counter-clockwise with a hammer and a screwdriver.
Watch out: don't go banging really hard on a cast-iron sink or you may break it.
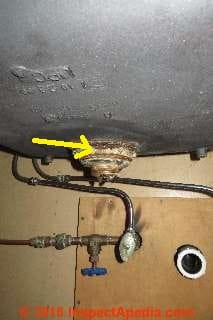
OK with that warning out of the way, try tapping the protruding lugs on the large round strainer nut - yellow arrow in the photo above. Tap the nut in the direction of the yellow arrow. When that lug breaks off, try the next one. Try tapping at several spaced points around the nut to see if you can loosen it. Try spraying some WD40 or Liquid Wrench on the corroded nut threads.
Sink Strainer Removal Problem 1: the whole strainer assembly just rotates in the sink when I try to unscrew it
OK so let's get a grip on things. The strainer nut isn't loosening. Instead the wole sink strainer assembly is rotating when you tap on the nut to try to turn it. Here's how your assistant can grab onto the strainer assembly from above you go back to pounding from below.
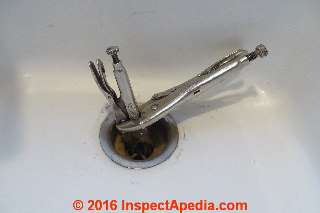
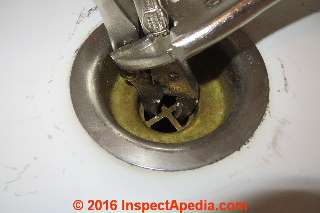
I use a pair of Vise Grip pliers. Unless your assistant is incredibly strong you'll need two Vise Grips. The first pinches down on the cross member of the sink strainer drain opening - see the close-up photo just below.
The second Vise Grip pliers grabs onto the first one at an angle so that your assistant can hold the strainer assembly from above you go back to pounding to try to turn the sink strainer lock nut from below.
Watch out: don't get rusty crud in your eyes while working below the sink. You risk abrasion, cuts, or a nasty eye infection. I'd say wear goggles but you won't, or if you do you won't be able to see what the heck you're doing. Instead keep your head out of the way of falling debris.
Sink Strainer Removal Problem 2. The Strainer Nut Won't Budge
Yeah I know. On a really badly corroded kitchen sink strainer assembly the whole shebang may be rusted together. So we continue with Plan B. You may still need your assistant to hold the strainer from above.
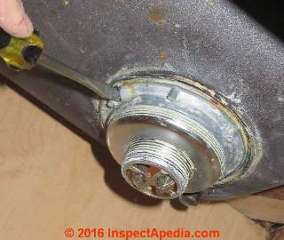
Using a hammer and a small 1/2" cold chisel or even a large crummy old big flat-bladed screwdriver, cut through a thin portion of the sink strainer lock nut.
In the photo above, I'd cut through the thin area of the sink strainer nut pointed to by the red arrow. I'm hammering mostly at right angles against the nut, I'm no longer trying to turn it. If you click to enlarge the photo you'll see the tips of our Vise Grip pliers nosing down through the strainer basket.
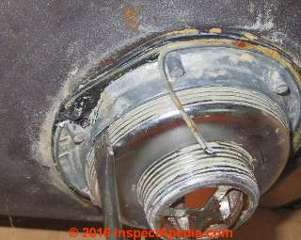
Above you can see my screwdriver just cutting through the outer flange the strainer nut.
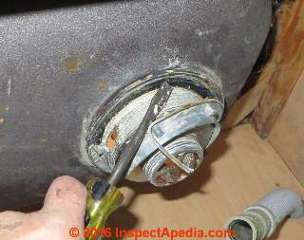
With the outer flange of the sink basket assembly nut cut, I was able to drive my screwdriver between the threaded side of the strainer nut and the basket assembly side - photo just below.
Don't worry about damaging the frozen sink strainer basket nut or basket itself - you're going to throw all of these parts away and install a whole new sink strainer assembly.
Once you've cut both the flange and the threaded portion of the sink basket nut you'll be able to pry the nut off of the sink strainer basket, as I illustrate just below.
Alternatives to using the cold chisel or old screwdriver to cut the frozen sink strainer nut
- A short hacksaw blade held to cut at an angle - this can work but it's difficult
- A Dremel tool with a carbide cutting blade - this is very dangerous as when you break off the cutting blade it can cut your eye to shreds.
Step 3. Remove the Sink Strainer Basket
With the strainer nut removed you will push the strainer basket up from below or just pull it off with your still-attached Vise Grip pleirs. Only if some idiot who installed the old sink strainer assembly used an adhesive instead of plumbers putty will we have trouble with this step.
Below at Step 4 you can see the sink, from above, with the old sink strainer basket out of the way.
Step 4: Remove Plumbers Putty from the Sink Surface
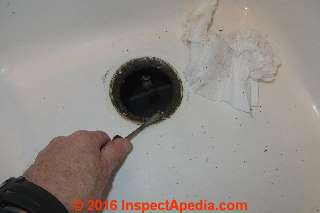
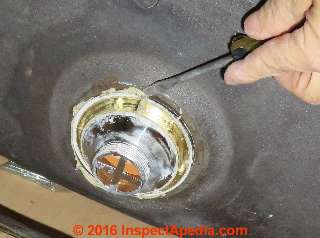
I used a dull flat bladed screwdriver to scrape off the nasty old plumbers' putty to begin preparing the sink to receive the new sink strainer assembly.
Inspect the under-side of the sink around the drain opening and scrape off any plumbers putty or rust crud that may be under there too.
Step 5. Clean the Sink Surfaces Around the Drain Opening
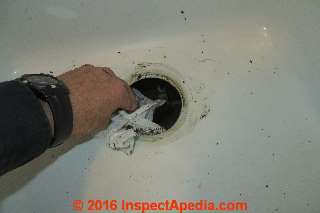
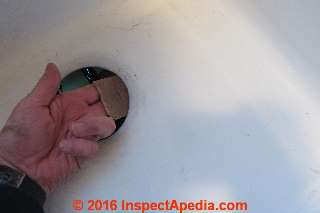
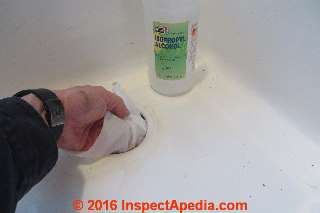
Above, using a paper towel, I'm wiping both sides (the porcelain side you can see and the cast iron under-side of the sink around the drain opening.
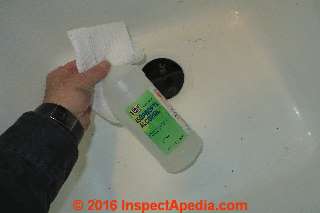
Below I'm using alcohol to finish cleaning both surfaces of the sink drain opening. I admit that few plumbers would bother to do this but I want to be extra sure that my plumbers putty will seal nicely against the porcelain/enamel of the upper sink surface, and I want a good clean mating surface for the rubber gasket that's going to go against the underside of the drain opening.
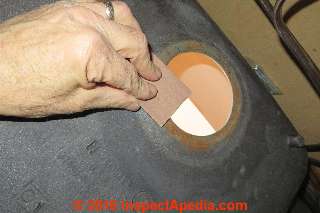
Below: I tried three methods to get the heavy rust off of the cast iron underside of the sink drain opening. I used a wire brush, then a flat bladed screwdriver to remove the high and very rusty material. I finished with 120 grit sandpaper - shown below.
I admit most plumbers won't bother to be so meticulous but I don't want to have to take this job apart because my new sink strainer baseket assembly is leaking.
You can take a break from lying on your back under the sink by sanding the under-side of the sink drain opening by reaching through the drain from above as Illustrate in my photo just below.
After scraping and sanding the under-side of the drain opening I wiped it off again with alcohol so that no dust or debris remained.
Step 6: Prepare Plumbers Putty & Install It Around the Sink Drain Opening
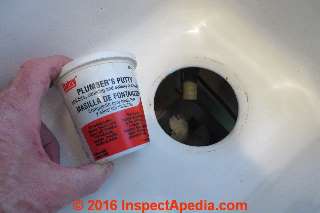
Above: If your plumbers' putty is old and dried out, buy new plumbers' putty.
Watch out: DO NOT substitute adhesive caulk or something like that for plumbers' putty. If you do, when your sink strainer assembly needs replacement, the next woman who sets out to repair this sink is going to find you and kill you.
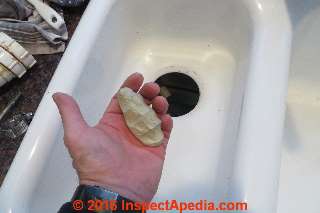
Warm the putty up in your hand by kneading it until it's soft. Then form it into a pencil-sized putty rope that you can press down around the sink drain opening.
If your putty won't adhere at all to the porcelain sink surface you should reconsider my suggestion of cleaning the surfaces with alcohol.
Lacquer thinner would work too but is more dangerous and more toxic. Here you see I've got my plumbers' putty sealant in place and I'm ready to press the sink basket upper part into place.
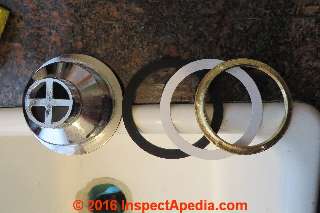
Step 7: Collect the New Sink Strainer Basket Parts
Above from left to right are the new sink drain basket strainer assembly parts in the order of installation.
- The sink strainer basket itself. This part will be pushed down through the sink drain opening from above.
- A large black round flat rubber gasket. This gasket will go around the sink basket and up against the under-side of the sink.
- A large white round flat plastic gasket. This gasket will go between the rubber gasket and the strainer nut. This allows the nut to turn up tight against the bottom of the sink, securing the strainer basket in place. Without this plastic gasket the nut may tend to deform or ruin the rubber gasket.
- The sink strainer assembly nut. This nut will be turned by hand into place then tapped snug with a hammer and screwdriver. Don't over-drive it or you may deform the gaskets. Don't under-drive it or the strainer will be loose, will rotate, and ultimately it will leak.
Step 8: Insert the Strainer Basket Through the Sink Drain Opening
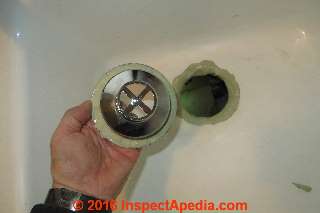
From above, insert the sink strainer basket through the drain opening. You'll see in the photo that I've placed more plumbers' putty right onto the underside of the sink drain basket flange.
This isn't necessary. Some plumbers just put their putty on the flange rather than on the sink surface. I do both.
I don't worry about too much putty as the excess is going to squeeze out when I tighten the sink drain basket nut.
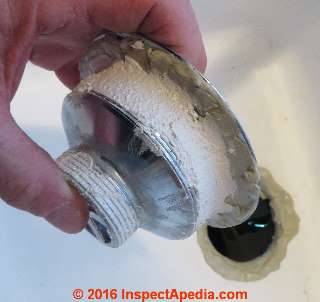
Below you see that I've swabbed both the large diameter sink drain basket threads and the smaller diameter threads with teflon pipe joint paste.
This will assure that both the drain basket nut and the sink drain tailpiece nut will screw easily in place.
As I've used non-hardening teflon paste this will make the next person who has to replace this sink strainer very happy as it'll probably be easier to unscrew the parts.
I also have the theory that this teflon paste helps resist corrosion of these parts during their service life.
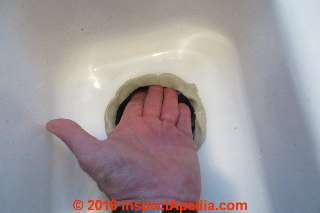
Below you can see the excess plumbers' putty that's oozed out of the connection as I push the sink drain basket in place.
I don't touch that oozed putty yet as more is to come oozing out when I tighten the nut that secures the sink drain basket in place.
Step 9: Install the Sink Strainer Assembly Gaskets & Nut
Above I've taken an extra step also eschewed by most plumbers: I've smeared plumbers putty on the upper side of the rubber gasket that will mate against the rusted and somewhat rough cast iron surface of the sink underside. You can see I've got the three parts in order: rubber gasket, plastic gasket, basket nut.
To hold the sink basket strainer from turning while I tighten the nut below, my accomplice uses a pair of blunt nosed pliers.
I don't need the Vise Grip pliers for this step as less force is required than when removing an old sink strainer basket assembly, and Also I want to try to avoid nicking or scarring the sink drain parts.
Below you can see from under the sink that the sink drain basket parts are now in place.
Below: more putty has oozed out from below the sink strainer basket flange as I've tightened the retaining nut. Now this putty can be removed.
I just used my screwdriver to gently cut it away.
I also remove any excess putty that has oozed out of the gasket and nut assembly on the sink underside.
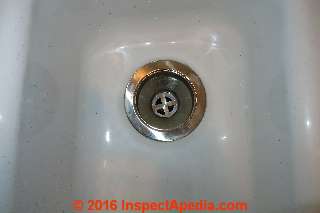
Below is one of my two newly-installed sink drain strainer baskets.
Step 10: Re-Connect the Sink Basket to the Drain
Above I've re-connected the plastic drain parts and trap so that the sink is now connected to the building drain-waste-vent system again.
With the plastic drain parts all snugged hand-tight we run water in both sinks and watch for leaks. You should not see leaks at the drain basket assembly but you may find a drip or two at those plastic drain connections if they were not clean and snugged up nicely.
A professional plumber would not re-use old drain parts.
Replace One or Both Strainers at a Double Kitchen Sink?
You can see that the main leak problem is at the main or deeper right hand sink of this double sink assembly
. If I had to physically remove the whole sink to repair the strainer assembly I'd certainly have done both of them rather than to have to do that a second time a few years later. In this case I decided to replace both of the strainer assemblies anyway.
...
Continue reading at LEAK TYPES, WATER SUPPLY or DRAIN PIPES or select a topic from the closely-related articles below, or see the complete ARTICLE INDEX.
Or see these
Recommended Articles
- LEAK CAUSES in WATER PIPING - what causes leaks in metal piping?
- PLUMBING DRAIN NOISE DIAGNOSIS
- REPAIR BURST LEAKY PIPES
- SINK TYPES & MATERIALS
- WATER STAINING CONTAMINANTS - stains on plumbing fixtures
- THAW FROZEN PIPES - how to find frozen and burst pipe leaks in buildings without causing a catastrophe
Suggested citation for this web page
SINK LEAK DIAGNOSIS & REPAIR at InspectApedia.com - online encyclopedia of building & environmental inspection, testing, diagnosis, repair, & problem prevention advice.
Or see this
INDEX to RELATED ARTICLES: ARTICLE INDEX to PLUMBING SYSTEMS
Or use the SEARCH BOX found below to Ask a Question or Search InspectApedia
Ask a Question or Search InspectApedia
Try the search box just below, or if you prefer, post a question or comment in the Comments box below and we will respond promptly.
Search the InspectApedia website
Note: appearance of your Comment below may be delayed: if your comment contains an image, photograph, web link, or text that looks to the software as if it might be a web link, your posting will appear after it has been approved by a moderator. Apologies for the delay.
Only one image can be added per comment but you can post as many comments, and therefore images, as you like.
You will not receive a notification when a response to your question has been posted.
Please bookmark this page to make it easy for you to check back for our response.
IF above you see "Comment Form is loading comments..." then COMMENT BOX - countable.ca / bawkbox.com IS NOT WORKING.
In any case you are welcome to send an email directly to us at InspectApedia.com at editor@inspectApedia.com
We'll reply to you directly. Please help us help you by noting, in your email, the URL of the InspectApedia page where you wanted to comment.
Citations & References
In addition to any citations in the article above, a full list is available on request.
- "New Electric Heat Tapes Help Prevent Fires," US Consumer Product Safety Commission (CPSC) #00936
- Mark Cramer Inspection Services Mark Cramer, Tampa Florida, Mr. Cramer is a past president of ASHI, the American Society of Home Inspectors and is a Florida home inspector and home inspection educator. Mr. Cramer serves on the ASHI Home Inspection Standards. Contact Mark Cramer at: 727-595-4211 mark@BestTampaInspector.com
- John Cranor [Website: /www.house-whisperer.com ] is an ASHI member and a home inspector (The House Whisperer) is located in Glen Allen, VA 23060. He is also a contributor to InspectApedia.com in several technical areas such as plumbing and appliances (dryer vents). Contact Mr. Cranor at 804-873-8534 or by Email: johncranor@verizon.net
- "Freezeproof Your House," Mike McClintock, Rodale's New Shelter, p. 30, October 1985 (approximate date)
- "How to Winterize Your Pipes," Mike McClintock, Homeowners How-To Magazine, p. 59-62, Nov-Dec 1979.
- Thanks to reader Dan Babb for discussing well piping leaks, July 2010
- In addition to citations & references found in this article, see the research citations given at the end of the related articles found at our suggested
CONTINUE READING or RECOMMENDED ARTICLES.
- Carson, Dunlop & Associates Ltd., 120 Carlton Street Suite 407, Toronto ON M5A 4K2. Tel: (416) 964-9415 1-800-268-7070 Email: info@carsondunlop.com. Alan Carson is a past president of ASHI, the American Society of Home Inspectors.
Thanks to Alan Carson and Bob Dunlop, for permission for InspectAPedia to use text excerpts from The HOME REFERENCE BOOK - the Encyclopedia of Homes and to use illustrations from The ILLUSTRATED HOME .
Carson Dunlop Associates provides extensive home inspection education and report writing material. In gratitude we provide links to tsome Carson Dunlop Associates products and services.


