 A Guide to Oil Furnace Cleaning & Heat Exchangers
- POST a QUESTION or COMMENT about furnace heat exchanger cleanout procedures, servicing, & troubleshooting
Furnace heat exchanger cleaning guide & suggestions.
This article describes the reasons that the heat exchanger on a warm air furnace needs annual cleaning and we explain how this cleanout is performed.
Heating system maintenance, including cleaning, inspection, and adjustment not only assure that the heating system will be safe and reliable when needed but more, the cost of proper service is just about always earned back in reduced heating costs.
We include the text from historical articles on methods used for testing furnace heat exchangers for leaks, and the allowable or standards for heat exchanger cracks, holes, leaks, or carbon monoxide hazards from such leaks.
InspectAPedia tolerates no conflicts of interest. We have no relationship with advertisers, products, or services discussed at this website.
- Daniel Friedman, Publisher/Editor/Author - See WHO ARE WE?
Oil Fired Furnace Heat Exchanger Cleanout Suggestions
[Click to enlarge any image]
The following recommendations for cleaning heating furnace heat exchangers were provided by an experienced HVAC technician and other residential heating furnace safety experts.[1]
Readers will note that the writer recommends a scope of work that extends considerably beyond the furnace heat exchanger itself. We agree.
Watch out: Dangerous carbon monoxide gas leaks, potentially fatal, can be present intermittently depending on variations in heating system operation and building conditions
Why is it Necessary to Clean the interior of an Oil Fired Furnace & its Heat Exchanger?
Home heating oil that has been burned in a oil fired furnace leaves sooty deposits that not only block heat transfer from the combustion chamber into the heat exchanger but also these deposits contain contain sulphur.
During the non-heating season this sulphur combines with moisture in the air to form a corrosive material.
The effect of moisture on deposits in the heat exchanger is increased metal corrosion.
These sooty deposits need to be removed from the furnace interior at least annually in order to reduce heating costs (by removing the insulating soot from the heat exchanger to assure safe and reliable heater operation, and to maximize the life of the heater by reducing corrosive deposits. Also
see HEATING COST SAVINGS METHODS,
An annual cleaning at the end of the heating season and before the summer's high humidity can also help reduce the amount of corrosion that takes place and extend the life of the heat exchanger.
Inspecting and Vacuuming the Oil Furnace Heat Exchanger
The heat exchanger is exposed by removing the furnace flue vent connector and covers so that its interior can be inspected visually for evidence of damage, vacuumed and brushed clean of soot and debris, inspected again for evidence of damage.
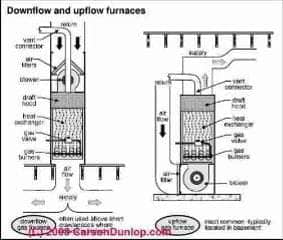
Carson Dunlop Associates' sketch (left) illustrates the location of the heat exchanger on both up-flow and down-flow heating furnaces.
[Click to enlarge any image]
Service techs use a HEPA vacuum cleaner whose wand is placed strategically along side or below the cleaning brush as soot is loosened and removed from the furnace. That approach helps avoid blowing messy oil soot around the utility area of the home.
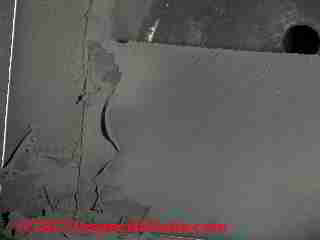
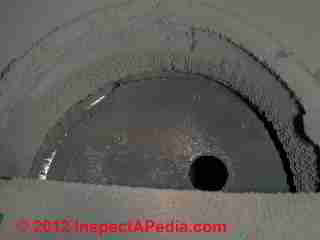
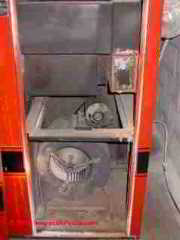
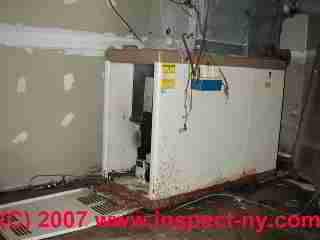
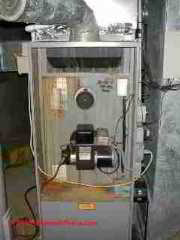
If the heating furnace has been exposed to leaks or wet conditions (see photo at the top of this page) there is a high risk of serious rust damage and system safety worries.
See HEAT EXCHANGER LEAK TEST for a discussion of inspection points at the furnace heat exchanger - be sure to pay attention to evidence of holes, rust, cracks, or heat exchanger leaks before, during, and after the heat exchanger cleanout process itself.
Those considering using instruments to test heat exchangers for leaks should review GAS MEASUREMENT INSTRUMENTS & gas detector tubes for indoor gas level tests.
But the annual service of an oil fired furnace should include considerably more points of disassembly, inspection, and cleaning than the heat exchange itself, as we outline in the following sections.
Oil Furnace Cleanout: Inspect the Chimney & Flue Vent Connector Pipe
Oil heat is widely used in the northeast of the U.S. and while many residential installations use masonry chimneys to carry away combustion gases when the furnace is operating, metal chimneys are widely used as well.
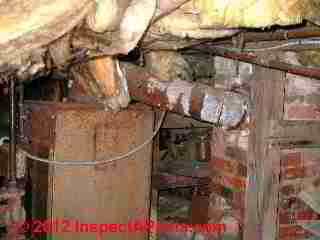
Watch out: Even if up-close inspection of the chimney from outside is difficult, inspecting inside the building one can often find indications of serious chimney leaks (photos at left) that will need prompt investigation and repair, and that are red flags warning of dangerous and costly hidden damage to the furnace and its heat exchanger.
Modern residential chimneys use a combination of masonry construction and clay flue liners that are stacked one on top of another to form the inner passage of the chimney. The brick layer helps support the liner and give the chimney a finished appearance.
Chimney flues that are uncapped are prone to water damage as the chimney ages. The clay liner sections are stacked one on top of the other creating a number of seams and rain water can get through deteriorating mortar or other crack fillers used in these seams.
Rainwater can end up in the flue pipe of the oil fired furnace. One clue that rainwater is entering is a stain running down the masonry beneath the flue pipe 'thimble', or metal sleeve that allows a tight fit between the flue pipe and masonry wall of the chimney.
Rainwater leaks may not be visible on the chimney masonry surface but show up in other places along the flue pipe. Water spots on the floor or dried deposits of white colored powder material beneath a flue pipe indicate that there's water entering during rain storms.
It's important to track down and address water leakage in the chimney when these conditions occur. A cap on an otherwise sound chimney is can help prevent rain water problems with the flue pipe.
Oil Furnace Cleanout: Condition of the Heat Exchanger Flue Pipe Extension Inside the Return Air Plenum
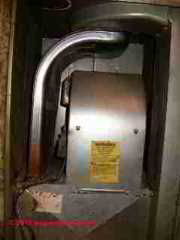
Modern forced hot air oil fired furnaces use a flue pipe that runs from the heat exchanger through the return air chamber of the furnace where the fan is located. As the furnace operates, the fan runs and some of the heat produced by combustion gas headed to the chimney is transferred to cool return air drawn into the furnace.
This flue pipe extension is heavy gage (thickness) and single piece with no coupling inside the return air chamber in the furnace. The reason for a single unbroken length is for safety.
If two coupled pieces in the extension were to separate the oil combustion gases would travel into the heating system with the help of the fan.
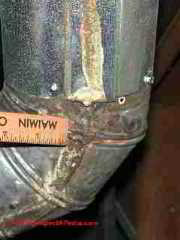
The flue pipe extension ends just outside the body of the furnace and in many installations has a 90 degree elbow turned upward that connects the extension to the remainder of the flue pipe system. Generally, draft flue pipe. systems have a run pitched upward so hot combustion gas drafts.
Water or moisture collection at the flue pipe extension and flue elbow can result in corrosion problems that may result in leakage of combustion gases. The combustion may be drawn into the heating system because of the vacuum created by the furnace fan drawing air.
Watch out: A sure sign that there is water problems from a leaking chimney are water spots or dried powdery material on the floor beneath the elbow and flue pipe extension connection.
[Indeed, when a client complained that their home inspector had failed to notice that the heating furnace was not usable, we simply removed the cover to expose the blower compartment and return air entry at the bottom of the suspect oil fired heating furnace.
The furnace had rusted and burned completely through leaving a two square foot hole that gave direct view into the combustion chamber.
When the oil burner ran one could see its flame impinging onto the blower assembly itself, and of course soot, smoke, and combustion gases were being blown through the entire home! A simple "look-see" by an inspector would have disclosed this very dangerous condition. - Ed.]
Breaking the flue pipe system apart and inspecting the condition of the flue pipe extension for inspection should be done as part of an annual cleaning.
If the technician carefully examines the metal in the are of the elbow and extension they should detect any corrosion that would lead to an eventual hole in the metal and combustion gas leakage.
Oil Furnace Cleanout: Flue pipe [flue vent connector] and fitting quality and inspection
Thicker (lower number gage) metal for flue pipes and pipe fittings result in longer life. However, it's common to have thin wall (higher number gage) less expensive metal fittings used during cleanings or service calls when the flue pipe fitting is corroded.
The horrible flue vent connector shown at left happens to be on a hydronic boiler, but the problems would be the same for a furnace:
- rusted out flue, unsafe
- down-sloping flue from heater top to chimney thimble - wrong direction, draft problems
- Collapsing insulation falling onto heater - unsafe
- Heater probably ruined by water and rust damage
While metal gage thickness standards may be set by codes, a 24 or 26 gauge pipe or fitting will last longer and be less likely to fail unexpectedly instead of a 28 gauge or higher number metal fitting.
Tip: When the furnace flue pipe is cool, try and squeeze the pipe as well as elbow fittings by hand. If there's a noticeable flex or you can see the metal deform, it's close to failure since the metal has corroded away from the inside even though the outside of the fitting looks normal with galvanized metal coating.
Oil Furnace Cleanout: Combustion Chamber Refractory Liner Inspection
Modern oil fired force d hot air furnaces have heat exchangers that are shaped similar to a metal trash can turned on its side. The burner is on one end of the exchanger and combustion exhaust leaves through an opening on the opposite end at the top of the exchanger.
To prevent the oil burner fireball from damaging the metal of the heat exchanger, a refractory (a non combustible chamber) is used. The refractory contains and allows the combustion exhaust out preventing damage to the relatively thin heat exchanger metal wall.
The refractory is suspended inside the heat exchanger using a metal strap cage and is replaceable if damaged.
Refractories are made from a non-asbestos material that can stand high heat and glow when heated (orange color) as the oil burner is running. Once the refractory is heated it becomes brittle as is used and ages. It's important not to vibrate the furnace excessively when cleaning or repairing once a refractory has been 'fired' (used with the oil burner). Avoid banging on or shoving the furnace or heat exchanger to prevent damaging a 'fired' refractory.
A damaged refractory allows the fireball from the oil burner directly contact the metal of the heat exchanger and can cause problems because of overheating which can distort the thin metal. This can lead to cracks and leakage of combustion gas into the forced air heating system.
The refractory interior should be inspected yearly. This means the oil burner needs to be removed to gain access and look at the inside of the refractory for cracks and holes. Temporary patches of refractory material called 'wet packs' can be used to repair cracks or holes until the original refractory can be replaced. A repair during the cold weather of the heating season is one reason to use a temporary 'wet pack' patch. These patches shouldn't be relied on as a permanent fix.
One sign of a long-term refractory problem that's gone un-addressed is discoloration on the side of the heat exchanger opposite the oil burner. It's best to check the heat exchanger for cracks since grossly uneven heating of the heat exchanger can cause stresses to build resulting in metal cracks.
Oil Furnace Cleanout: Flue pipe. fasteners
It's a serious subject because the integrity of the flue pipe. system to the chimney or other outlet is a safety issue while the furnace is running. There's nothing more hazardous than a flue pipe. assembly that could come apart while the furnace is running either when someone is nearby or when no one is home.
One sign of a professional flue pipe. installation is the use of TWO screws at each point where a flue pipe or fitting are joined together. Each screw is placed 90 degrees apart from the other.
Why? Well, in the event that one screw that falls out - either from lack of tightening, heating/cooling cycles, or the assembly being bumped accidentally - there's a a backup screw holding the assembly together and it's less likely to disconnect.
Oil Furnace Cleanout: Oil burner adjustment conditions
Residences built before energy codes often have enough air leakage that interior air is used to operate the oil burner.
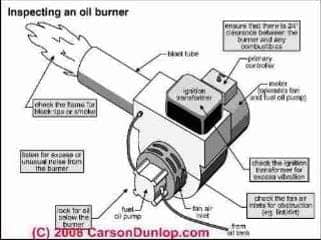
Our sketch (left, courtesy Carson Dunlop Associates ) illustrates some common service and inspection points at the oil burner.
When a oil fired furnace is cleaned and adjusted during warm summer weather, there can be problems if operating conditions aren't the same as during the heating season.
Normally during the winter outside windows and doors aren't open. If the burner is adjusted with unlimited air you may not see problems related to burner flame quality or other things like back draw of combustion smoke back into the house from the furnace fan.
So, even if it's June and very warm out, make sure that the burner adjustment is done with the house setup as it would be in the heating season. This means closing all windows and doors and shutting off whole house ventilation fans.
Readers of this document should also see CARBON MONOXIDE - CO and see BACKDRAFTING HEATING EQUIPMENT.
This article series answers most questions about central heating system troubleshooting, inspection, diagnosis, and repairs. We describe how to inspect, troubleshoot and repair heating and air conditioning systems to inform home owners, buyers, and home inspectors of common heating system defects.
...
Continue reading at FURNACE HEAT EXCHANGER LEAKS or select a topic from the closely-related articles below, or see the complete ARTICLE INDEX.
Or see these
Recommended Articles
Suggested citation for this web page
HEAT EXCHANGER CLEANING at InspectApedia.com - online encyclopedia of building & environmental inspection, testing, diagnosis, repair, & problem prevention advice.
Or see this
INDEX to RELATED ARTICLES: ARTICLE INDEX to HEATING FURNACES
Or use the SEARCH BOX found below to Ask a Question or Search InspectApedia
Ask a Question or Search InspectApedia
Questions & answers or comments about the procedure for inspection & cleanout of the oil fired furnace heat exchanger
Try the search box just below, or if you prefer, post a question or comment in the Comments box below and we will respond promptly.
Search the InspectApedia website
Note: appearance of your Comment below may be delayed: if your comment contains an image, photograph, web link, or text that looks to the software as if it might be a web link, your posting will appear after it has been approved by a moderator. Apologies for the delay.
Only one image can be added per comment but you can post as many comments, and therefore images, as you like.
You will not receive a notification when a response to your question has been posted.
Please bookmark this page to make it easy for you to check back for our response.
IF above you see "Comment Form is loading comments..." then COMMENT BOX - countable.ca / bawkbox.com IS NOT WORKING.
In any case you are welcome to send an email directly to us at InspectApedia.com at editor@inspectApedia.com
We'll reply to you directly. Please help us help you by noting, in your email, the URL of the InspectApedia page where you wanted to comment.
Citations & References
In addition to any citations in the article above, a full list is available on request.
- [2] "Heat Exchanger Testing, Who's Right?" Dan Friedman, The ASHI Technical Journal, Vol. 2 No. 1, July1991. DJ Friedman (editor of InspectAPedia.com) served as a professional home inspector and forensic investigator of building failures from, 1986 to 2010. He previously operated a heating and cooling service and repair company and a residential construction and renovation firm.
- [3] "Case History: LP Gas Leak - Using the TIF 8800," Dan Friedman, The ASHI Technical Journal, Vol. 2 No. 1, July1991
- [4] "Choosing and Using a Carbon Monoxide CO Monitor," Dan Friedman, The ASHI Technical Journal, Vol. 2 No. 1, July1991
- [5] American Gas Association, Fundamentals of Gas Combustion, 7th printing, September 1985. Prepared by American Gas Association Laboratories for American Gas Association, 1515 Wilson Boulevard, Arlington, VA 22209 and Gas Appliance Manufacturers Association, Inc., 1901 North Fort Myer Drive, Arlington, VA 22209.
- [6] National Fuel Gas Code, NFPA 54 1988 and ANSI Z223.1 1988, available from AGA at the address above, or from the National Fire Protection Association, Batterymarch Park, Quincy MA 02269
- [7]NFPA and AGA, National Fuel Gas Code Handbook, Z223.2, same source as above
- [8] "Residential Gas Furnace Heat Exchanger Testing", Douglas DeWerth, P.E. American Gas Association (AGA) Laboratories under SAM number 630-92 9/86. , Refrigeration Service Engineer’s Society’s Service Application Manual (SAM)" The manual outlines and explains the many test methods that are used and have been used to inspect and test heat exchangers. This manual also goes into detail about the test equipment used in the 3 step method that the AGA developed. RSES members can view the SAM minus the photographs and diagrams at http://www.rses.org. If you are not a member or want to purchase a complete copy call RSES (800)297-5660 for availability and cost.
- [9] Furnace Heat Exchanger Leak Test, American Gas Association .
- Step 1 Visual inspection.
- Step 2 Burner flame deviation test.
- Step 3 injecting a nitrogen/methane gas mixture into the burner chamber. The heat exchanger outlet of the heat exchanger is plugged and a combustible gas detector is used to check for gas leakage on the exterior of the heat exchanger. A detailed fact sheet on the AGA test procedure is of the heat exchanger.
- Source: http://www.aga.org/NR/rdonlyres/A156C36A-9324-4978-91B4-E78DB63DAD7D/0/8612FURNHEATEXCHNGLEAKTEST.pdf
- [12] Heating service technician, prefers to remain anonymous, private email to InspectAPedia editor, January 2012
- Our recommended books about building & mechanical systems design, inspection, problem diagnosis, and repair, and about indoor environment and IAQ testing, diagnosis, and cleanup are at the InspectAPedia Bookstore. Also see our Book Reviews - InspectAPedia.
- Domestic and Commercial Oil Burners, Charles H. Burkhardt, McGraw Hill Book Company, New York 3rd Ed 1969.
- National Fuel Gas Code (Z223.1) $16.00 and National Fuel Gas Code Handbook (Z223.2) $47.00 American Gas Association (A.G.A.), 1515 Wilson Boulevard, Arlington, VA 22209 also available from National Fire Protection Association, Batterymarch Park, Quincy, MA 02269. Fundamentals of Gas Appliance Venting and Ventilation, 1985, American Gas Association Laboratories, Engineering Services Department. American Gas Association, 1515 Wilson Boulevard, Arlington, VA 22209. Catalog #XHO585. Reprinted 1989.
- The Steam Book, 1984, Training and Education Department, Fluid Handling Division, ITT [probably out of print, possibly available from several home inspection supply companies] Fuel Oil and Oil Heat Magazine, October 1990, offers an update,
- Principles of Steam Heating, $13.25 includes postage. Fuel oil & Oil Heat Magazine, 389 Passaic Ave., Fairfield, NJ 07004.
- The Lost Art of Steam Heating, Dan Holohan, 516-579-3046 FAX
- Principles of Steam Heating, Dan Holohan, technical editor of Fuel Oil and Oil Heat magazine, 389 Passaic Ave., Fairfield, NJ 07004 ($12.+1.25 postage/handling).
- "Residential Steam Heating Systems", Instructional Technologies Institute, Inc., 145 "D" Grassy Plain St., Bethel, CT 06801 800/227-1663 [home inspection training material] 1987
- "Residential Hydronic (circulating hot water) Heating Systems", Instructional Technologies Institute, Inc., 145 "D" Grassy Plain St., Bethel, CT 06801 800/227-1663 [home inspection training material] 1987
- "Warm Air Heating Systems". Instructional Technologies Institute, Inc., 145 "D" Grassy Plain St., Bethel, CT 06801 800/227-1663 [home inspection training material] 1987
- Heating, Ventilating, and Air Conditioning Volume we , Heating Fundamentals,
- Boilers, Boiler Conversions, James E. Brumbaugh, ISBN 0-672-23389-4 (v. 1) Volume II, Oil, Gas, and Coal Burners, Controls, Ducts, Piping, Valves, James E. Brumbaugh, ISBN 0-672-23390-7 (v. 2) Volume III, Radiant Heating, Water Heaters, Ventilation, Air Conditioning, Heat Pumps, Air Cleaners, James E. Brumbaugh, ISBN 0-672-23383-5 (v. 3) or ISBN 0-672-23380-0 (set) Special Sales Director, Macmillan Publishing Co., 866 Third Ave., New York, NY 10022. Macmillan Publishing Co., NY
- Installation Guide for Residential Hydronic Heating Systems
- Installation Guide #200, The Hydronics Institute, 35 Russo Place, Berkeley Heights, NJ 07922
- The ABC's of Retention Head Oil Burners, National Association of Oil Heat Service Managers, TM 115, National Old Timers' Association of the Energy Industry, PO Box 168, Mineola, NY 11501. (Excellent tips on spotting problems on oil-fired heating equipment. Booklet.)
- In addition to citations & references found in this article, see the research citations given at the end of the related articles found at our suggested
CONTINUE READING or RECOMMENDED ARTICLES.
- Carson, Dunlop & Associates Ltd., 120 Carlton Street Suite 407, Toronto ON M5A 4K2. Tel: (416) 964-9415 1-800-268-7070 Email: info@carsondunlop.com. Alan Carson is a past president of ASHI, the American Society of Home Inspectors.
Thanks to Alan Carson and Bob Dunlop, for permission for InspectAPedia to use text excerpts from The HOME REFERENCE BOOK - the Encyclopedia of Homes and to use illustrations from The ILLUSTRATED HOME .
Carson Dunlop Associates provides extensive home inspection education and report writing material. In gratitude we provide links to tsome Carson Dunlop Associates products and services.


