 Deck Framing for Complex Designs
Deck Design-Build Online Guide
- POST a QUESTION or COMMENT about deck construction
How to build a multi-level or non-square deck. This article describes cutting angles, non-square corners, and also special framing to support a hot tub or spa to be located on or built into the deck.
This article series describes details for decks and porches, including avoiding deck or porch designs that include multi-level decks, complex deck layouts building a deck over uneven ground.
InspectAPedia tolerates no conflicts of interest. We have no relationship with advertisers, products, or services discussed at this website.
- Daniel Friedman, Publisher/Editor/Author - See WHO ARE WE?
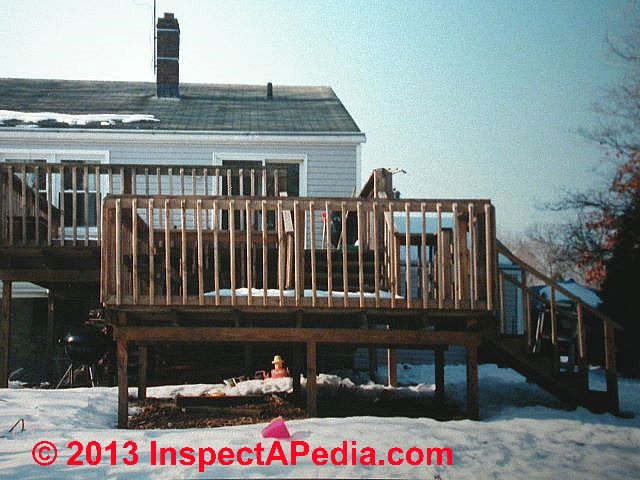
Deck Framing Techniques for Complex Deck Designs
Single-level rectangular decks are the easiest and quickest to build.
But it does not necessarily take much extra effort to add some variety to this basic design. And some decks almost demand to be built with multiple levels, around a corner, or without damaging the health of a favorite tree.
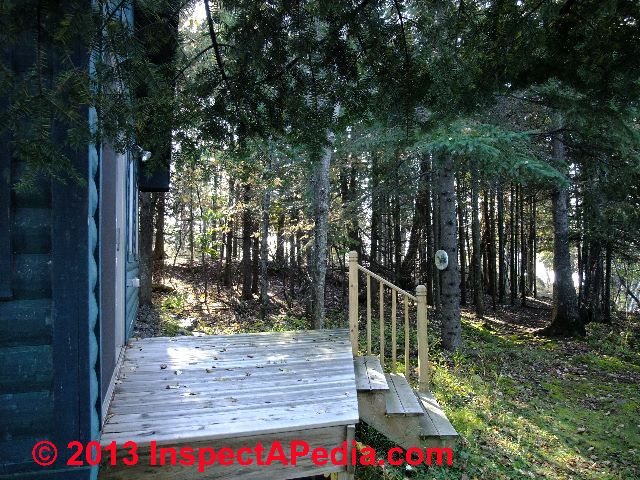
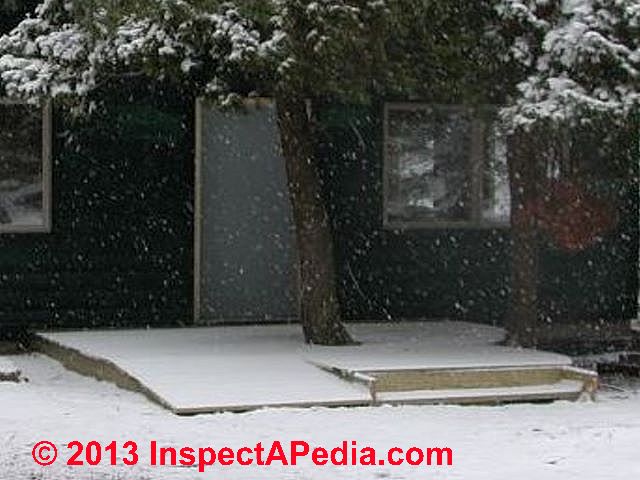
The simple angles on this little entry deck under construction in northern Minnesota afforded a more interesting design. The deck is large enough to allow visitors to sit with a view of the nearby lake (just seen through the trees) and to serve as an entrance to the green cabin.
Cutting Angled Deck Corners Adds Interest
Angled corners are an easy way to avoid a boxy-looking deck. Although you can use any number of angles, it is smart to stick with 45-degree angles. Build the deck as though it were a normal rectangle, then cut the framing to allow for the angle. A short 45-degree corner requires only two cuts in the framing.
Set your circular saw at a 22 1/2 degree angle and cut the rim and end joists as close to plumb as you can. Cut a short filler piece with a 22 1/2 degree angle on each end and attach it with nails.
A larger angled corner requires cutting several joists. You can increase the size of the corner by maximizing the distance that the joists overhang the beam (check your building code for restrictions). Snap a chalk line across the tops of the joists to guide your cutting. For a long angled corner, you would need to install an angled beam to provide the necessary support.
Turning Corners in Complex Deck Designs - wrap the deck around the building
Wrapping a deck around the corner of a house offers many benefits, usually with minimal added effort. It can allow you to take advantage of different views or micro-climates, create a private area, or make it possible to reach a deck from more than one door to the house.
One of the first decisions you need to make with a wraparound deck is how you want to install the decking. There are two styles that can be built and both can be framed the same way. Both have decking that runs entirely in the same direction, one across the joists and the other at a diagonal. Both have three parallel beams, although the diagonal design includes a short diagonal beam that allows for an optional angled corner.
Perhaps the simplest deck to build is essentially two conventionally framed rectangular decks that meet at the comer of the house, but with one ledger extended under the decking. The mitered decking pattern requires more time and effort, but produces what many will find to be a more attractive deck.
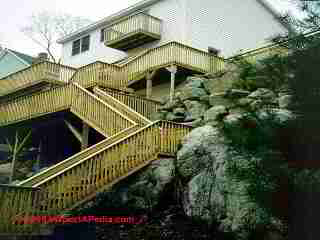
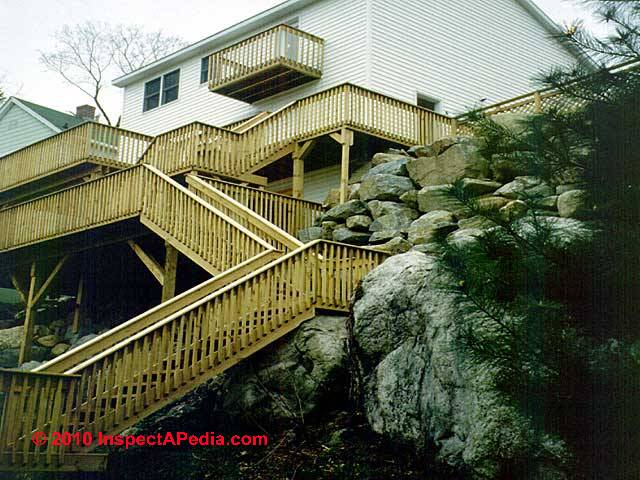
Level Changes in an Exterior Deck
Level changes can dramatically boost the visual appeal of a deck. While separate decks, built at separate levels, can be constructed next to each other, the most efficient and cost-effective approach is to use the same foundation to support adjacent levels. The transition between levels, no matter how wide it is, constitutes a step and should be designed to provide a safe and code-approved rise
Shared Beams in Multi-Level Deck Designs
 A relatively easy technique utilizes one beam to support two levels. The rim joist for the upper level falls directly over the lower rim joist, and the two are joined with tie plates.
This style of level change can also be built by attaching the lower joists to the side of the beam with joist hangers and securing the upper joists to the top of the beam. With 2 X 6 or 2 X 8 joists, the shared-beam technique creates a comfortable step between levels.
Shared Posts in Multi-Level Deck Designs
A technique using shared posts is preferred if you want to create a greater difference in height between two levels, which must then be joined with stairs.
Plan to use 6x6 posts, which must be notched on two sides to accept the lower beam. The upper beam rests on top of the posts, with joists overlapping or hung from the side of the beam.
Stacked Deck Designs Give Small Raised Areas
One way to create a small raised area is simply to construct a separate deck frame and set it on top of the regular frame. Use tie plates to hold the top frame in place, and attach short joist sections to the joists on both sides of the upper level to provide nailing surfaces for the decking.
Although it is not particularly cost-effective for large sections of the deck, this technique is a handy way to create a step up to the house.
Simple Openings in a Deck Floor
 Sometimes it is necessary to build a deck around a large object, such as a tree.
Small openings can be framed quite easily. First, install double joists on both sides of the object. Then attach header joists, using two pieces of joist stock, between the joists on the other two sides of the opening.
Outside the opening, attach joist sections to each header, maintaining your regular on-center spacing. Cut and install the decking so that it overhangs the framing by about 1 inch on all four sides. Use joist hangers (3 inches wide for double joists and 1 1/2 inches wide for single joists) at all connections.
If you would rather create a round opening to better match a tree trunk, start by framing the opening.
Then cut and install four diagonal joist sections. Install the decking so that it covers as much of the opening as possible, then mark and cut the circle.
If you are building around a young tree, take extra care to allow plenty of room for the trunk to expand.
Access Panels in Decks
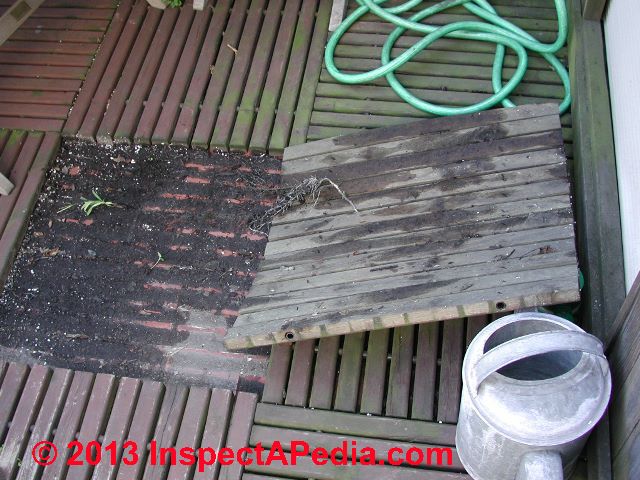 If your deck will cover a water faucet or electrical outlet, you may need to build a small access panel. Attach 2x4 cleats to facing joists, 3 1/2 inches from the top of each joist.
Build a frame with 2 X 4s, with the frame width about 1/2 inch less than the distance between joists. Cut and attach decking, then drill two finger holes.
Framing Around a Deck Hot Tub
While a standard deck should be able to support the weight of a small children’s wading pool, a larger hot tub or spa requires added support. This support is generally provided in one of two ways, as described below.
Choose your tub or spa before you begin building, and be sure to follow the manufacturer’s instructions. Keep in mind that you will need to have some plumbing and electrical work done, and you may want to give some extra thought to privacy and shading when you design the deck.
Framing around A Deck Spa or Hot Tub
On a low deck, it is usually best to rest the hot tub or spa on a concrete pad.
Check with the manufacturer and with your local building department for specifications on the size of pad required, and plan to pour the concrete before you begin framing the deck. When a spa or a tub is installed with this approach, the deck frame surrounds the tub or spa, but provides no additional support.
The top of the tub or spa can be above the surface of the deck, or be level with it. If you prefer the latter style, plan the height of the deck very carefully. The framing is similar to that needed around a tree, except that a larger opening is needed.
Supporting Deck Framing Beneath The Hot Tub
If you prefer to set the hot tub or spa on top of the deck surface, you will need to substantially increase the framing beneath it. The frame must be able to support the weight of the tub or spa filled with water and people. Check with the manufacturer or a structural engineer for more detailed recommendations.
Once the decking has been installed, you can construct an elevated platform to surround the tub or spa; make sure to allow for that weight, too, in your planning.
...
Continue reading at DECK PLAN & SKETCH or select a topic from the closely-related articles below, or see the complete ARTICLE INDEX.
Or see these
Recommended Articles
- DECK LEDGER BOARD INSTALL if you don't give a darn abouit good deck constructin planning & want to just get to work framing.
Suggested citation for this web page
DECK DESIGN & BUILD at InspectApedia.com - online encyclopedia of building & environmental inspection, testing, diagnosis, repair, & problem prevention advice.
Or see this
INDEX to RELATED ARTICLES: ARTICLE INDEX to BUILDING DECKS & PORCHES
Or use the SEARCH BOX found below to Ask a Question or Search InspectApedia
Or see
INDEX to RELATED ARTICLES: ARTICLE INDEX to BUILDING STRUCTURES
Or use the SEARCH BOX found below to Ask a Question or Search InspectApedia
Ask a Question or Search InspectApedia
Share this article:Try the search box just below, or if you prefer, post a question or comment in the Comments box below and we will respond promptly.
Search the InspectApedia website
Note: appearance of your Comment below may be delayed: if your comment contains an image, photograph, web link, or text that looks to the software as if it might be a web link, your posting will appear after it has been approved by a moderator. Apologies for the delay.
Only one image can be added per comment but you can post as many comments, and therefore images, as you like.
You will not receive a notification when a response to your question has been posted.
Please bookmark this page to make it easy for you to check back for our response.
IF above you see "Comment Form is loading comments..." then COMMENT BOX - countable.ca / bawkbox.com IS NOT WORKING.
In any case you are welcome to send an email directly to us at InspectApedia.com at editor@inspectApedia.com
We'll reply to you directly. Please help us help you by noting, in your email, the URL of the InspectApedia page where you wanted to comment.
Citations & References
In addition to any citations in the article above, a full list is available on request.
- [1] Steve Bliss's Building Advisor at buildingadvisor.com helps homeowners & contractors plan & complete successful building & remodeling projects: buying land, site work, building design, cost estimating, materials & components, & project management through complete construction. Email: info@buildingadvisor.com
Steven Bliss served as editorial director and co-publisher of The Journal of Light Construction for 16 years and previously as building technology editor for Progressive Builder and Solar Age magazines. He worked in the building trades as a carpenter and design/build contractor for more than ten years and holds a masters degree from the Harvard Graduate School of Education. Excerpts from his recent book, Best Practices Guide to Residential Construction, Wiley (November 18, 2005) ISBN-10: 0471648361, ISBN-13: 978-0471648369, appear throughout this website, with permission and courtesy of Wiley & Sons. Best Practices Guide is available from the publisher, J. Wiley & Sons, and also at Amazon.com - [2] Decks and Porches, the JLC Guide to, Best Practices for Outdoor Spaces, Steve Bliss (Editor), The Journal of Light Construction, Williston VT, 2010 ISBN 10: 1-928580-42-4, ISBN 13: 978-1-928580-42-3, available from Amazon.com
- [3] Prescriptive Residential Wood Deck Construction Guide, based on the 2009 International Residential Code, American Forest & Paper Association, Inc., provided by reader Mark Morsching from Everflashing.
- [4] Mark Morsching, Everflashing, Tel: 800-550-1667, Email: everflashing@gmail.com. The Everflashing product comes in G-185 and Stainless Steel and is intended for use with treated lumber with copper in it. Everflashing produces a variety of specialty flashing products including flashings for use with decks at deck ledgers and deck perimeters.
- [2] Manual for the Inspection of Residential Wood Decks and Balconies, by Cheryl Anderson, Frank Woeste (Forest Products Society), & Joseph Loferski, October 2003, ISBN-13: 978-1892529343,
- [5] Claudia Hudson, Asheville NC, Tel: 828-252-0644 Email: claudiahudson@charter.net . Ms. Hudson is an SEO copyrighter / content writer. She has provided background research and text for InspectApedia's articles on deck and porch construction methods & procedures. April 2013.
- In addition to citations & references found in this article, see the research citations given at the end of the related articles found at our suggested
CONTINUE READING or RECOMMENDED ARTICLES.
- Carson, Dunlop & Associates Ltd., 120 Carlton Street Suite 407, Toronto ON M5A 4K2. Tel: (416) 964-9415 1-800-268-7070 Email: info@carsondunlop.com. Alan Carson is a past president of ASHI, the American Society of Home Inspectors.
Thanks to Alan Carson and Bob Dunlop, for permission for InspectAPedia to use text excerpts from The HOME REFERENCE BOOK - the Encyclopedia of Homes and to use illustrations from The ILLUSTRATED HOME .
Carson Dunlop Associates provides extensive home inspection education and report writing material. In gratitude we provide links to tsome Carson Dunlop Associates products and services.
 |
HOME | ABOUT | ASK a QUESTION | CONTACT | CONTENT USE POLICY | DESCRIPTION | POLICIES | PRIVACY | |
| © 2026 - 1985 Publisher InspectApedia.com - Daniel Friedman | |||||||||