 DIY Low Cost Vacuum Sampler for Building IAQ
- POST a QUESTION or COMMENT about vacuuming building insulation to screen for mold or other hazardous particle contamination.
How to collect an environmental dust sample:
This article describes how to build (well basically just buy) inexpensive equipment & materials to perform your own dust or particle sampling for qualitative analysis.
Taking a look at dust or particles collected from a suspect surface, building area, furnishings, even insulation, can be quite helpful in detecting the presence of high levels of problem particles such as mold from a nearby problem mold reservoir, animal allergens (hair, dander), insect fragments, fiberglass or other insulation particles, or other materials.
Here we explain why qualitative assessment (what are the dominant particles) is often quite sufficient to screen building areas or furnishings for certain contaminants. We further argue that quantitative analysis (how many particles of a given sort are present per cubic meter of air or per square foot of surface area) are often seriously inaccurate and can be quite misleading.
InspectAPedia tolerates no conflicts of interest. We have no relationship with advertisers, products, or services discussed at this website.
- Daniel Friedman, Publisher/Editor/Author - See WHO ARE WE?
How to assemble a very low cost vacuum sampling device for building IAQ investigations

Article Contents
Why would we bother to use a vacuum device and sampling cassette to collect dust particles when there is a very simple, very low-cost method to collect surface samples of dust, mold, or other particles using adhesive tape ?
- During a building IAQ or environmental inspection and testing we use a simple vacuuming device and sampling cassette to collect dust from surfaces that cannot be easily or reliably sampled with simple adhesive tape.
Examples are carpeting, fabrics such as drapes or couches, or clothing that is suspect of containing irritating levels of an unknown particle, possibly insect fragments, moldy dust, animal allergens, or insulation fragments. This is the methodology discussed here.
- We use the clear adhesive tape sampling method to collect settled dust from a surface, such as settled dust to be examined or visible or suspected mold growth on a building surface or material. Details of that easy procedure are
at MOLD TEST KITS.
Watch out: in some circumstances it is appropriate and cost justified to hire an expert to investigate conditions in your home or other building or to perform necessary clean-up work.
See MOLD / ENVIRONMENTAL EXPERT, HIRE ? for details.
Dust or other particle collection: qualitative sampling explained

In our introduction we noted that a qualitative examination of dust or particles collected from a suspect surface or material can be quite helpful in detecting the presence of high levels of problem particles.
A skilled forensic microscopist prepares one or more samples for examination by light or polarized light microscopy in order to provide a characterization of what was in the dust sample.
Lab technicians and forensic microscopists who have examined many building & environmental samples have a pretty good idea what typical house dust looks like and can recognize if the dominant or most-frequent particles in a sample are telling us something special.
If the microscopist finds usually high levels of a recognizable problem particle not found in normal house dust, then further investigation is usually justified.
Low levels of even "harmful" particles (individual toxic, allergenic, or pathogenic mold spores for example) found in air or dust samples are usually not significant. But a few technical exceptions to this rule might be noticed by your laboratory.
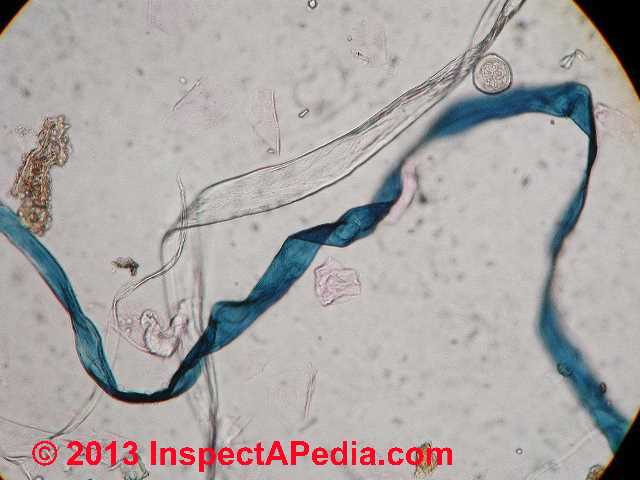
For example the presence of Pen/Asp spores in chains is usually an indicator of nearby fungal growth. The spore chain didn't fly in through the building window. Our photo at above left shows Aspergillus niger spore chains (speciated by further examination) in a building dust sample that was otherwise low in total mold spore levels.
At ACTIVITY of MOLD in BUILDINGS we discuss the example of special meaning attached to spore chains or the presence of fresh fungal growth structures & conidiophores even when the total mold spore count is low.
What were the dominant particles in the dust sample? If the dominant particles are those typical of house or building dust (skin cells, fabric fibers, low or incident levels of pollen, mold, road debris) then we conclude that in most cases the dust sample did not detect evidence of a problem.
Watch out: selection of the sampling area as well as intelligent collection of the sample make an enormous difference in how much you can rely on the lab findings.
If your sample is probably representative of building conditions then the lab results make sense.
List of equipment & supplies needed for for DIY vacuum dust sampling
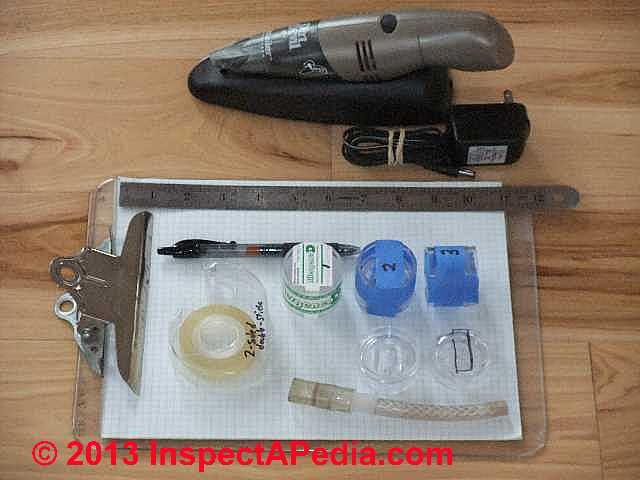
For a total cost typically less than $50. U.S. you can assemble the vacuum device, tubing, adapter and even purchase a single air sampling cassette.
It's easy to construct your own qualitative dust sampling kit. Here's what you need:
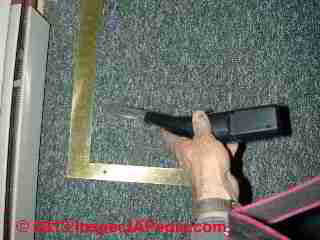
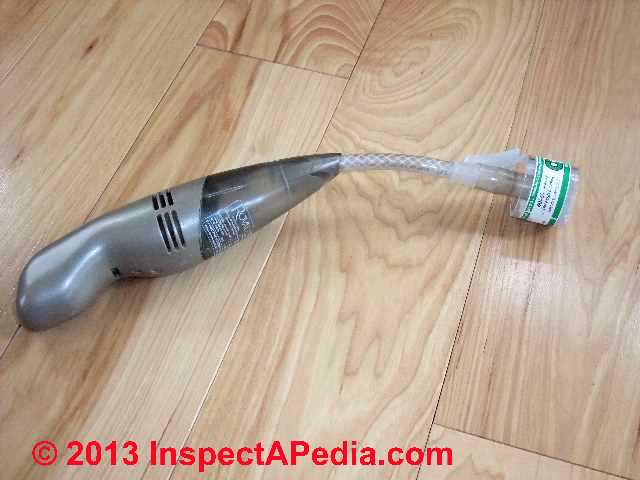
1. A small portable keyboard vacuum
such as the device shown at page top (Radio Shack) or at left (Dirt Devil Detail by Royal Appliances). The Radio-Shack vacuum uses four AA batteries while the Dirt Devil Detail is rechargeable.
We bought a dozen of each of these devices to test in our laboratory where we measured air flow rates. Typically the air flow as 8-12 lpm, which puts the flow rate in the proper velocity for use with air sampling cassettes produced by several manufacturers and designed for a 10 lpm flow rate.
Technical note: if the air flow rate is too high the particle bounce rate is increased - you lose too many particles, and also the distribution of particles collected will be skewed by particle size. If the air flow rate through the air sampling device is too low or weak, particles are not sufficiently accelerated to adhere to the micro-slide's sticky collection media.
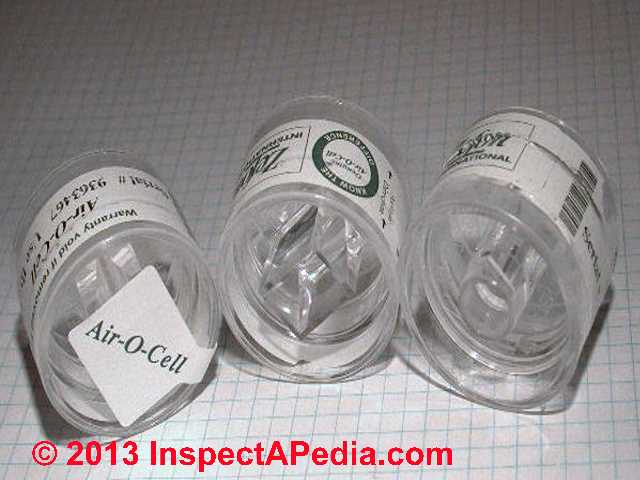
2. Air sampling cassettes:
you need one cassette for each sample to be collected.
Air sampling cassettes are readily available online from IAQ equipment suppliers or directly from the manufacturers such as Allergenco® or Zefon®. We report on these cassettes in detail
at AIRBORNE PARTICLE TEST SAMPLING CASSETTE STUDY
Purchase information is also at our References section. [26][27][28]
If you plan to do a lot of sampling, here's a tip: thanks to our friend and fellow aerobiologist Larry Syzdek, we discovered that one can "re-load" used plastic air sampling cassettes with two-sided sticky adhesive tape for a still more crude particle sampler.[12]
Watch Out: using adhesive tape in an air sampling cassette is useful for qualitative testing in buildings but the approach has not been widely calibrated and risks giving an inaccurate collection of particles by type - the stickiness of the adhesive tape is not the same as that of the original micro-slide placed in these sampling cassettes by the manufacturer.
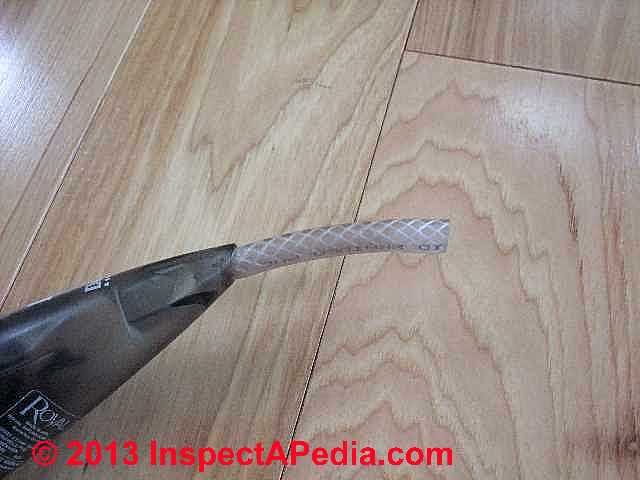
3. Short (4-6-inch) plastic tubing that inserts into the end of the vacuum device. Just bring your little vacuum machine to your nearest hardware store where by test-fit you can purchase a short length of plastic tubing that fits snugly into the opening at the end of the vacuum machine.
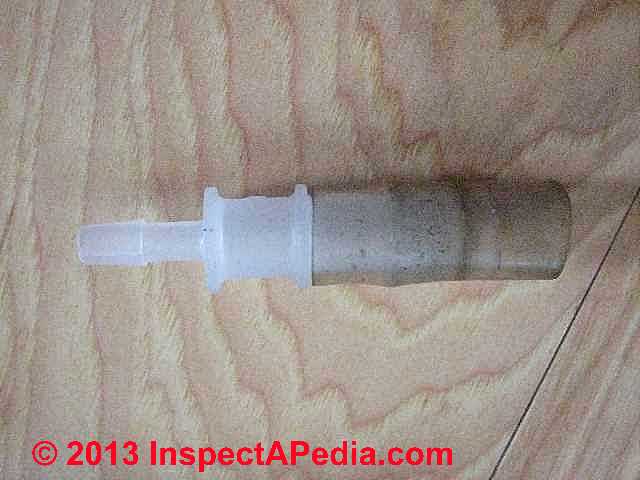
4. Adapter to connect tubing to the vacuum cassette.
You will probably find that tubing whose outer diameter fits snugly into the end of your little vacuum will have an inner diameter that is too small to fit over the connection-end of your air sampling cassettes.
The tubing that we could just jam into our little Dirt Devil has an outer diameter (OD) of 3/8-inches and an inner diameter (ID) of 1/4-inches.
The outer diameter (OD) of the plastic fitting on the air sampling cassette intended to connect to the sampler tubing is 1/2-inch and is tapered so that when you push the tubing over the cassette fitting it will be tight and snug.
You can cobble together an adapter from assorted tubing at your same hardware store, or for very little you can purchase a suitable adapter from your air sampling cassette supplier along with your cassette order. Cassette adapters are included at no charge in orders from some suppliers.
How to use your DIY vacuum dust sampler
Assemble your vacuum sampler and tubing.
Turn on the vacuum and confirm that it is drawing air through the tubing by feeling for a vacuum at the open end of the tube. If the vacuum feels quite weak, open the vacuum sampler and remove its internal filter or dust collecting bag if necessary.
Push the sampling cassette onto the open tubing end.
Now remove the sticker covering the air sampling cassette's round inlet attachment. This is the side of the sample that attaches to the vacuum device's plastic tubing.
It will be obvious that one side of the sampling cassette contains an input slot (and venturi) through which particles flow into the cassette. The other side of the cassette contains the 1/2-inch plastic fitting to which tubing is connected. It is just about impossible connect the cassette incorrectly.
Watch out: to avoid confusion and sample contamination, do not un-tape the sample dust or air inlet side of the cassette until you are at the sampling location and are ready to turn on the vacuum.
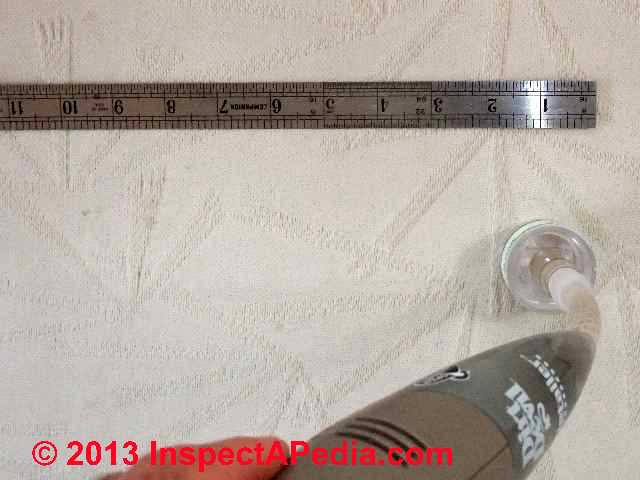
To vacuum sample dust from a hard surface
such as a dusty table, select the test area, turn on the sampler, and keeping the cassette with its leading edge tipped just slightly up off of the surface (about 1/8" is plenty) move the cassette over the sampling space.
We tip theleading edge of the sampling cassette slightly because otherwise on a flat smooth hard surface you are just pushing the dust away from the sampler as the cassette slides across the surface. We want to pick the dust up, not push it away.
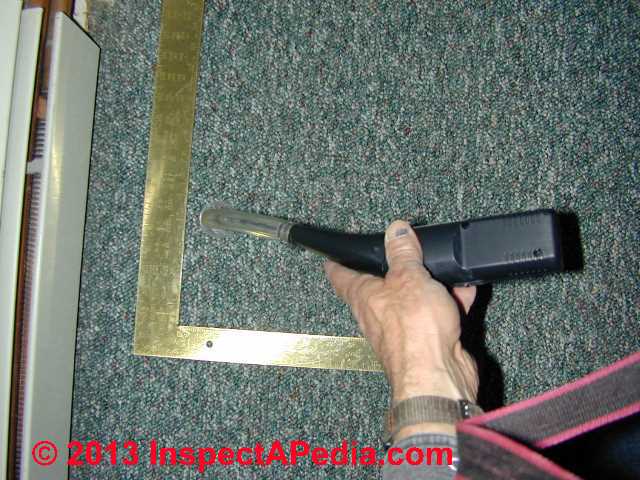
To vacuum sample dust or particles from a soft surface
such as carpeting or upholstered furniture, select the sample area and turn on the vacuum sampler. Either slide the sampling cassette lightly over the sample area, or use the light tapping method we describe just below.
How much dust to collect for an environmental sample?
Watch out: do not overload the sample with dust particles and debris. More is not better. If the cassette's internal micro-slide is overloaded with particles it may be very difficult, even impossible to analyze in the laboratory.
On hard surfaces we adjust the area vacuumed subjectively (and based on experience) based on the visible amount of dust on the surface. 4 to 12 sq.in. is usually plenty.
On fabrics and carpets we do not vacuum more than a 4 x 4 sq.in. and we take care not to "scrub" the cassette aggressively over the surface lest we overload the cassette with fibers. Better would be to tap the cassette vertically onto each sample spot on the carpet or fabric until the desired area is tested.
This approach tends to cause particles in the material to become airborne and to collect in the sampler. Scrubbing the surface with the cassette will overload with fibers.
At DUST SAMPLING PROCEDURE we describe the selection of sampling location and we also illustrate using clear adhesive tape to collect a dust sample.
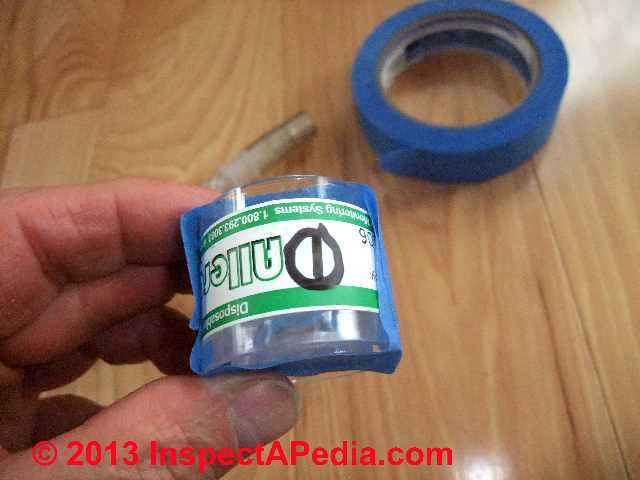
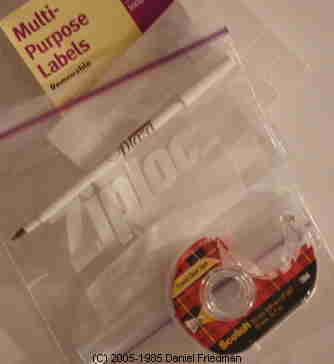
Seal each sampling cassette:
When the sample is collected, turn off the vacuum, remove the cassette, and seal its two open ends by re-using the original stickers or if you lost the original stickers or they're all messy just seal the cassette by using masking tape.
This step keeps extraneous debris out of the cassette during shipping and handling.
Label each cassette
on its side with an identification number that will correspond to your chain of custody form or sample log.
That assures that you can match the lab results to the areas you sampled. Do not write the sample number on the tape you used to close off its openings - that tape will be pulled off in processing and risks losing track of the sample identity.
Mail the vacuum sample cassettes
to an environmental testing lab of your choice. Be sure to include your chain of custody or sample log and description and note thereon that you have prepared a surface sample, not an air sample and that you are requesting qualitative analysis of the sample contents.
You can use this CHAIN OF CUSTODY FORM [PDF]] but please do NOT mail your samples to the address on that form (my lab). Use any other independent envrionmental testing laboratory.
Can I just use my household vacuum cleaner to collect a particle sample?
Well yes and no: not with air sampling cassettes (left) using the equipment we describe above, and yes with different test kits and equipment.
It is indeed possible to use a home vacuum cleaner to collect dust samples but the approach is completely different.
A home vacuum cleaner is hundreds of times too powerful to use with an air sampling cassette. Its airflow rate enormously exceeds the cassette's intended air flow rate of 10 lpm.
How top Use a "Dust Sampling Sock" for Particle Collection & Quantitative Analysis
With conventional vacuum cleaners you would purchase a dust sampling adapter and test kit designed to fit over the end of your vacuum cleaner's inlet tubing or wand.
That kit includes a sock-like filter that captures close to 100% of the particles sampled, permitting a laboratory analysis of particle types by percentage or by weight. A typical dust sampling sock is about 9" long x 4" wide and is designed for use in a range of vacuum cleaner nozzles.
This approach is more precise than the mini-vacuum approach we describe above. Remember that precision is not the same thing as accuracy. Typical dust kit price varies depending on quantity in which sold, but expect to pay $30. and up per test kit.
Dust sampling sock kit suppliers are listed at Reviewers [29].
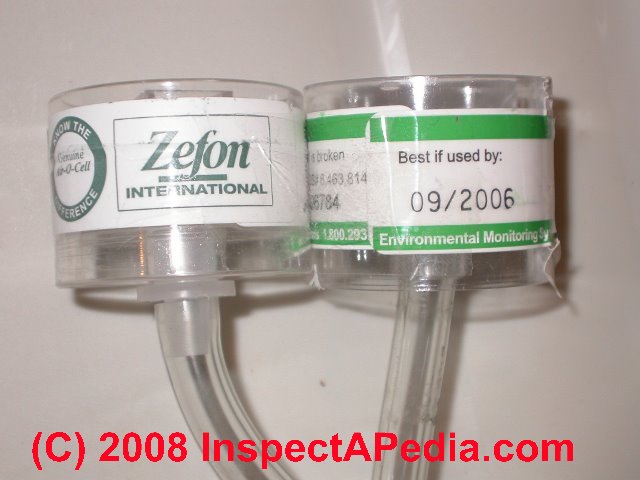
Examples of higher-cost & more precise vacuuming tools
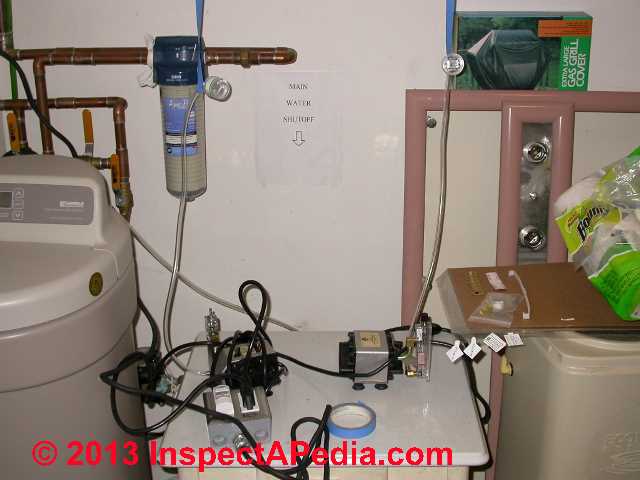
Above you can see a test we set up to study consistency of results when using two different brands of air sampling cassettes.
Two calibrated air sampling pumps were run simultaneously, in parallel, with just enough distance between the sampling points to avoid interference.
Using a calibrated air sampling device permits accurate determination of the level of airborne particles in the sample area, and permits the lab to provide a count of particles per cubic meter of air.
This approach, regrettably, is precise but horribly inaccurate when performed in buildings, since even a small change (walking through the room, opening a window or door, moving the sampling device etc.) can make a difference of several orders of magnitude in the "particle count" obtained.
Details are at ACCURACY vs PRECISION of MEASUREMENTS.
...
Continue reading at VACUUM CASSETTE FILTER SAMPLE TESTS for DUST / MOLD or select a topic from the closely-related articles below, or see the complete ARTICLE INDEX.
Or see these
Recommended Articles
- DUST SAMPLING PROCEDURE
- INDOOR AIR QUALITY METHODS COMPARED
- MOLD TEST PROCEDURES
- TECHNICAL & LAB PROCEDURES
- MOLD / ENVIRONMENTAL EXPERT, HIRE ?
- VACUUMING BUILDING CAVITIES
- VACUUM CASSETTE FILTER SAMPLE TESTS for DUST / MOLD
- VACUUM SAMPLING EQUIPMENT, DIY
- VACUUM TEST INSULATION CONTAMINANTS
Suggested citation for this web page
VACUUM SAMPLING EQUIPMENT, DIY at InspectApedia.com - online encyclopedia of building & environmental inspection, testing, diagnosis, repair, & problem prevention advice.
Or see this
INDEX to RELATED ARTICLES: ARTICLE INDEX to MOLD CONTAMINATION & REMEDIATION
Or use the SEARCH BOX found below to Ask a Question or Search InspectApedia
Ask a Question or Search InspectApedia
Share this article:Try the search box just below, or if you prefer, post a question or comment in the Comments box below and we will respond promptly.
Search the InspectApedia website
Note: appearance of your Comment below may be delayed: if your comment contains an image, photograph, web link, or text that looks to the software as if it might be a web link, your posting will appear after it has been approved by a moderator. Apologies for the delay.
Only one image can be added per comment but you can post as many comments, and therefore images, as you like.
You will not receive a notification when a response to your question has been posted.
Please bookmark this page to make it easy for you to check back for our response.
IF above you see "Comment Form is loading comments..." then COMMENT BOX - countable.ca / bawkbox.com IS NOT WORKING.
In any case you are welcome to send an email directly to us at InspectApedia.com at editor@inspectApedia.com
We'll reply to you directly. Please help us help you by noting, in your email, the URL of the InspectApedia page where you wanted to comment.
Citations & References
In addition to any citations in the article above, a full list is available on request.
- In addition to citations & references found in this article, see the research citations given at the end of the related articles found at our suggested
CONTINUE READING or RECOMMENDED ARTICLES.
- Carson, Dunlop & Associates Ltd., 120 Carlton Street Suite 407, Toronto ON M5A 4K2. Tel: (416) 964-9415 1-800-268-7070 Email: info@carsondunlop.com. Alan Carson is a past president of ASHI, the American Society of Home Inspectors.
Thanks to Alan Carson and Bob Dunlop, for permission for InspectAPedia to use text excerpts from The HOME REFERENCE BOOK - the Encyclopedia of Homes and to use illustrations from The ILLUSTRATED HOME .
Carson Dunlop Associates provides extensive home inspection education and report writing material. In gratitude we provide links to tsome Carson Dunlop Associates products and services.
 |
HOME | ABOUT | ASK a QUESTION | CONTACT | CONTENT USE POLICY | DESCRIPTION | POLICIES | PRIVACY | |
| © 2026 - 1985 Publisher InspectApedia.com - Daniel Friedman | |||||||||