 Stop Roof Ice Dam Leaks on a Sloped Roof
- POST a QUESTION or COMMENT about roof ice dam leak emergency repairs
Emergency repairs for roof ice dam leaks:
This article describes emergency steps to stop roof ice dam leaks or water entry into a building in the middle of cold winter weather.
InspectAPedia tolerates no conflicts of interest. We have no relationship with advertisers, products, or services discussed at this website.
- Daniel Friedman, Publisher/Editor/Author - See WHO ARE WE?
Emergency procedures to stop indoor water leaks from a sloped-roof roof ice dam.
 These emergency steps show to clear snow & drain water to roof ice dam stop leaks into building wallsThis article illustrates the successful control of an ice dam leak on an older home.
The lower roof formed ice dams that sent so much water leaking into the roof wall over a window that water was entering the home interior.
Here we describe the steps in getting the water under control and stopping the ice dam leak. The article concludes with options for more permanent solutions to prevent future ice dam leaks at roofs like this one.
Emergency Steps to Stop a Roof or Gutter Ice Dam Leak
1. Indoor Steps to Stop Water Damage
These photos and comments describe the diagnosis and cure of roof ice dam leakage occurring on a steep-sloped roof in a New York Home.
Most likely the first notice you will see of a snow or ice related roof leak will be water dripping from a ceiling or a puddle on the floor.
The immediate steps to respond to this leak meant getting control of the water and stopping it from flowing into wall cavities or across interior floors.
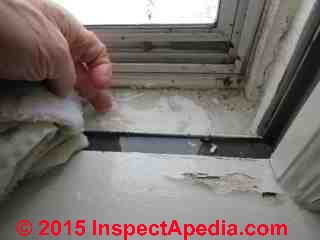
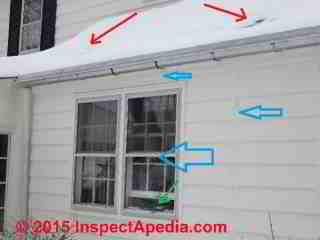
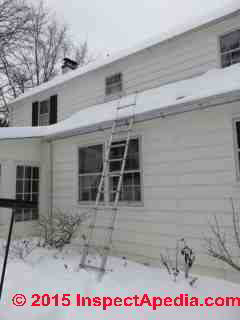
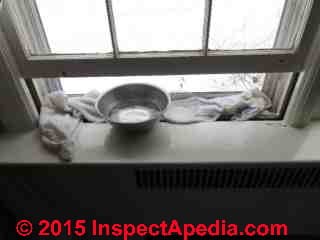
Control the water: approaching the home and with the help of the observant homeowner we already knew which roof section was leaking - shown at the top of this page. Indoors at the worst leak point our immediate attention was focused on one window whose sill was filled with water that was overflowing and running into the room.
Leaving the window opoen a bit so that a bowl and towels could collect water may also have been speeding the leak by warming the window cavity into which water was flowing from the roof above.
[Click to enlarge any image]
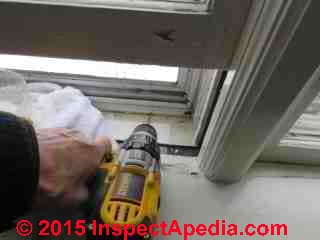
We decided to adapt an ancient approach first practiced by the ancient greeks: therapeutic phlebotomy. Except instead of slitting anyone's wrists we drilled openings to simply let water run out of the lake formed between the storm window frame and the lip of the window sill or stool.
(Photos just above and below). This immediate relief sent water back outside and stopped the flow of water down the interior wall and onto the interior floor.
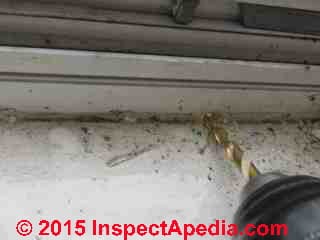
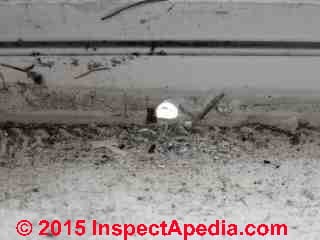
At below left you can see the new storm window weep opening that we re-opened. Prior owners had caulked these shut.
See STORM WINDOW WEEP HOLES if you are not already convinced you need these openings to be opened. There you'll find photos of rot damage from un-drained window sills on older homes.
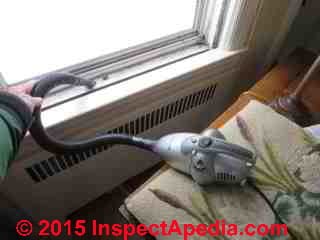
When we'd drained and drained this window sill we vacuumed out loose debris that might otherwise have quickly clogged our 1/4" diameter drain opening.
2. Outdoor Steps to Stop the Ice Dam Leaks
Heading back outdoors we took a closer look for both clues explaining the ice dam leaks and water pathways onto or into the building walls.
Other leaks may be entering this home's walls but not showing up in window sills. (You might spot these other ice dam leaks from a basement or crawl space below the lower floor.)
Back outside we took another more detailed look at the home's roof, walls and windows to see where water was flowing. Winter helps us out by freezing some of the leaking water to leave more easily-spotted ice.
This was a lower slope un-vented roof on a Colonial style two story home built more than fifty years ago. The original construction had included little or no insulation though various owners over the years had added insulation in the upper attic and possibly some of the home's walls. We suspect that the ceiling over this lower roof is either un insulated or has little insulation. There was no direct access into the attic-crawl area below the lower roof.
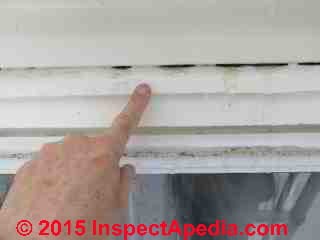
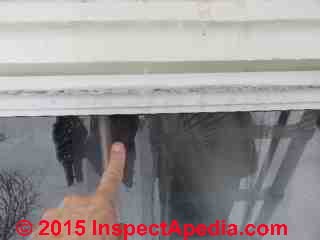
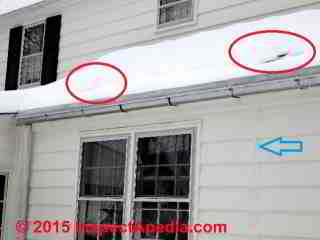
At above we're looking at ice and water leaking out of the building wall just above the flooding window and window sill we'd been addressing with our handy drill.
You can see ice and water both outside the storm window top (above left) and running down the inside of the storm window (above right).
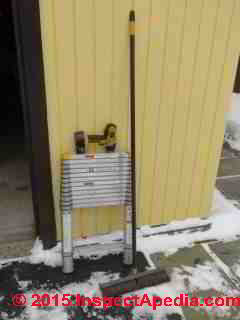
Above are all that was needed to get this pesky ice dam leak under control: a ladder, drill and 1/4" bit, and a push broom.
The vacuum cleaner was provided by the homeowner.
Below we're beginning to explore the roof.
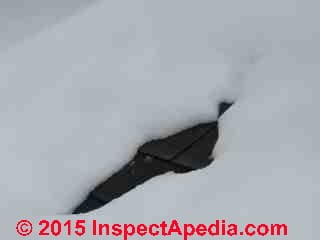
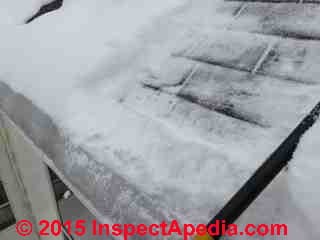
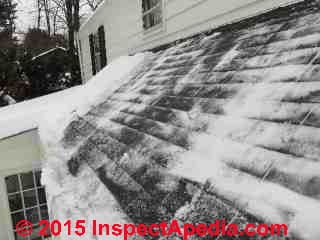
From my little toy ladder I can see not only obvious melt spots through the snow (you can also see these in our page top photo) but as the roof is cleared of snow we can see that the ice dam extends past the gutter and several inches up the roof (below right).
Below we show the roof raked of all of the snow I could remove with the back of my push broom. About half of this snow went into the tops of my boots.
Watch out: take care not to damage the shingles when brushing or raking snow off of a roof. Do not chop, hammer, bang or pry on ice or you may cause damage to the shingles and a new crop of leaks that will show up at the next rain storm.
3. Steps to Prevent Future Ice Dam Leaks at This Roof
The leak was stopped. At this point we have these repair options for this ice dam leak:
- Heat tapes:
Install a heat tape along this roof edge, as described
at HEAT TAPES & CABLES for ROOF ICE DAMS
This is a reasonable, inexpensive preventive measure that works but requires owners or occupants to remember to plug-in and confirm operation of the heat tape at the onset of winter.
Watch out: heat tapes must be properly installed and connected to a GFCI receptacle to be safe and reliable.
- Snow Raking:
Keep raking snow off of this problem roof or install heat tapes. This option is suitable for a low, easily-reached roof and at a home where owners don't mind doing some careful snow-raking. Spring was near. This was the owner's choice.
Incidentally, telescoping snow rakes designed to pull snow off of accessible roof edges are available if you shop for them at the start of the snow season.
Watch out: I do not recommend the snow-raking option for homeowners for high roofs. It's too easy to fall off of a ladder, especially in cold icy weather. I also warn about electrocution hazard if you are crazy enough to try raking snow off of a roof using a metal-handled tool near electrical wires.
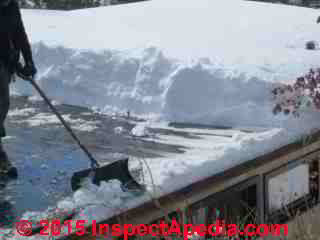
If you need snow removed from a high roof hire a professional. In the photo above snow is being removed from a flat EPDM covered roof. This job was too much for me so my partner [mostly cropped from view] performed it.
- Roof venting:
Cut an opening sufficient to inspect the roof cavity below this roof - a very tight attic crawl space. Decide on adding insulation, plugging warm air leaks into the roof space, and if we're not going to go with a hot roof design, install soffit intake at the eaves and a half-ridge exhaust vent (at the upper house wall) to ventilate this space.
See ROOF VENTILATION SPECIFICATIONS for articles on how to vent roofs.
or
See UN-VENTED ROOF SOLUTIONS for hot roof approaches. - Ice and water shield:
for a hard to vent roof below which nobody wants to insulate, when re-roofing there's the option of covering the whole roof surface with ice and water shield.
Also see ROOF ICE DAM LEAKS
Watch out: even ice and water shield won't prevent ice dam leaks from severe ice damming on a roof under unusual condtions, at least not unless heroic details are included to be sure that the lower roof, fascia, eaves, and possibly even the wall top trim are carefully wrapped and detailed so that water backing up from ice dams in gutters is directed outside rather than up into the building.
See ROOF ICE DAM DIAGNOSIS for a case study of real trouble with ice dams and a too-hot house.
...
Continue reading at HEAT TAPES & CABLES for ROOF ICE DAMS or select a topic from the closely-related articles below, or see the complete ARTICLE INDEX.
Or see these
Recommended Articles
Suggested citation for this web page
ICE DAM LEAK EMERGENCY REPAIRS at InspectApedia.com - online encyclopedia of building & environmental inspection, testing, diagnosis, repair, & problem prevention advice.
Or see this
INDEX to RELATED ARTICLES: ARTICLE INDEX to BUILDING VENTILATION
Or use the SEARCH BOX found below to Ask a Question or Search InspectApedia
Ask a Question or Search InspectApedia
Try the search box just below, or if you prefer, post a question or comment in the Comments box below and we will respond promptly.
Search the InspectApedia website
Note: appearance of your Comment below may be delayed: if your comment contains an image, photograph, web link, or text that looks to the software as if it might be a web link, your posting will appear after it has been approved by a moderator. Apologies for the delay.
Only one image can be added per comment but you can post as many comments, and therefore images, as you like.
You will not receive a notification when a response to your question has been posted.
Please bookmark this page to make it easy for you to check back for our response.
IF above you see "Comment Form is loading comments..." then COMMENT BOX - countable.ca / bawkbox.com IS NOT WORKING.
In any case you are welcome to send an email directly to us at InspectApedia.com at editor@inspectApedia.com
We'll reply to you directly. Please help us help you by noting, in your email, the URL of the InspectApedia page where you wanted to comment.
Citations & References
In addition to any citations in the article above, a full list is available on request.
- Roger Hankey is principal of Hankey and Brown Inspections, Winter Park, CO. Mr. Hankey is a past chairman of the ASHI Standards Committee and served in other ASHI chapter and national leadership roles. Mr. Hankey is a National Radon Proficiency Program certified measurement professional and a Level II infrared thermographer. Contact Roger Hankey at: 970-393-6604 - rogerhankey47@gmail.com . Website: www.HankeyandBrown.com Mr. Hankey is a frequent contributor to InspectAPedia.com.
- Our recommended books about building & mechanical systems design, inspection, problem diagnosis, and repair, and about indoor environment and IAQ testing, diagnosis, and cleanup are at the InspectAPedia Bookstore. Also see our Book Reviews - InspectAPedia.
- In addition to citations & references found in this article, see the research citations given at the end of the related articles found at our suggested
CONTINUE READING or RECOMMENDED ARTICLES.
- Carson, Dunlop & Associates Ltd., 120 Carlton Street Suite 407, Toronto ON M5A 4K2. Tel: (416) 964-9415 1-800-268-7070 Email: info@carsondunlop.com. Alan Carson is a past president of ASHI, the American Society of Home Inspectors.
Thanks to Alan Carson and Bob Dunlop, for permission for InspectAPedia to use text excerpts from The HOME REFERENCE BOOK - the Encyclopedia of Homes and to use illustrations from The ILLUSTRATED HOME .
Carson Dunlop Associates provides extensive home inspection education and report writing material. In gratitude we provide links to tsome Carson Dunlop Associates products and services.


